Introduction
You now have the ability to develop your own applications and then deploy them to new exciting operating systems thanks to the recent releases of the following products:
- System Center 2012 R2 Configuration Manager
- Visual Studio 2013
- Windows 8.1
- Server 2012 R2
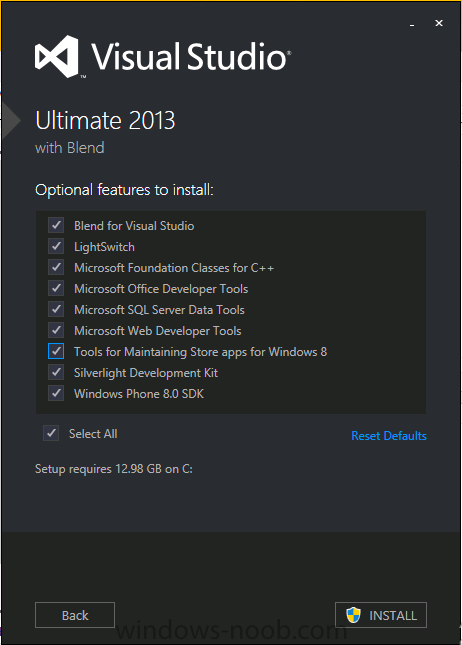
In this post I’ll show you how to create a quick modern style (formally Metro) test application using Visual Studio 2013 and then add that application into System Center 2012 R2 Configuration Manager and finally deploy it to a Windows 8.1 computer. I assume you’ve already downloaded and installed Visual Studio 2013 on Server 2012 R2, you could install it on a Windows 8.1 computer if you wish, in fact that is a necessary minimum operating system level if you want to develop for Windows 8.1.
For your reference I used en_visual_studio_ultimate_2013_x86_dvd_3009107.iso available on MSDN.
Note: I’m not a developer, I’m doing this to give you some ideas about using modern style apps in Configuration Manager 2012 R2.
Step 1. Download and extract the Windows 8.1 app samples
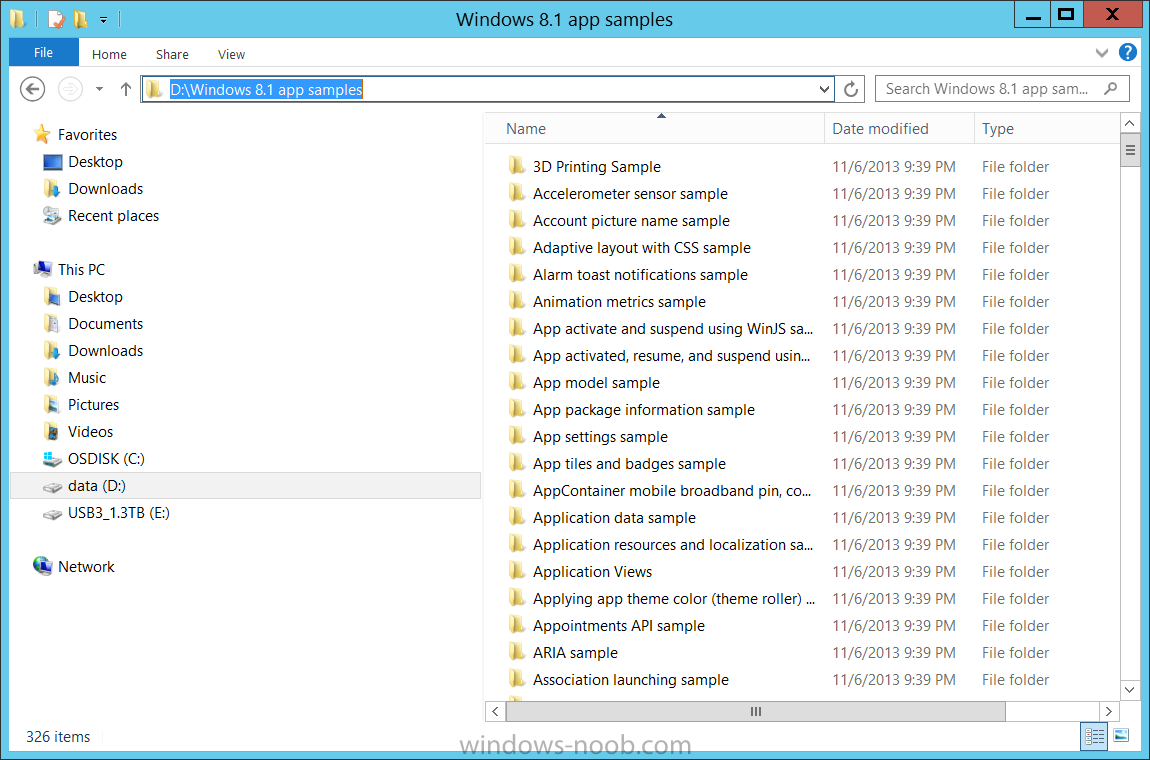
Microsoft provides a whole bunch of example code/applications that you can use to create your first masterpiece. Download them from here and extract them locally. I downloaded the full zip package and extracted it to D:\Windows 8.1 app samples like in the screenshot below
Step 2. Import an Application into Visual Studio
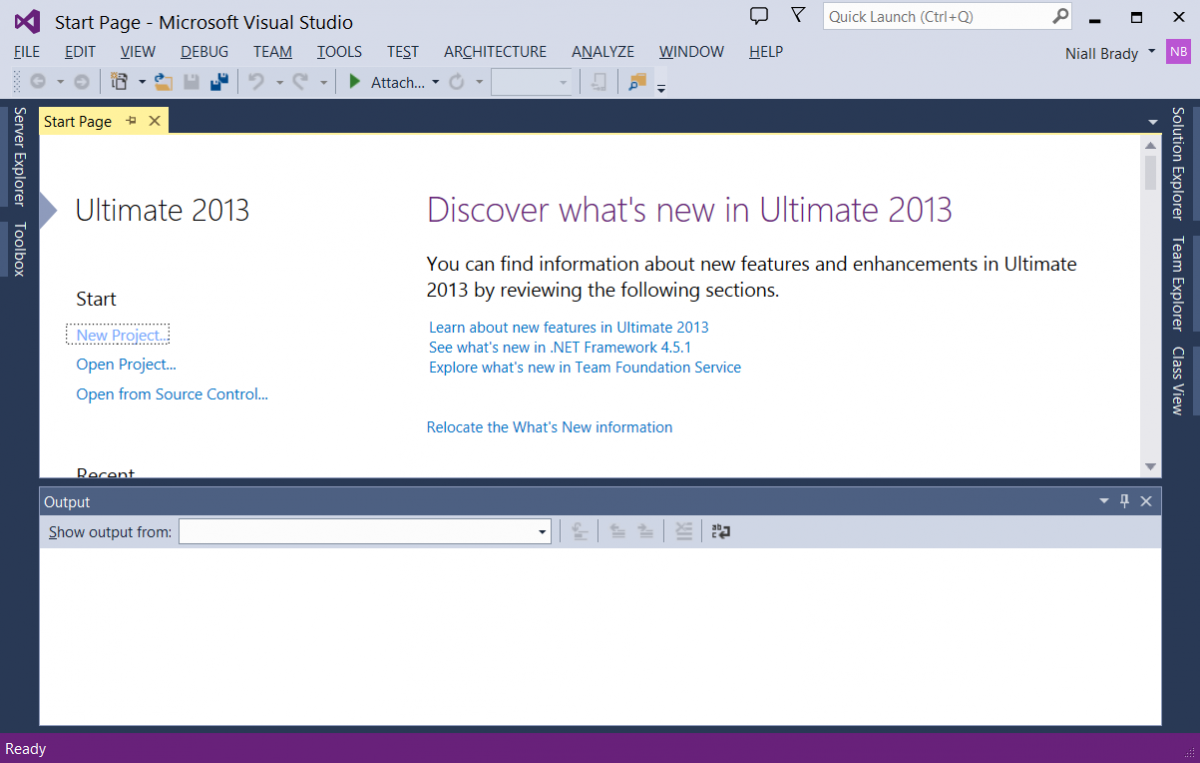
Start Visual Studio 2013, if this is your first time it may be a bit overwhelming, don’t worry you’ll soon get some action. I’d recommend a high resolution monitor for this type of work.
I’ve already signed in with my Microsoft Live account so you can see my name in the top right corner.
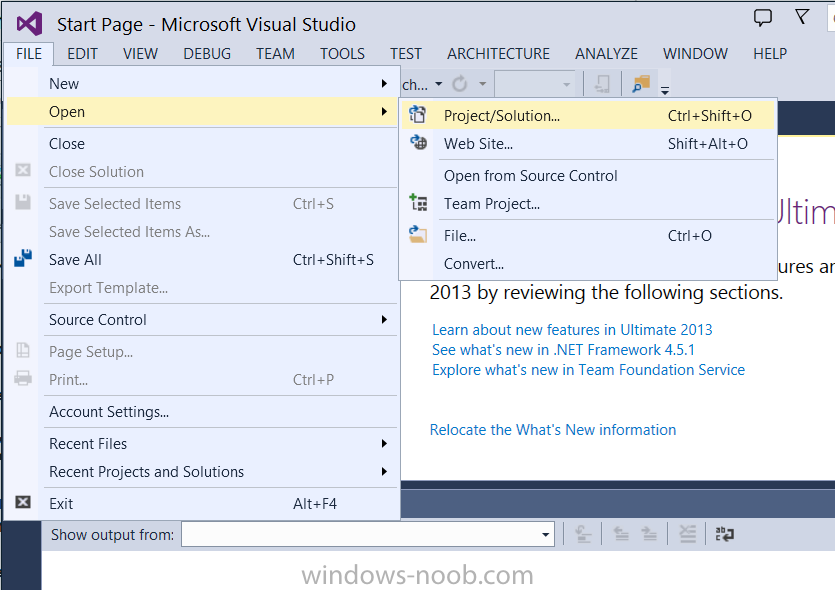
Click on file and choose Open, Project/Solution
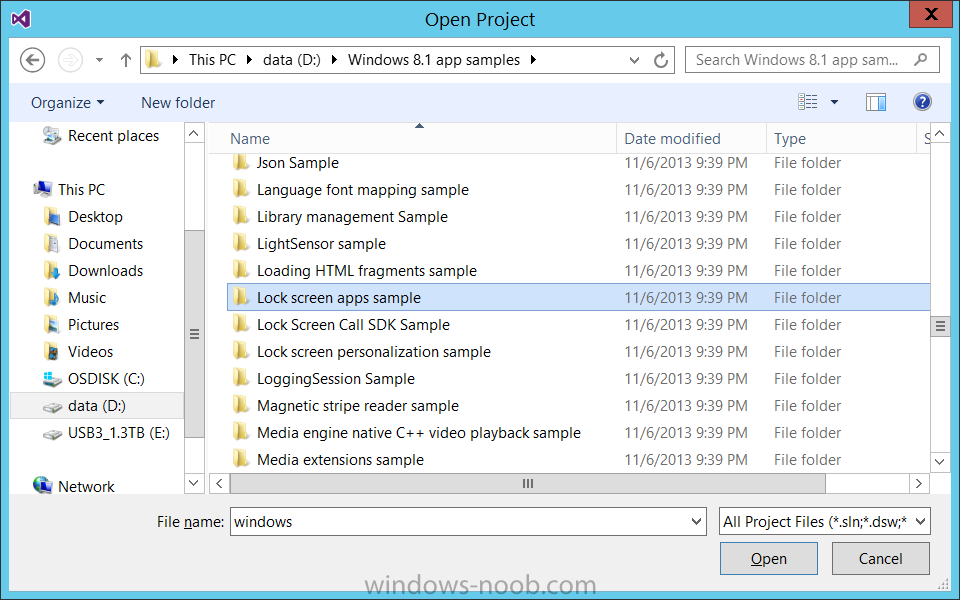
select a sample app from the list of 250 or so apps, I’ve selected Lock screen apps sample below
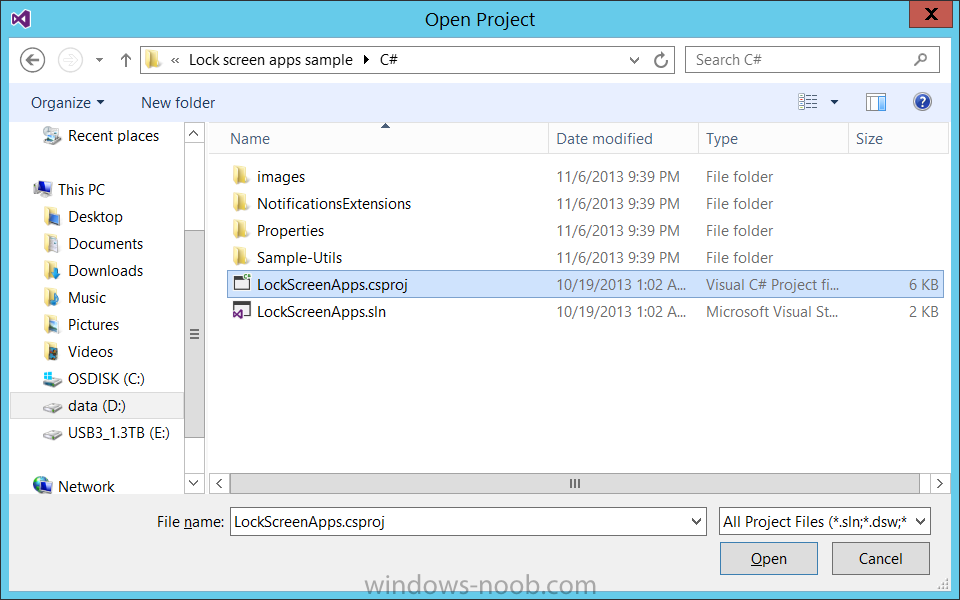
and select the C# folder within and then select the .csproj file within that folder (LockScreenApps.csproj) and click on Open
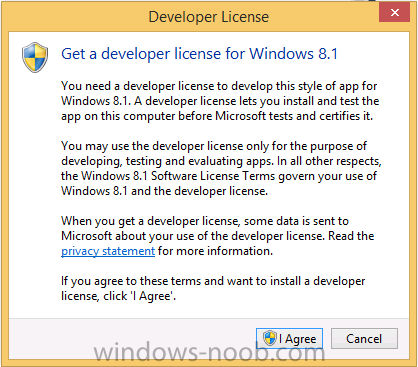
If you don’t have one already, you will be prompted to get a Developers License (it’s free). So go ahead and get one.
and after signing in to your live account you’ll get the license…
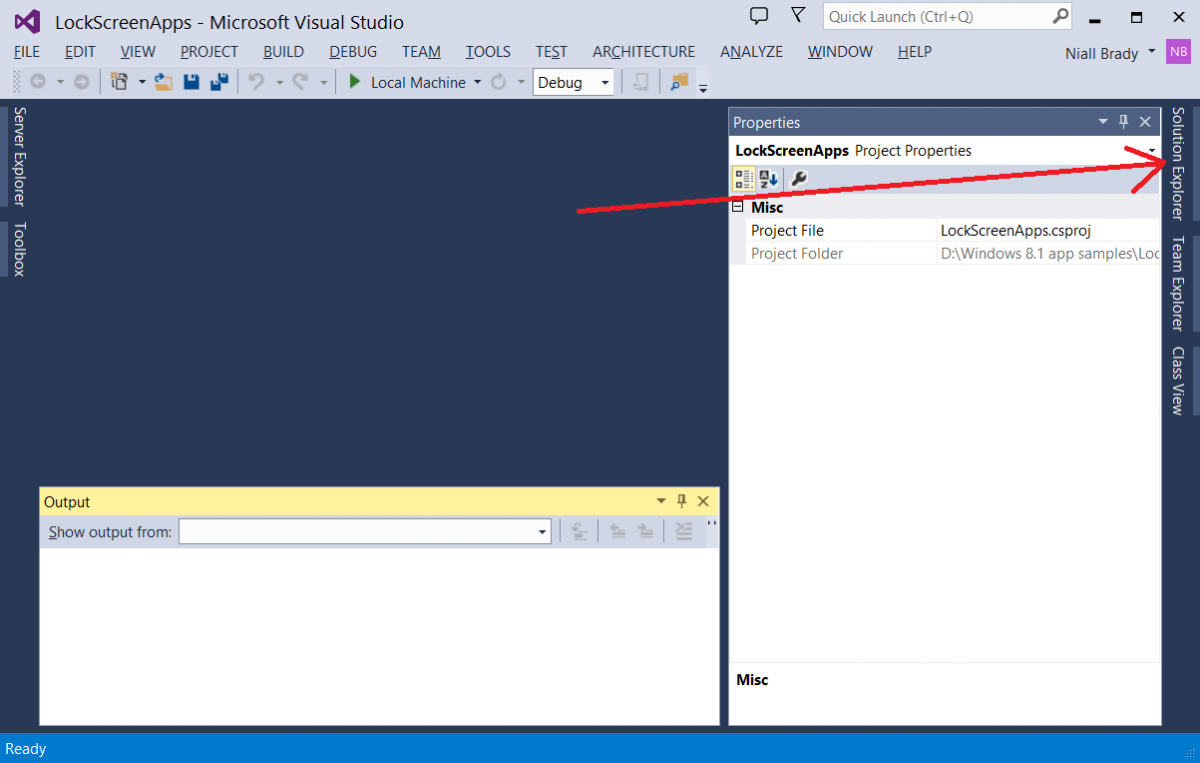
Your first project is loaded and you’ve got a developers license !
Step 3. Build and then Create app packages
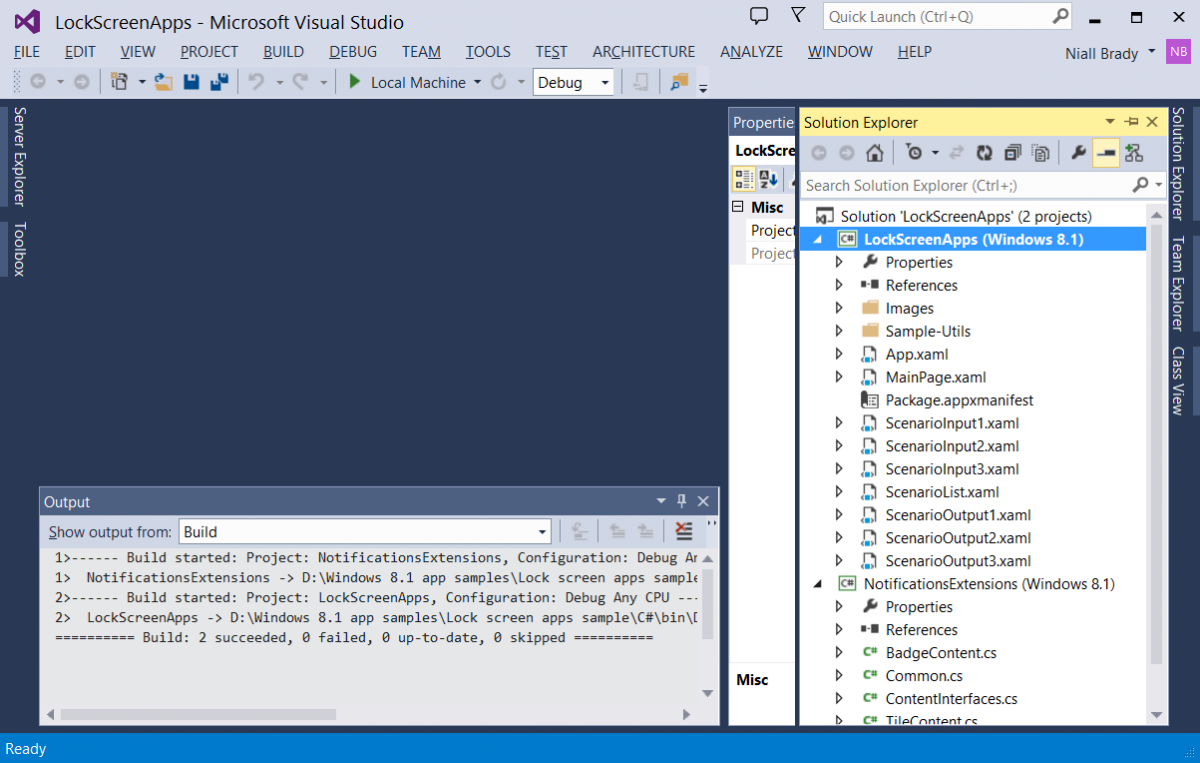
We’ve got the code, let’s build it. Click on Solution Explorer to the right to expand that menu if it isn’t already expanded.
Right click on your app listed in Solution Explorer and choose Build (or rebuild if trying again….)
any messages about the build will be reflected in the output window
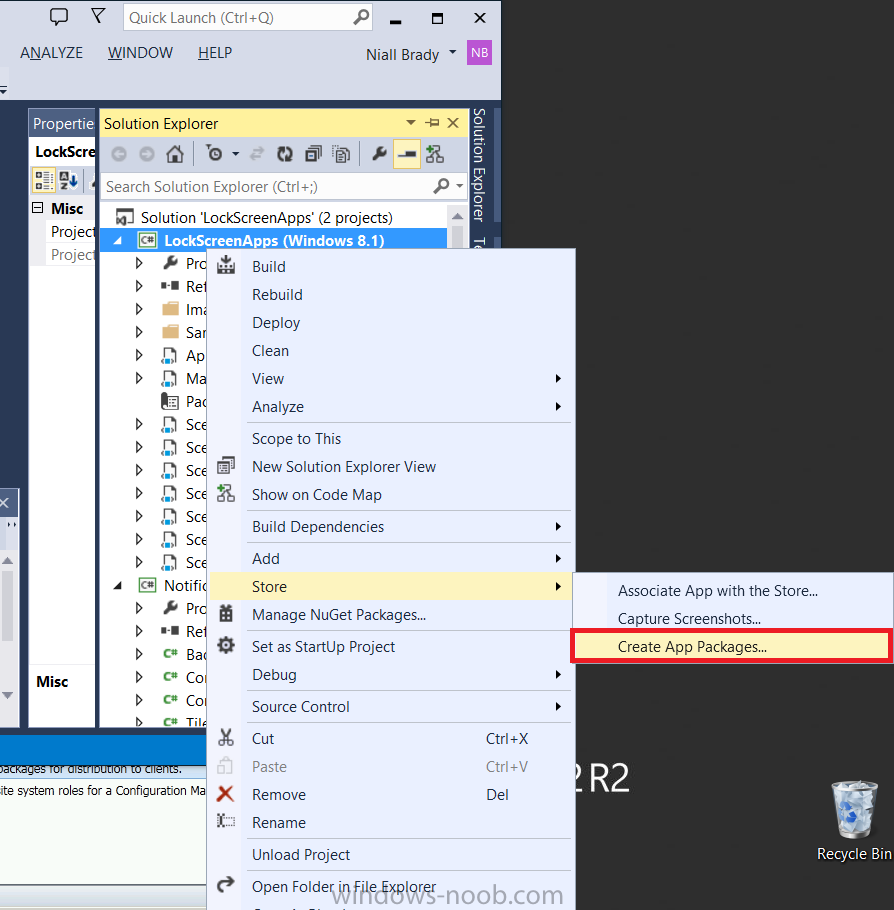
Now that it has built the code, right click the application and choose Store, then Create App packages.
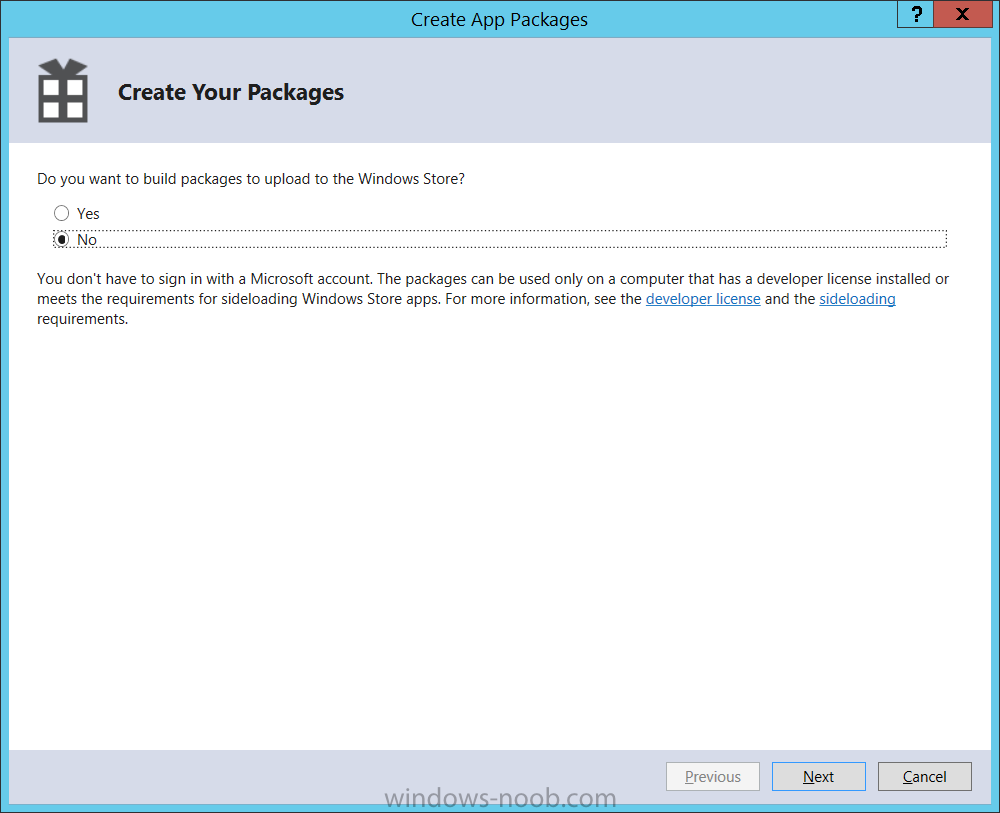
select No when asked do you want to upload to the Store (Windows store), we are only testing after all…
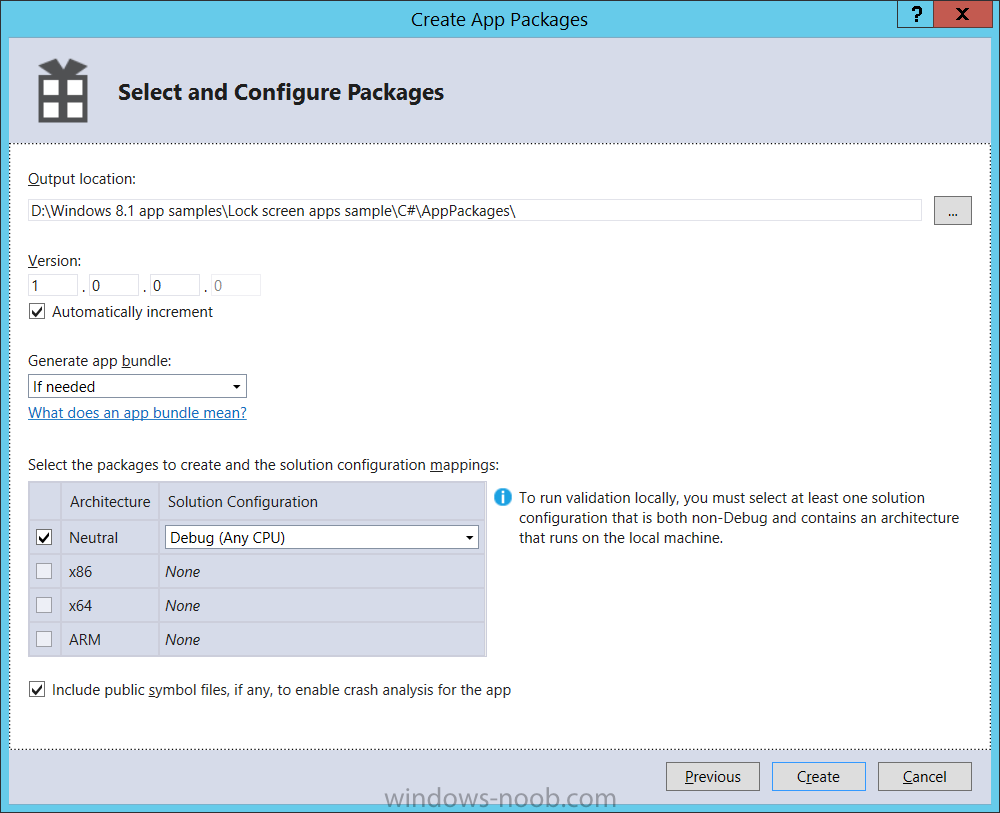
leave the output location as default and click on Create, note that you can change the version number of the application here, cool
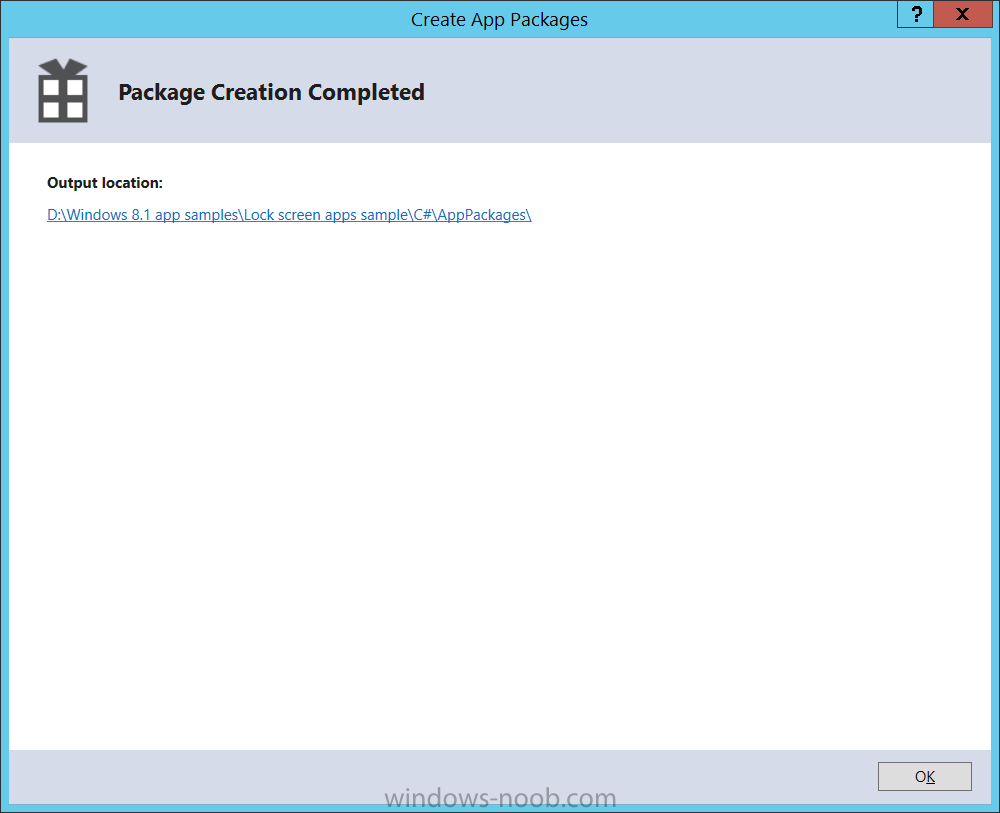
and if all goes well you’ll be informed that it’s done
Step 4. Create a GPO for Deploying Windows 8.1 apps
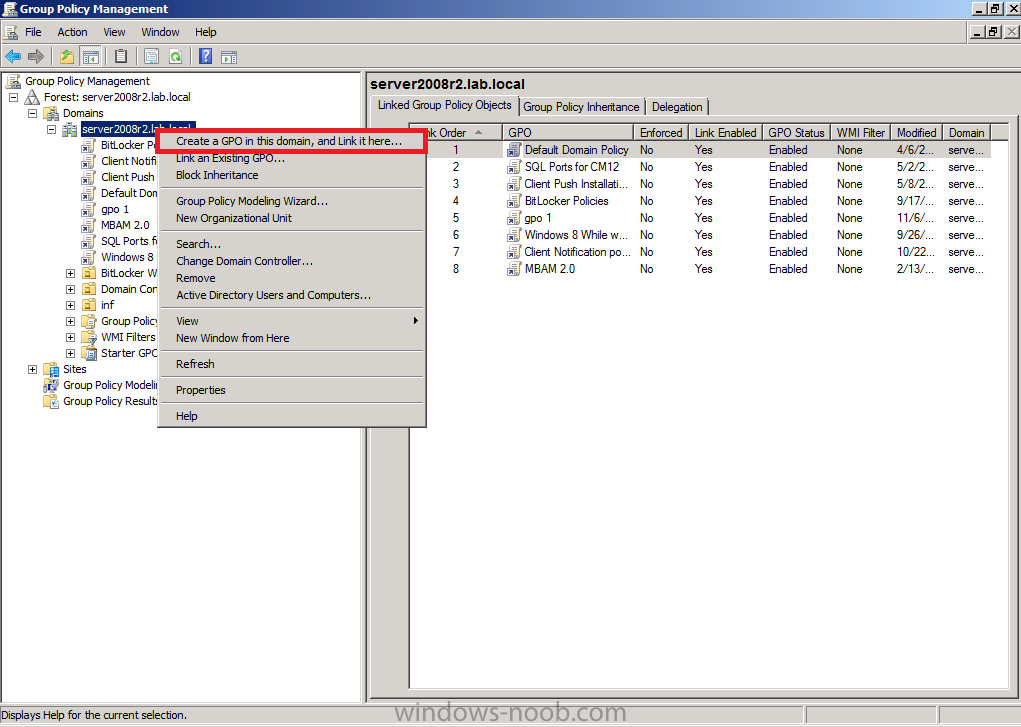
In Active Directory start up Group Policy management (gpedit.msc) and choose to create a new Group Policy Object
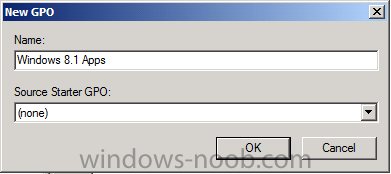
give it a suitable name
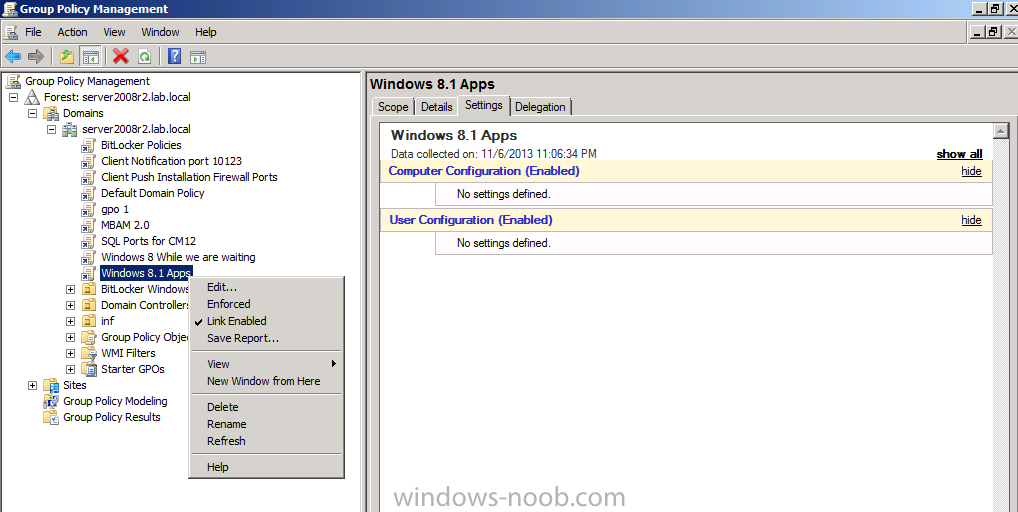
and once done right click and choose Edit
In order to deploy an appx app (modern style app) via Software Center certain requirements must be met on the client, and these can be done via Group Policy. So expand
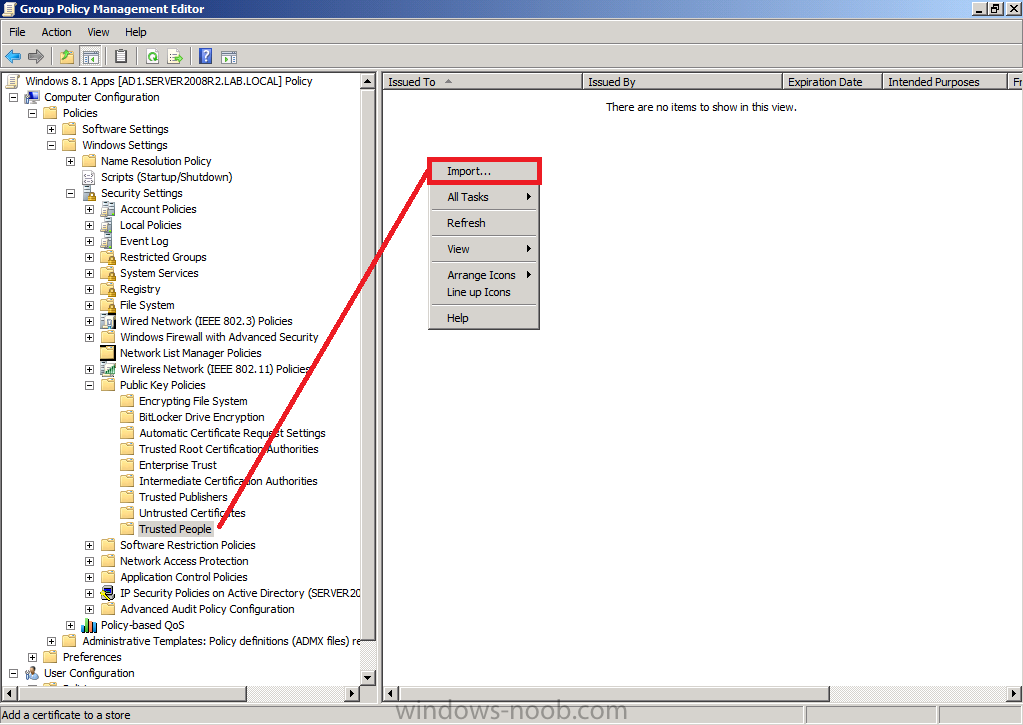
Computer Configuration, Policies, Windows Settings, Security Settings, Public Key Policies,Trusted People
right click and choose import to import the needed certificate for each app you want to deploy,
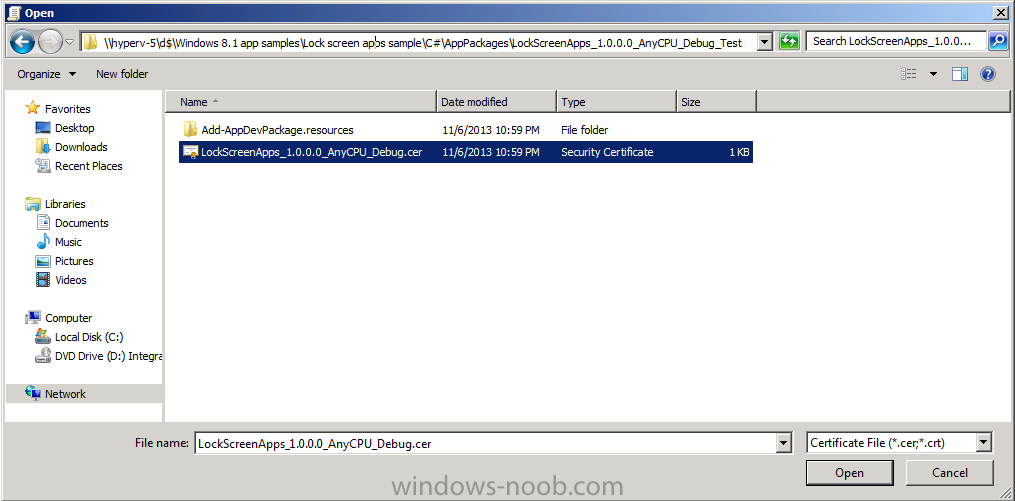
browse to the CER file located in the AppPackages directory that you just built the app in (see screenshot below)
make sure you are placing it in the Trusted People Certificate Store, click your way through the wizard
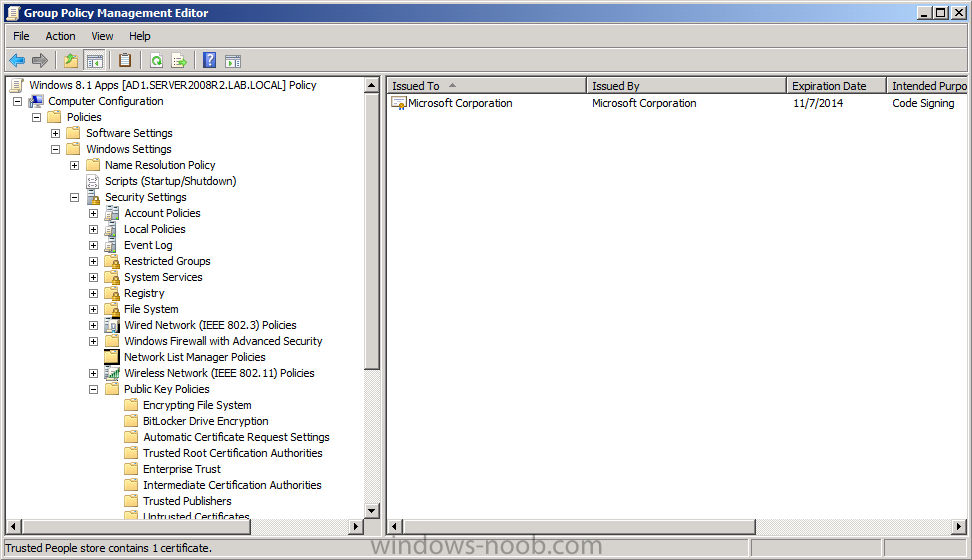
The certificate appears, note the expiration date, when it expires you’ll no longer be able to deploy the app with that certificate.
Next, set the following setting in the GPO
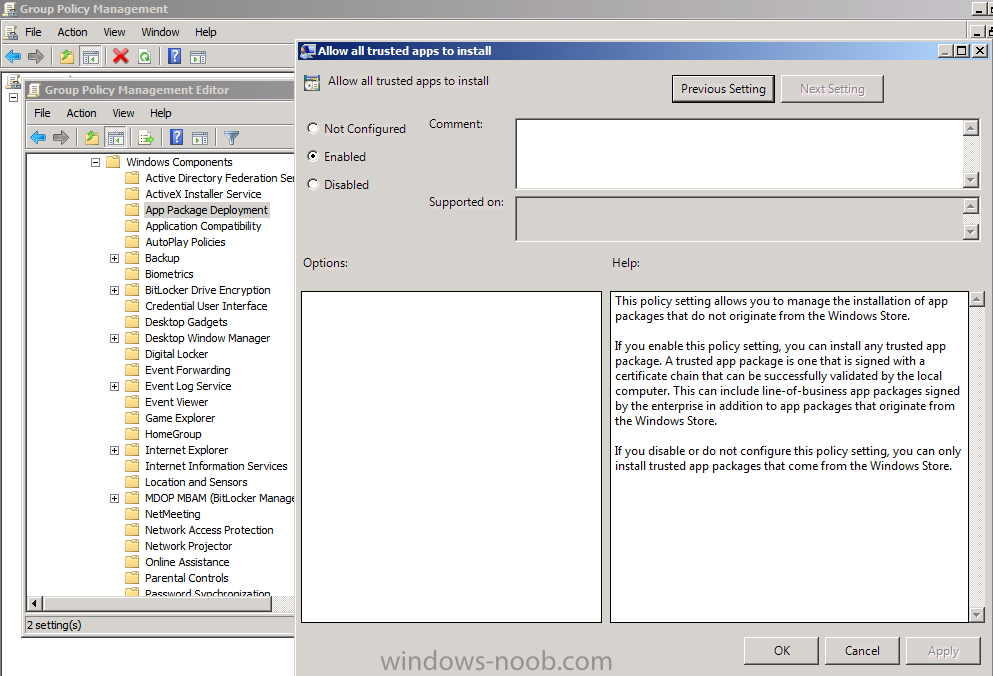
Computer Configuration, Administrative Templates, Windows Components, App Package Deployment,
Allow all trusted apps to install (Enable)
If you don’t have that setting then you’ll need to import it by logging on to a Windows 8 computer, copy the admx file from Windows 8 to %logonserver%, Logoff Active Directory, Logon AD, run gpedit.msc and the new templates are there.
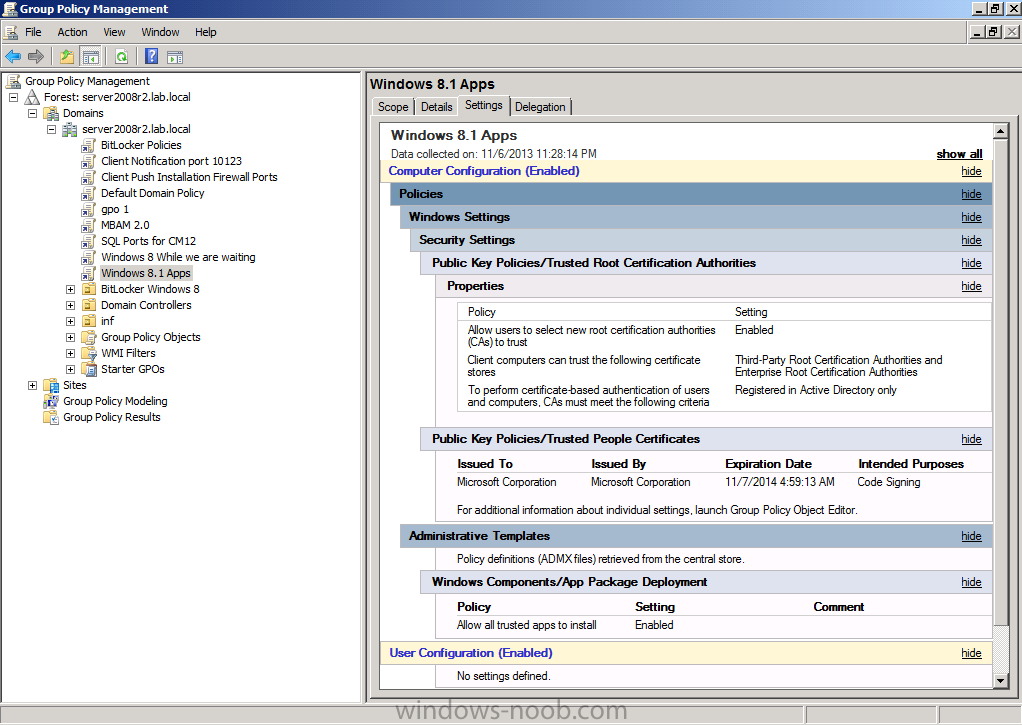
the finished GPO should look like this
Step 5. Copy the new app to Configuration Manager 2012 R2
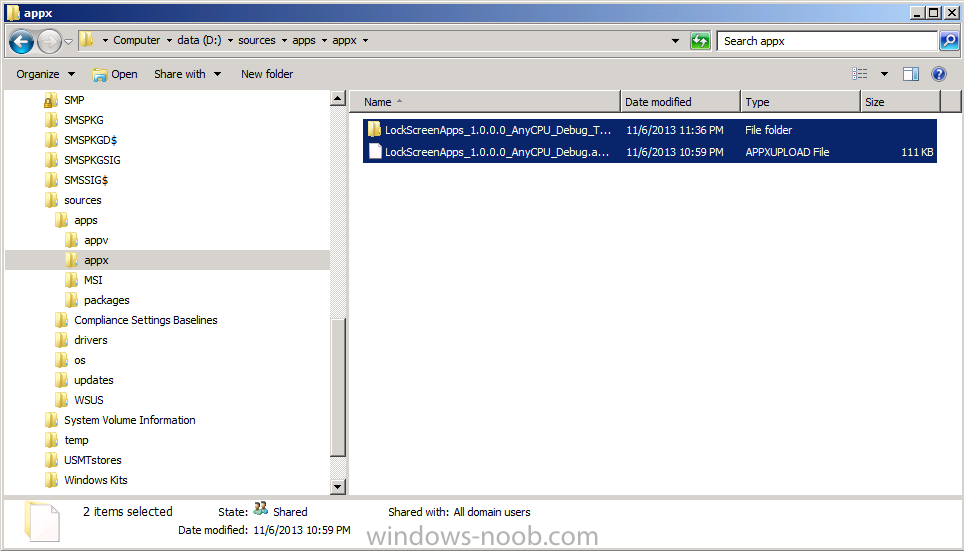
Copy the new application to your sources share on the Configuration Manager server.
Step 6. Create and deploy the application in Configuration Manager 2012 R2
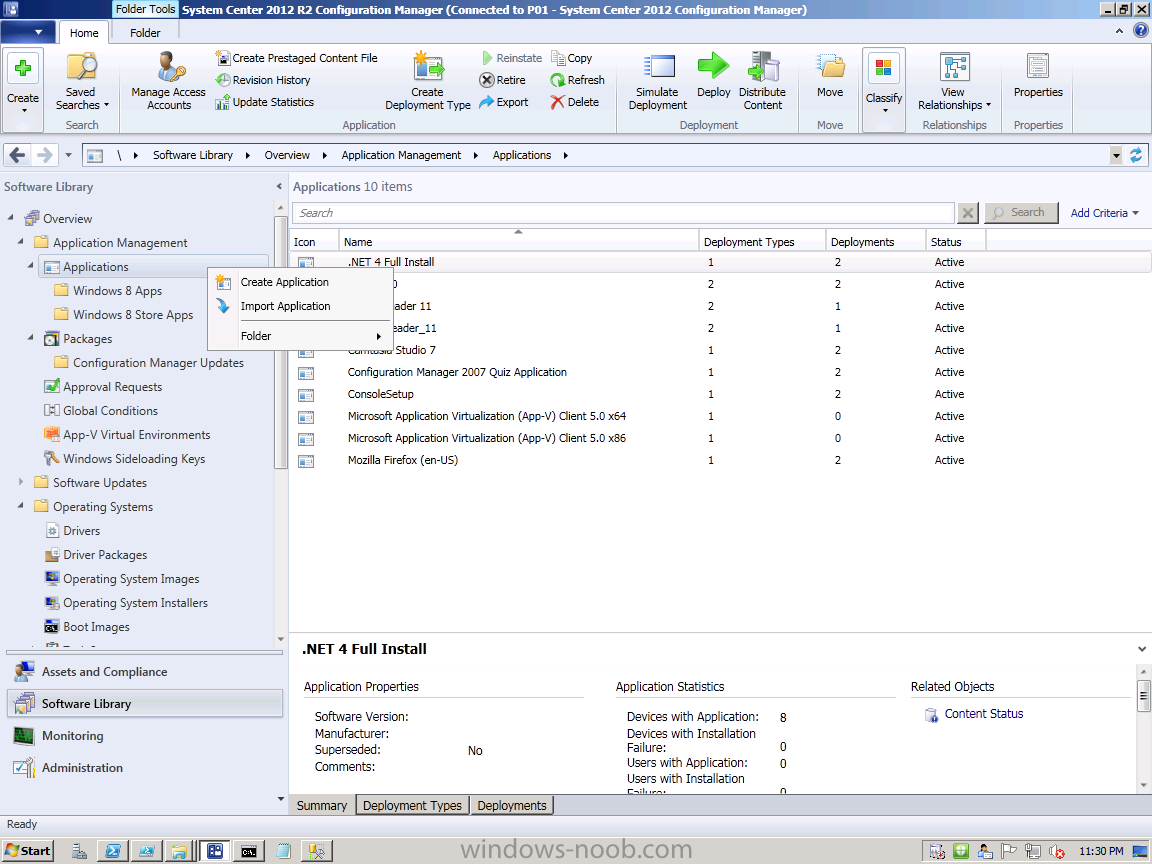
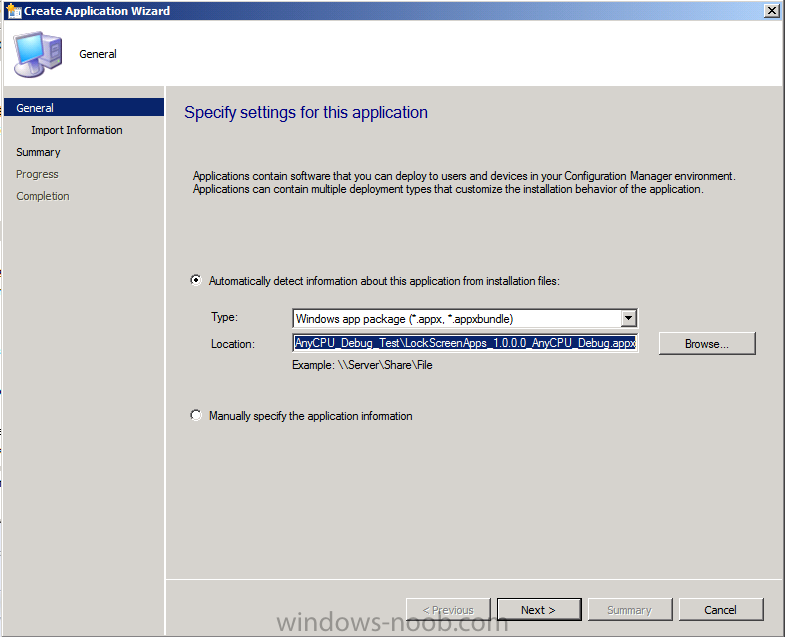
In the Configmgr Console expand Software Library and Applications, choose Create Application.
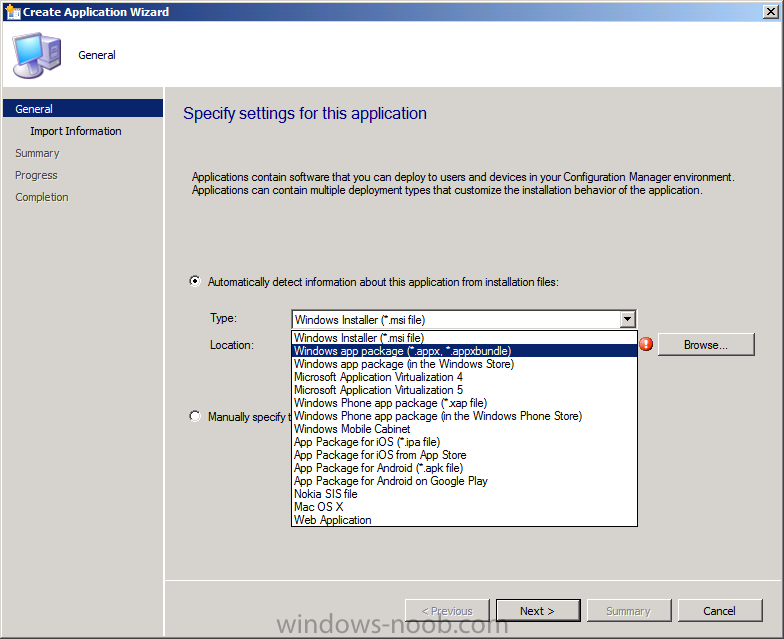
select Windows app package (*.appx, *.appxbundle) from the drop down menu
point to the appx file in the files we copied in Step 5 above
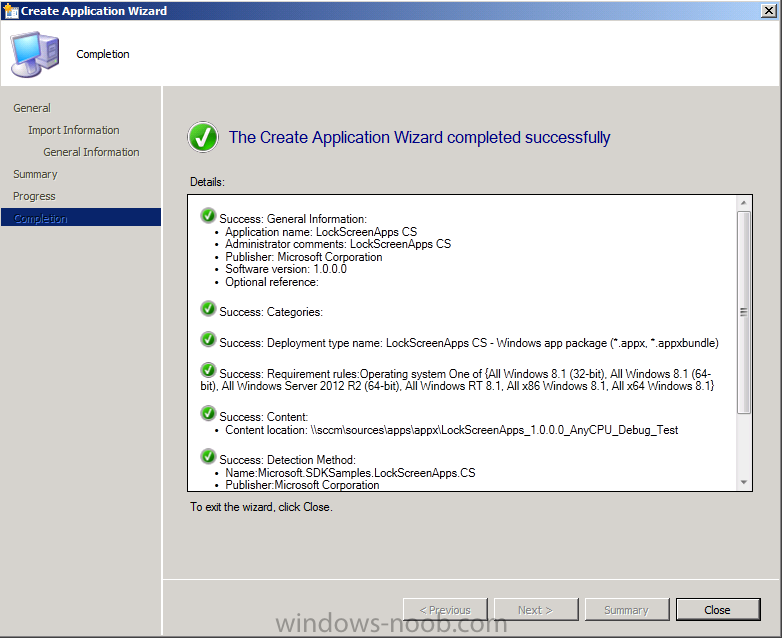
continue through the wizard until completion.
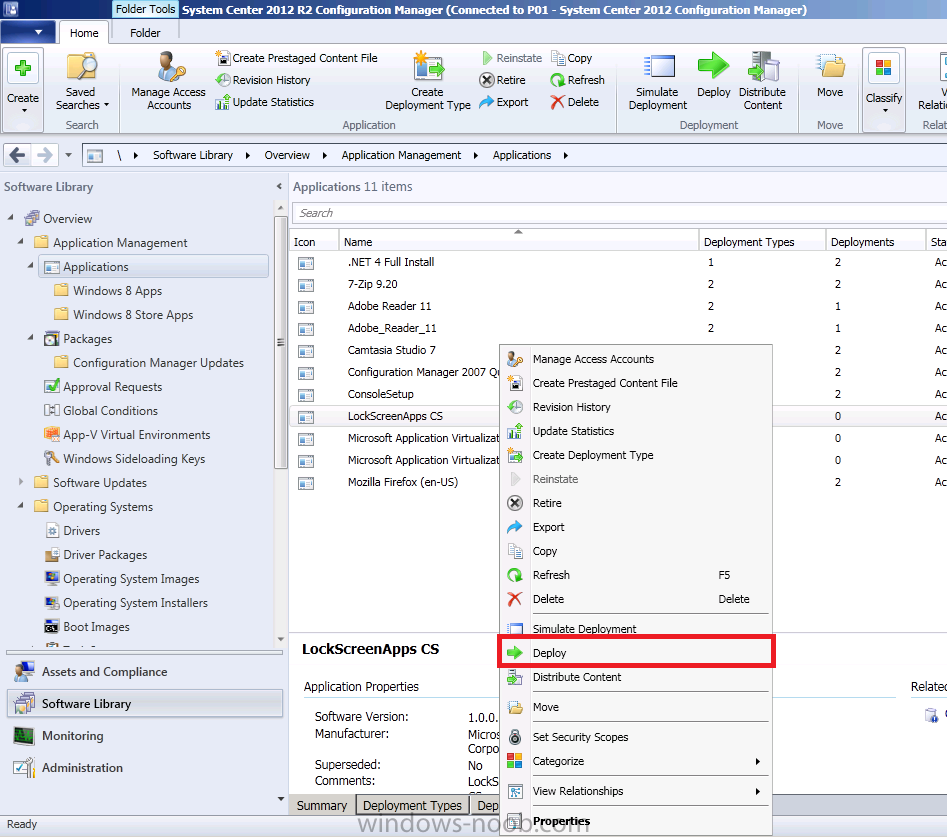
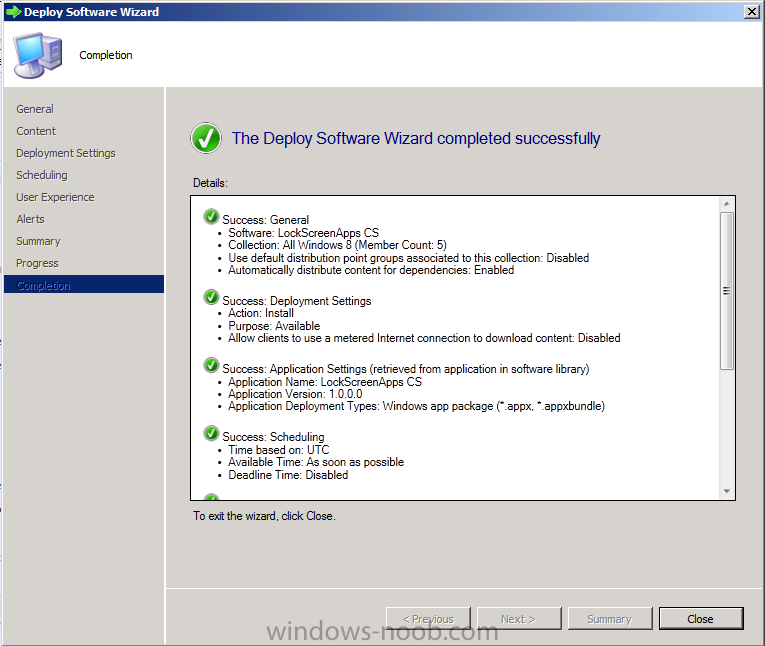
I won’t go into details about Deploying the app as it’s the same process as any application, just right click and choose deploy, go through that wizard…
make sure to to Deploy it to a Device collection that contains our Windows 8.1 computer, make it an available (optional) deployment. and to distribute it to your distribution points.
Step 7. Test the new app on a Windows 8.1 computer
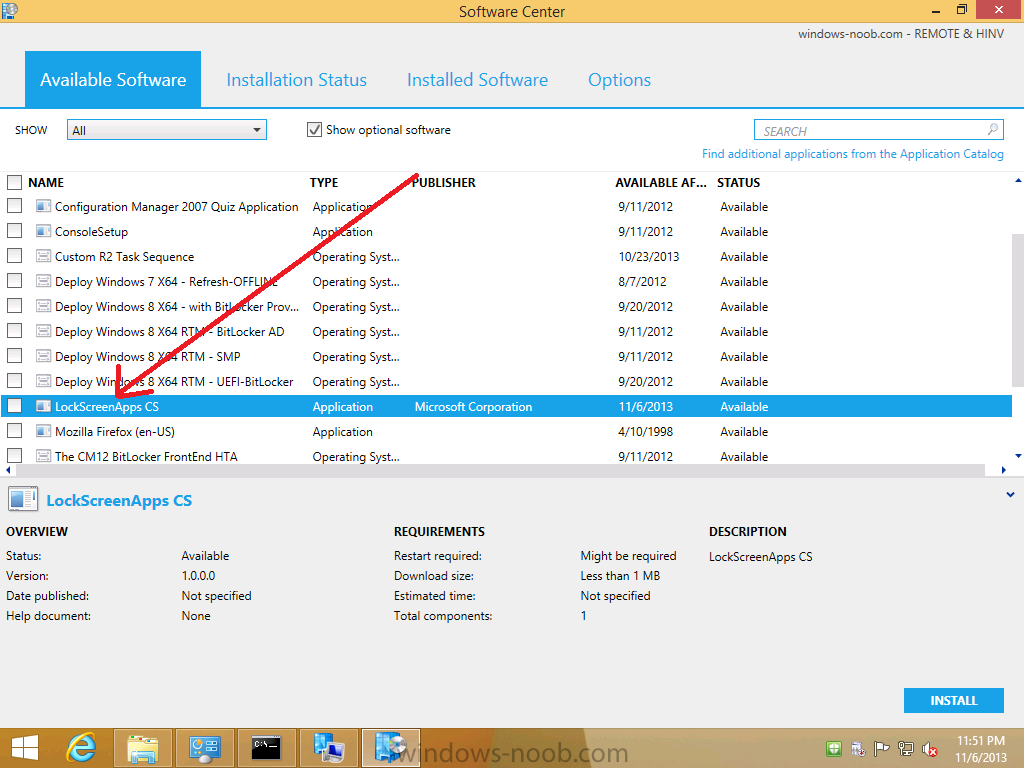
Logon to a Windows 8.1 computer and open software center, you should see our new app, click Install.
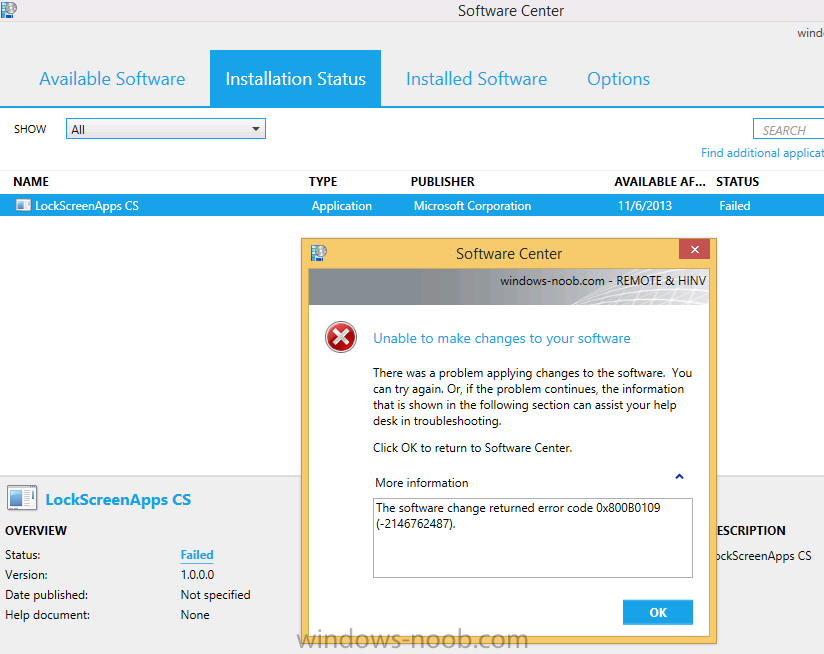
after a few moments if it fails with The software change returned error code 0x800B0109 like in the screenshot below,
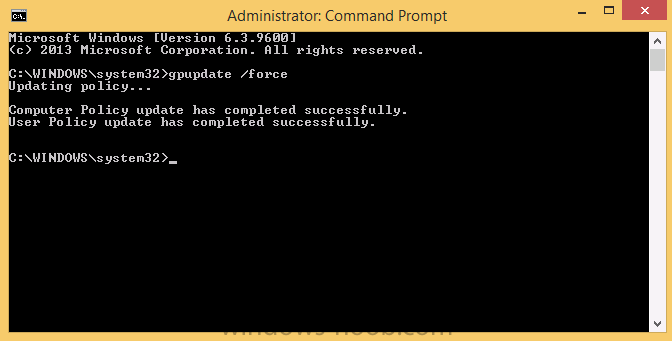
then make sure to update Group Policy like so…
gpupdate /force
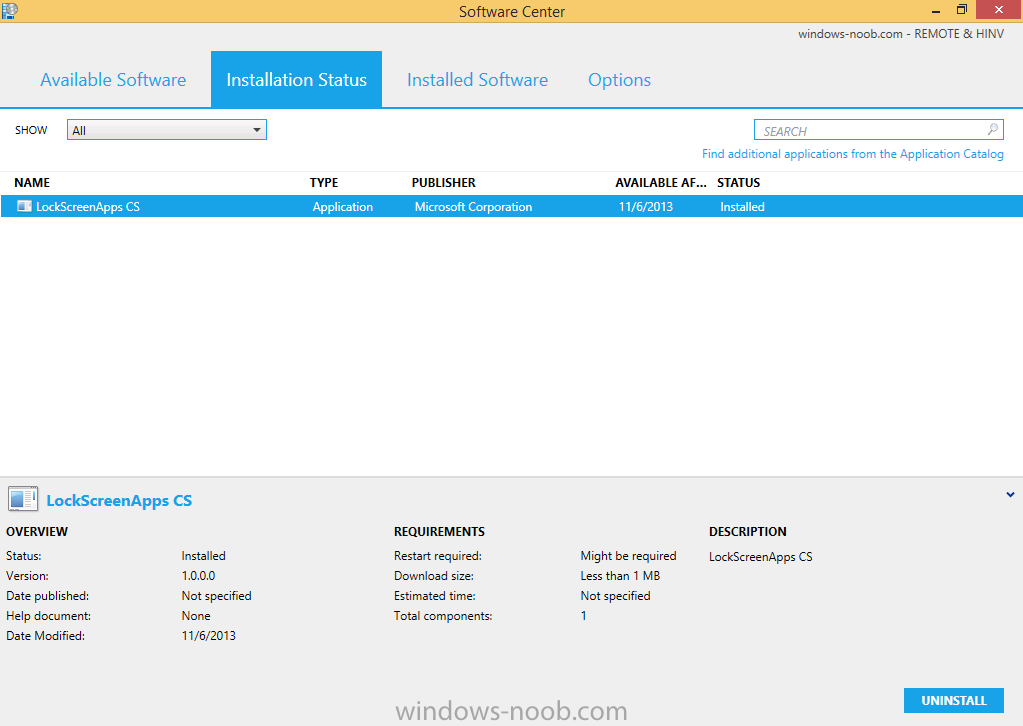
then try again. This time it will work
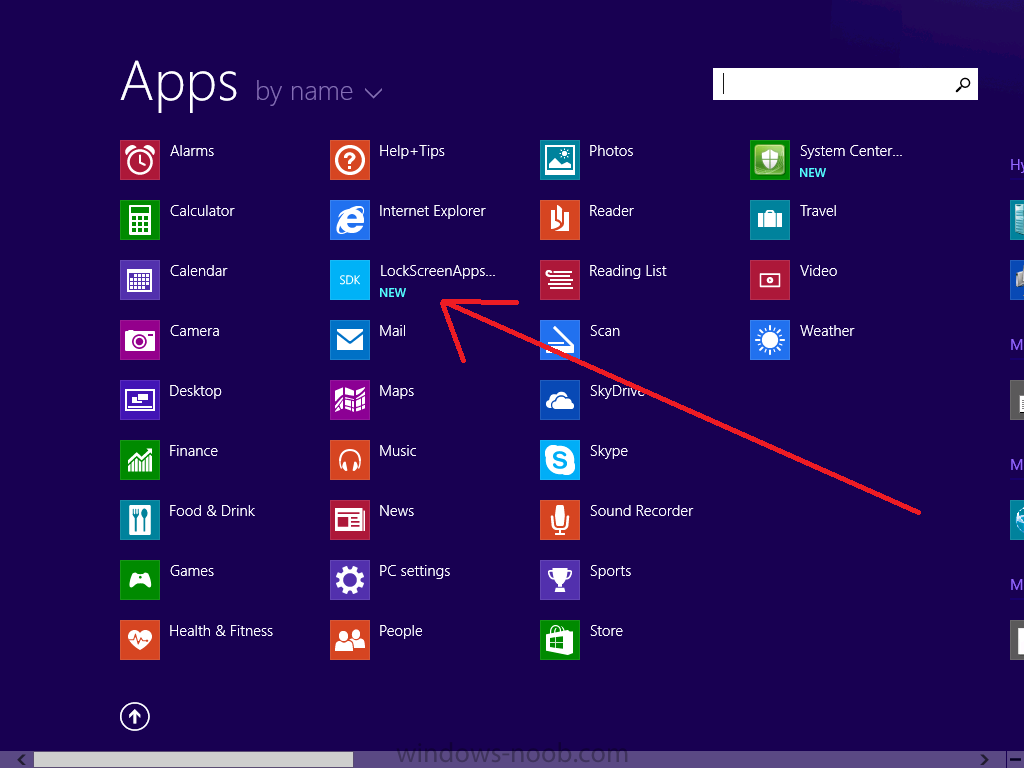
and there it is on the Start screen !
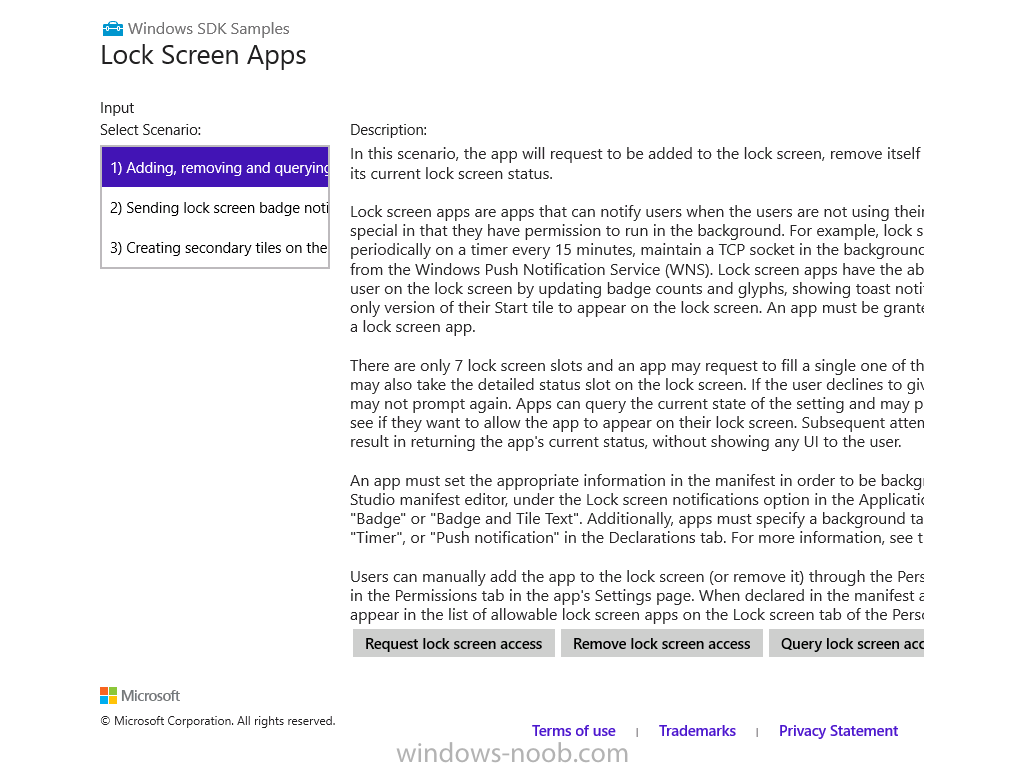
click on it to see what happens
cool or what !
until next time, adios !
Related Reading
Windows 8.1 app samples – http://code.msdn.mic…yle-App-Samples
Get a Developers License – http://msdn.microsof…(v=vs.110).aspx
Planning to Deploy Windows 8 Apps in Configuration Manager – http://technet.micro…y/jj822984.aspx


