Introduction
This is Part 4 of a new series of guides which will cover managing Windows 365 Cloud PCs using PowerShell and Microsoft Graph. This mini series should help you get started with automating and managing your Cloud PCs using PowerShell via Microsoft Graph. If you are new to Windows 365 Cloud PCs then please read our previous series called Getting started with Windows 365 available here. At the time of writing, Paul is a 8 times Enterprise Mobility MVP based in the UK and Niall is a 14 times Enterprise Mobility & Windows and Devices MVP based in Sweden.
Below you can find all parts in this series:
- Automating Windows 365 part 1 – Introducing Graph and setting up Visual Studio code
- Automating Windows 365 part 2 – Using Graph X-Ray
- Automating Windows 365 part 3 – Provisioning Cloud PC’s
- Automating Windows 365 part 4 – Managing your Cloud PC <- you are here
- Automating Windows 365 part 5 – TBD
In this part of our guide to managing Windows 365 Cloud PCs via PowerShell and Microsoft Graph, we’ll cover the following management actions:
- Resize
- Restore
- Reprovision
- Restart
Resizing your Windows 365 Cloud PCs
The Resize remote action for Windows 365 Cloud PCs retains user and disk data which is very cool, and allows you the IT Admin to resize the users device as required based on usage or requests. The resize action allows you to:
- Upgrade the RAM, CPU, and storage capacity of a Cloud PC.
- Downgrade the RAM and CPU of a Cloud PC.
Note: The resize option does not support reducing disk space. Also worth mentioning, you cannot resize a Frontline provisioned Cloud PC.
The available options when attempting to resize your Cloud PCs are also based on the Windows 365 licenses you have in your tenant. For example, in our tenant we have the following licenses available:
- Windows 365 Enterprise 2 vCPU, 8 GB, 128 GB
- Windows 365 Enterprise 4 vCPU, 16 GB, 128 GB
- Windows 365 Enterprise 16 vCPU, 64 GB, 512 GB
There are various resize options available but for this guide we’ll upgrade from 2vCPU to 4vCPU, we cannot downgrade the disk space from 128GB to something smaller as this is not supported and we don’t have the licenses available anyway.
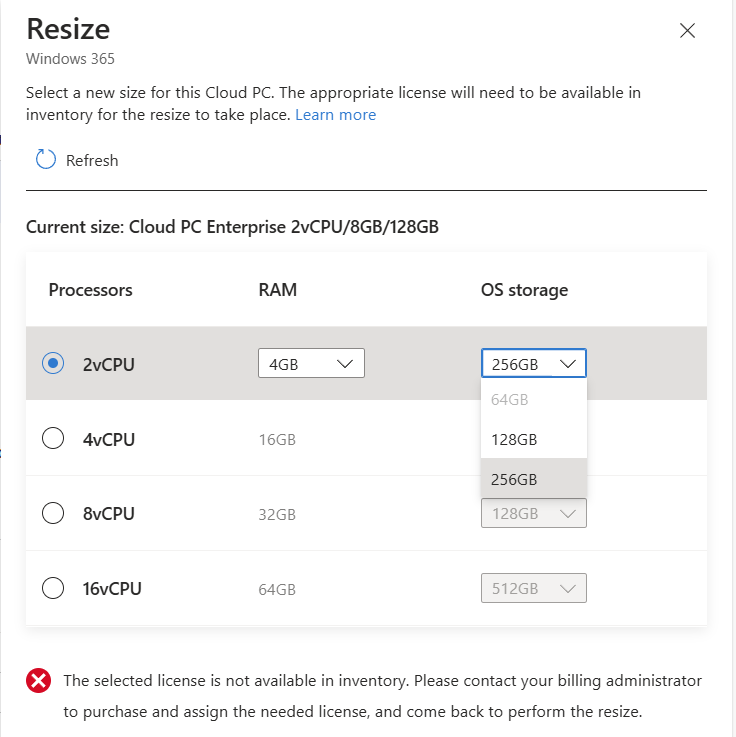
With that in mind in the Microsoft Intune admin under Devices > Device onboarding > Windows 365 > All Cloud PCs, if you select a device and choose Resize, you are presented with the options to Resize. Selecting an inappropriate option results in you being informed that the selected license is not available in your inventory as shown below in the screenshot. Keep this in mind when you attempt to resize your Cloud PCs via Graph.
To get started with Resize via Graph and PowerShell, we need to list all the service plans available. Remember, these are not all the sizes available, just a list of them all.
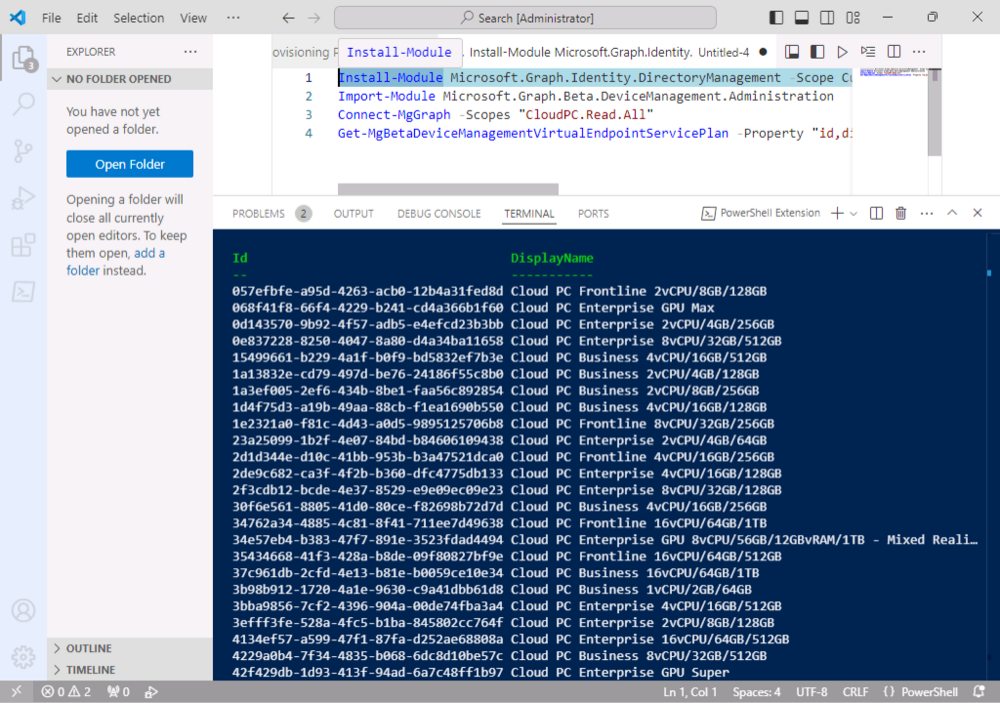
Using the following code, we can list all of those service plans, this uses the following cmdlet Get-MgBetaDeviceManagementVirtualEndpointServicePlan documented here.
Install-Module Microsoft.Graph.Identity.DirectoryManagement -Scope CurrentUser -Force -AllowClobber
Import-Module Microsoft.Graph.Beta.DeviceManagement.Administration
Connect-MgGraph -Scopes "CloudPC.Read.All"
Get-MgBetaDeviceManagementVirtualEndpointServicePlan -Property "id,displayName,type,vCpuCount,ramInGB,storageInGB,category,provisioningType,supportedSolution"
Launch Visual Studio Code give it a go. The results will be displayed similar to the below output.
To demonstrate the Resize action, we will upgrade one of our Cloud PCs, you can try this out on one of your own Windows 365 Cloud PCs by substituting the relevant service plan information.
Currently, our Cloud PC is 2 vCPU, 8 GB, 128 GB as you can see below.
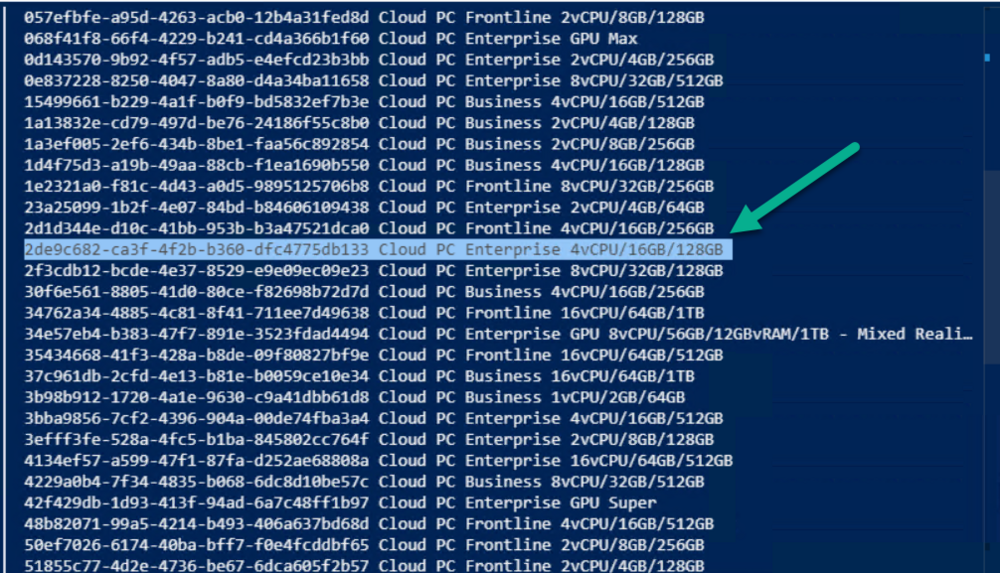
Looking at the output from Graph for our service plans, we can see that we need service plan with the ID 2de9c682-ca3f-4f2b-b360-dfc4775db133 as this matches the subscription we have available.
In the code below, we use the Get-MgBetaDeviceManagementVirtualEndpointCloudPc cmdlet, documented here, to retrieve the details of the device we are going to resize. Remember, you will need to change the ManagedDeviceName from CPCnM7PRJ to one of your own Cloud PC device names and select an available target service plan Id. We store the service plan information in the variable targetServicePlanId in the $params array. You will also need to change this to your target service plan ID.
Finally, we issue the Resize-MgBetaDeviceManagementVirtualEndpointCloudPc cmdlet to kick start the resize process. Read about that cmdlet here.
Install-Module Microsoft.Graph.Beta.DeviceManagement.Administration -Scope CurrentUser -Force -AllowClobber
Import-Module Microsoft.Graph.Beta.DeviceManagement.Administration
Connect-Graph -Scopes "CloudPC.ReadWrite.All"
$cloudPc = Get-MgBetaDeviceManagementVirtualEndpointCloudPc | Where-Object { $_.ManagedDeviceName -eq "CPCnM7PRJ" }

$params = @{
	targetServicePlanId = "2de9c682-ca3f-4f2b-b360-dfc4775db133"
}

Resize-MgBetaDeviceManagementVirtualEndpointCloudPc -CloudPCId $cloudPC.Id -BodyParameter $params
If you have picked a service plan which is not applicable, based on the criteria we have mentioned previously, you will receive a failure to resize when you view the device in the Intune admin center.
If however you have executed the code against a valid target service plan, you will see the Resize action taking place in Intune.
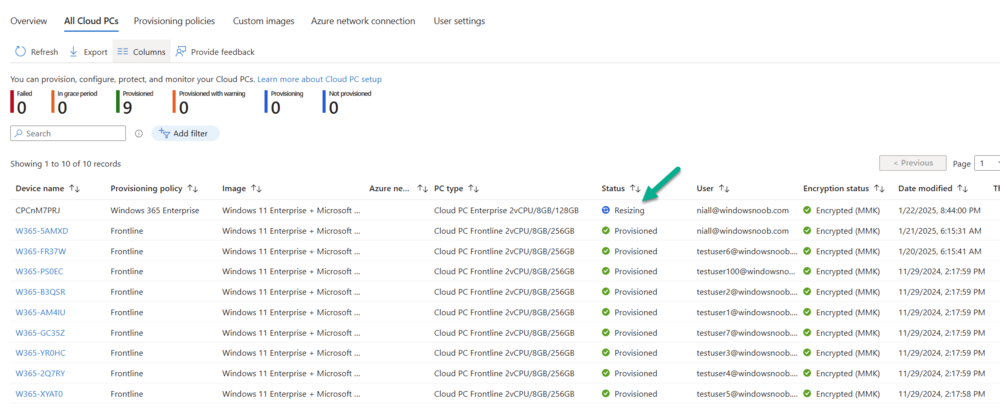
Return to the All Cloud PCs view under Devices > Device onboarding > Windows 365 > All Cloud PCs you will notice that the device will be listed with its Status as Resizing.
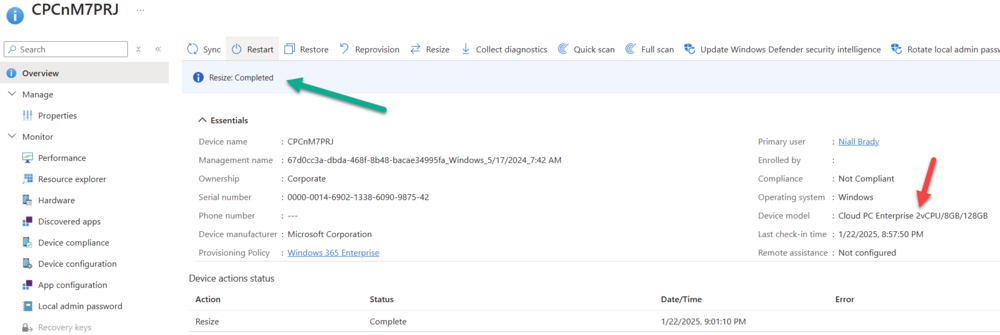
After some time, the resizing operation will complete and this will be reflected under Device actions status when viewing the targeted device. In the screenshot below however you can also see that the old device model is listed.
Triggering a Sync of the device or just waiting will update the model to the correct specs.
In the All Cloud PCs view, the Status will now report as Provisioned and the PC type should reflect the new service plan. We can see below that the device does indeed have the new changes (CPU/RAM).
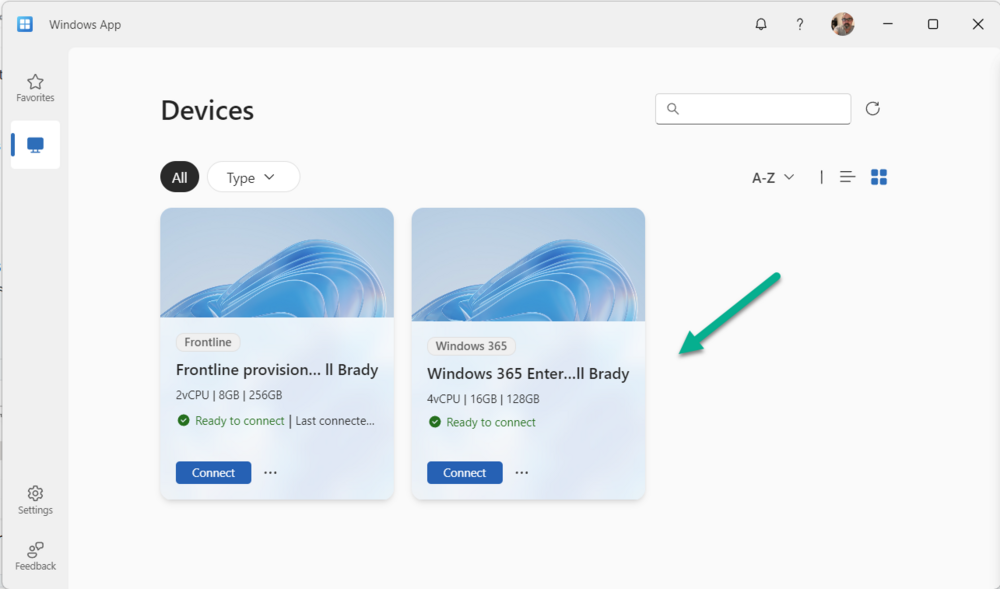
Also, if the user attempts to access the Cloud PC from the Windows app or Windows 365 website, the size details of the Cloud PC will be reflected with the new resized information.
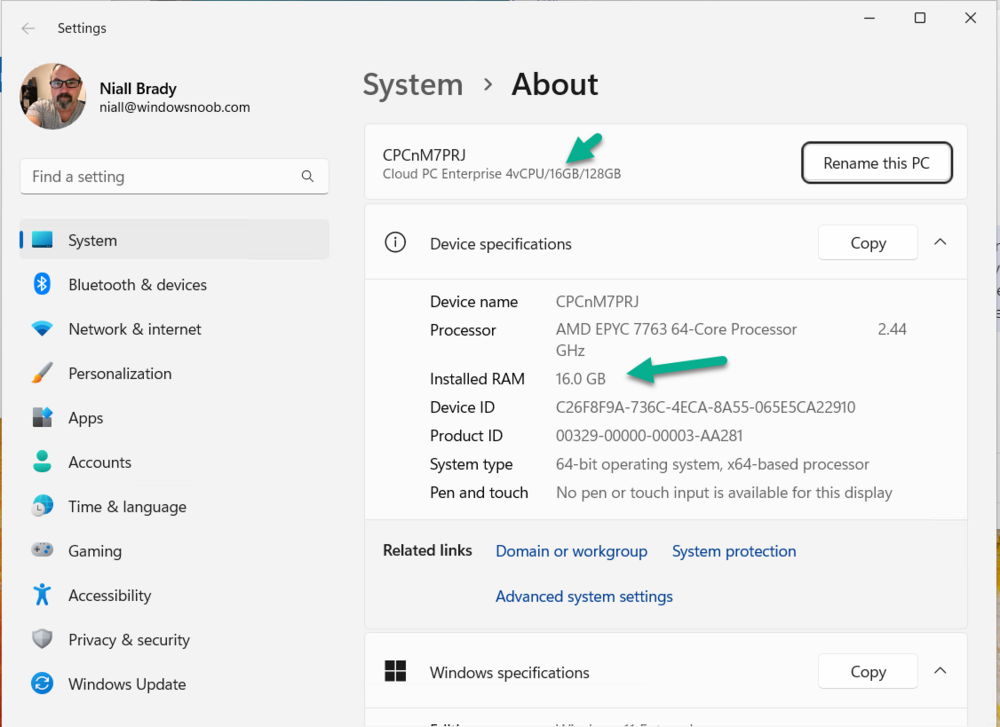
Finally, the quick check on the Cloud PC itself confirms the change in CPU/RAM.
The resize via Graph was a success!
The Restore action via Graph
In our previous Windows 365 series about Windows 365 we covered the Restore action, a feature specifically available to Cloud PCs. These restore points allow you, as the admin, to choose from a series of long or short term restore points. Long term restore points are saved every 7 days and there are a maximum of 4 long term restore points. Short term restore points are saved based on the user settings interval, so can be every 4, 6, 12, 16 or 24 hours. Read more about restore points at our blog post, here.
You can view the available restore points for a device by navigating to Devices > Device onboarding > Windows 365 > All Cloud PCs in Intune. You then select a device and choose Restore from the menu. You are presented with a list of the available restore points which can be selected to revert the Cloud PC to.
When managing our Cloud PCs for Restore via Graph, we need to begin by querying those restore points for our device.
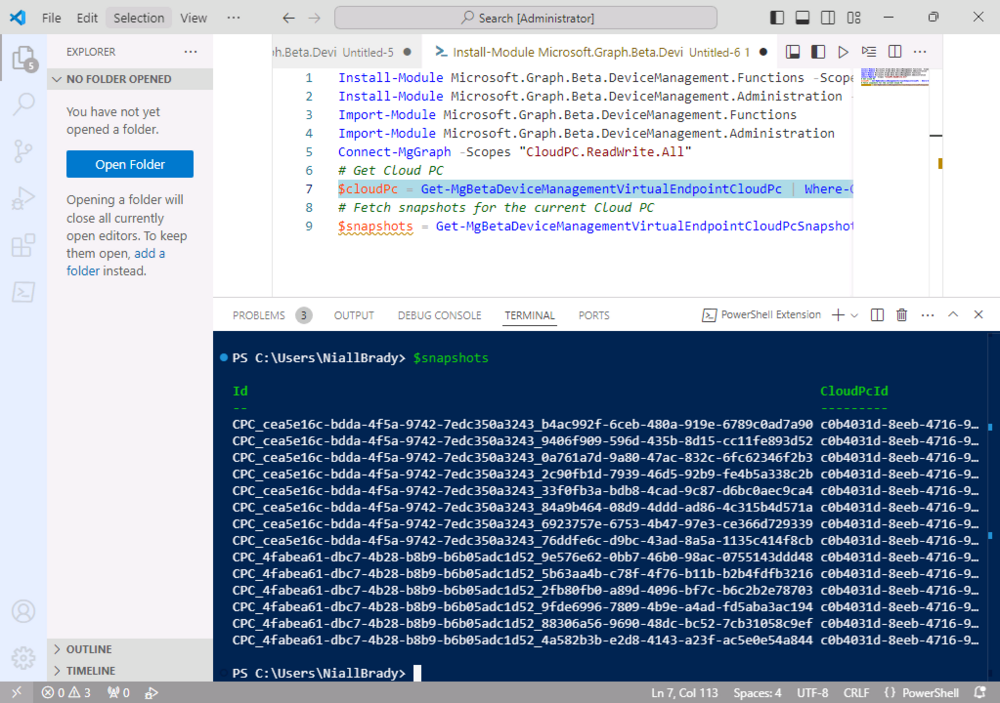
Start off by running the relevant modules and connecting to Graph. Next, you need to obtain the details of the Cloud PC you want to run the Restore action on. We are reusing our code from previous to do this by running the Get-MgBetaDeviceManagementVirtualEndpointCloudPc cmdlet and filtering on a specific hostname.
Then we utilise the Get-MgBetaDeviceManagementVirtualEndpointCloudPcSnapshot cmdlet to gather all the snapshots for this Cloud PC. Read more about that cmdlet here.
Install-Module Microsoft.Graph.Beta.DeviceManagement.Functions -Scope CurrentUser -Force -AllowClobber
Install-Module Microsoft.Graph.Beta.DeviceManagement.Administration -Scope CurrentUser -Force -AllowClobber
Import-Module Microsoft.Graph.Beta.DeviceManagement.Functions
Import-Module Microsoft.Graph.Beta.DeviceManagement.Administration
Connect-MgGraph -Scopes "CloudPC.ReadWrite.All"

# Get Cloud PC
$cloudPc = Get-MgBetaDeviceManagementVirtualEndpointCloudPc | Where-Object { $_.ManagedDeviceName -eq "CPCnM7PRJ" }

# Fetch snapshots for the current Cloud PC
$snapshots = Get-MgBetaDeviceManagementVirtualEndpointCloudPcSnapshot -CloudPcId $cloudPc.Id
After executing, all the snapshots will be stored in the $snapshots variable.
Let’s say that we want to create a new snapshot for this Cloud PC. We can execute the New-MgBetaDeviceManagementVirtualEndpointCloudPcSnapshot cmdlet to achieve this. Details of this cmdlet are here.
#Create a new snapshot
New-MgBetaDeviceManagementVirtualEndpointCloudPcSnapshot -CloudPcId $cloudPc.Id
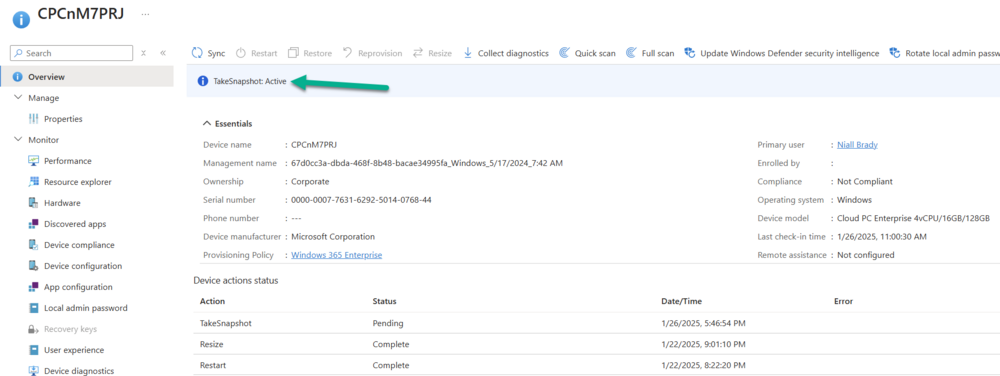
In the Intune console, if you take a look at the targeted device you will see that Take Snapshot: Active is reported and initially in a Pending state before becoming Active.
Once the Restore action of taking the snapshot is compete, the Device action status will be updated to reflect this.
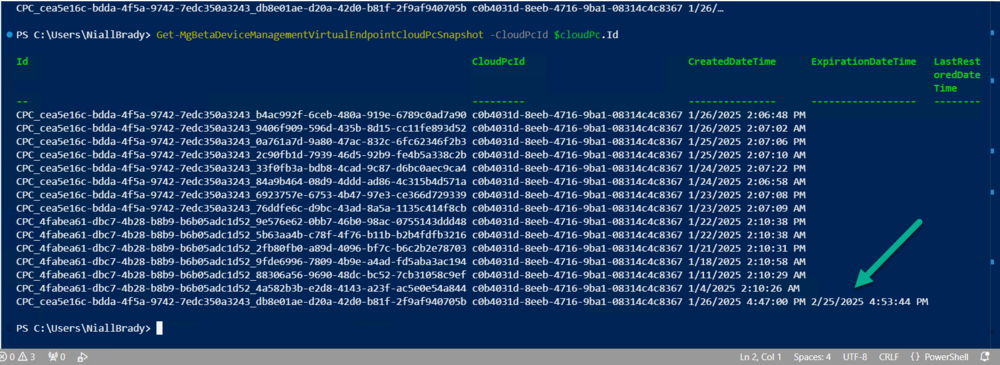
You can now re-run the Get-MgBetaDeviceManagementVirtualEndpointCloudPcSnapshot -CloudPcId $cloudPc.Id command to see the newly created, manual, snapshot listed.
Likewise, in the Intune console, the snapshot will be listed. Note that the Restore point type will be listed as manual.
OK, let’s look at how you can restore to a specific restore point. You previously collected all the snapshots for a device and stored them in the $snapshots variable. You can use the ID from that data to run the restore. These are the ID’s starting with CPC. Find the ID you want to use for your restore point and use the code below, changing the cloudPcSnapshotId details to match the ID of your snapshot.
The code runs the Restore-MgBetaDeviceManagementVirtualEndpointCloudPc cmdlet to restore the Cloud PC. You can read about this cmdlet here.
Install-Module Microsoft.Graph.Beta.DeviceManagement.Actions -Scope CurrentUser -Force -AllowClobber
Import-Module Microsoft.Graph.Beta.DeviceManagement.Actions

$params = @{
	cloudPcSnapshotId = "CPC_cea5e16c-bdda-4f5a-9742-7edc350a3243_db8e01ae-d20a-42d0-b81f-2f9af940705b"
}

Restore-MgBetaDeviceManagementVirtualEndpointCloudPc -CloudPCId $cloudPC.Id -BodyParameter $params
Once again, check the device in the Intune console to observe the status of the action. Here you can see from the All Cloud PCs view that the device is Restoring.
and the Device action status will show when that Restore action is complete.
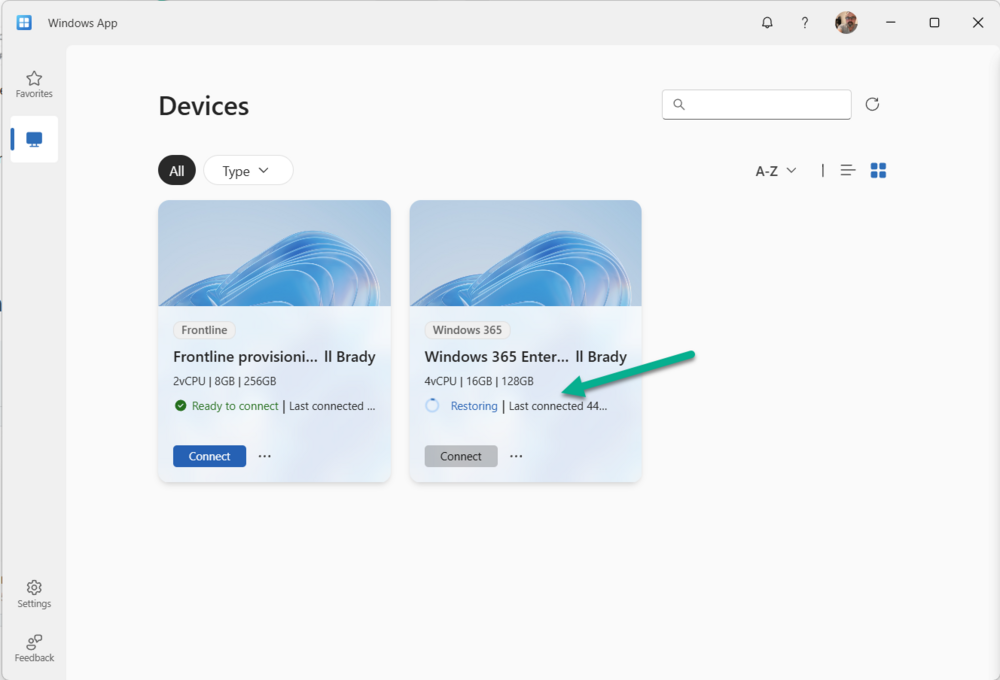
Whilst a restore takes place, the user is unable to access the Cloud PC. In the Windows app, or the Windows 365 website, the status of the device will report Restoring Cloud PC.
How to Reprovision a Cloud PC with Graph
Another action, which is unique to Windows 365 Cloud PCs, is Reprovision. This action effectively deletes a user’s current Cloud PC and creates a brand new one for the same user. Note that all the user’s data, applications, customisations, etc, are also removed as part of this process.
The code, once again, utilize the Get-MgBetaDeviceManagementVirtualEndpointCloudPc cmdlet and, as before, remember to change the name of the Cloud PC to match your device.
To reprovision the device you simply need to run the Invoke-MgBetaReprovisionDeviceManagementVirtualEndpointCloudPc cmdlet against that Cloud PC. Read about that cmdlet here.
Install-Module Microsoft.Graph.Beta.DeviceManagement.Actions -Scope CurrentUser -Force -AllowClobber
Import-Module Microsoft.Graph.Beta.DeviceManagement.Actions
Install-Module Microsoft.Graph.Beta.DeviceManagement.Administration -Scope CurrentUser -Force -AllowClobber
Import-Module Microsoft.Graph.Beta.DeviceManagement.Administration
Connect-MgGraph -Scopes "CloudPC.ReadWrite.All"

# Get Cloud PC
$cloudPc = Get-MgBetaDeviceManagementVirtualEndpointCloudPc | Where-Object { $_.ManagedDeviceName -eq "CPCnTGYOI" }

# Reprovison the device
Invoke-MgBetaReprovisionDeviceManagementVirtualEndpointCloudPc -CloudPCId $cloudPC.Id
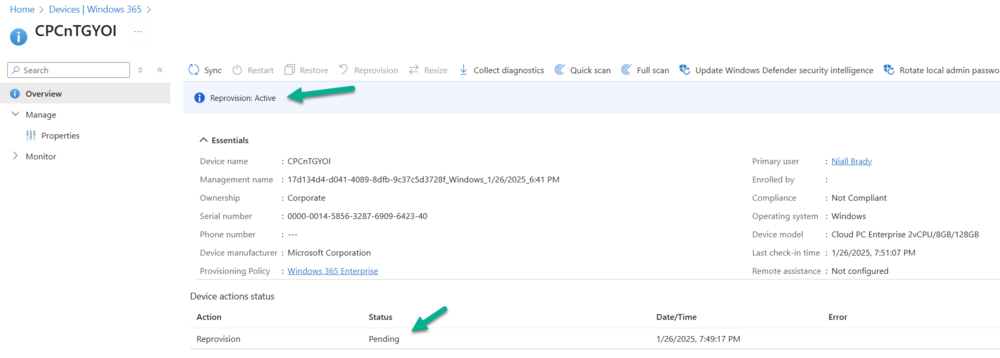
Let’s check the Intune console once again for the status of the Reprovision action. You will see it reporting as Active in the device view.
In the All Cloud PCs view it will state Provisioning in the Status column.
Since our Cloud PCs using a random naming template, the device will be created with a new name. In our case the device is now called CPCn4D8PH.
Finally, in the device view, the reprovisioning will be marked as Completed.
Restarting a Cloud PC
As with the reprovisioning via Graph, the Restart action is fairly simple to implement. The Restart device action initiates a reboot of the selected device within five minutes. Keep in mind that the device owner won’t receive an automatic notification, which could result in unsaved work being lost.
Since we provisioned the Cloud PC previously, we have updated the hostname in our command to get the Cloud PC via the Get-MgBetaDeviceManagementVirtualEndpointCloudPc cmdlet. Be aware of that if you have followed along and also reprovisioned prior to running this action. As mentioned, the reprovision action may have changed the device name.
With details of the Cloud PC gathered, you can execute the Restart-MgBetaDeviceManagementVirtualEndpointCloudPc cmdlet. Details here.
Install-Module Microsoft.Graph.Beta.DeviceManagement.Actions -Scope CurrentUser -Force -AllowClobber
Import-Module Microsoft.Graph.Beta.DeviceManagement.Actions
Install-Module Microsoft.Graph.Beta.DeviceManagement.Administration -Scope CurrentUser -Force -AllowClobber
Import-Module Microsoft.Graph.Beta.DeviceManagement.Administration
Connect-MgGraph -Scopes "CloudPC.ReadWrite.All"

# Get Cloud PC
$cloudPc = Get-MgBetaDeviceManagementVirtualEndpointCloudPc | Where-Object { $_.ManagedDeviceName -eq "W365-5AMXD" }

# Restart the device
Restart-MgBetaDeviceManagementVirtualEndpointCloudPc -CloudPCId $cloudPC.Id
The device will report as Restart: Active in the device view in the Intune console.
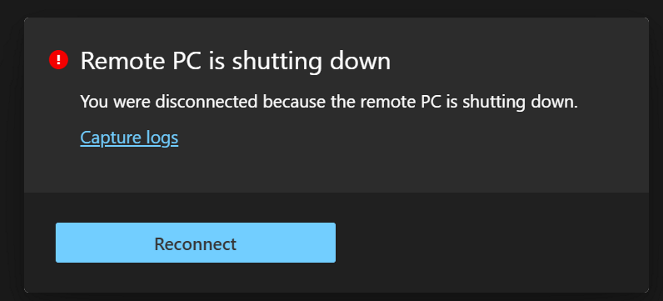
As mentioned, the user will get disconnected from their Cloud PC.
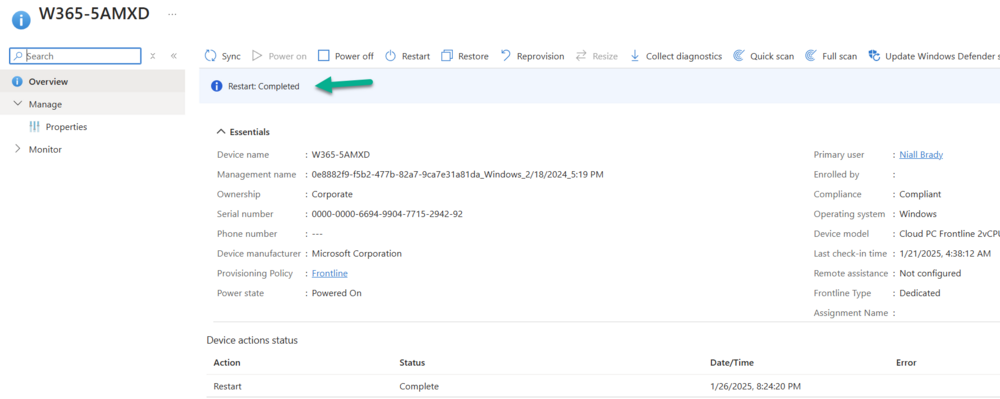
and when the action is complete, it will be reported as such in the Intune console and the user will be able to log back into their device.
Summary
Managing your Cloud PCs via Microsoft Graph is super simple and we have showed you how you can run effective code to execute the resize, restore, reprovision and restart actions against a specific device. You can take the code provided and expand this to create scripts which could run these actions against a collection of devices, similar to the Bulk actions options available in the Microsoft Intune admin center.


