

Introduction
On Friday 21st of June, myself and Paul presented on the topic of Windows 365 at the TunedIn: Leeds event, it was received with a lot of positivity and questions, so I thought I’d cover the content here for those of you that couldn’t make it to the event, it was awesome!

The agenda that we covered was all Windows 365 related and shown below:
- Windows 365 Boot
- Windows 365 GPU
- Windows 365 Frontline
- Windows 365 Switch
- Securing your Windows 365 PC’s <- you are here
In this blog post I’ll summarize Paul’s part of our session on Securing your Windows 365 PC’s with his permission. We’ll cover the following topics
- Encryption
- Watermarking
- Screen capture
- Conditional Access – allow
Encryption
To help you protect your organization’s data, Windows 365 Enterprise and Business Cloud PC disks are encrypted with Azure Storage server-side encryption (SSE).
This storage layer encryption provides the following benefits:
- When data is persisted to the cloud, data at rest on your Microsoft-hosted Cloud PC’s disk is automatically encrypted.
- Windows 365 Cloud PC disks are encrypted transparently using 256-bit Advanced Encryption Standard (AES) encryption, a modern block cipher, and is FIPS 140-2 compliant. The encryption at this layer doesn’t affect Cloud PC performance.
- The encryption is applied to every Cloud PC in every region at no extra cost.
source > https://learn.microsoft.com/en-us/windows-365/enterprise/encryption
This encryption is revealed when you review the Cloud PC’s in Intune, but you have to know where to look. In the Intune console select Devices, select Device Onboarding, click Windows 365 and finally select the All Cloud PCs tab. This will reveal the Encrypted (MMK) status.
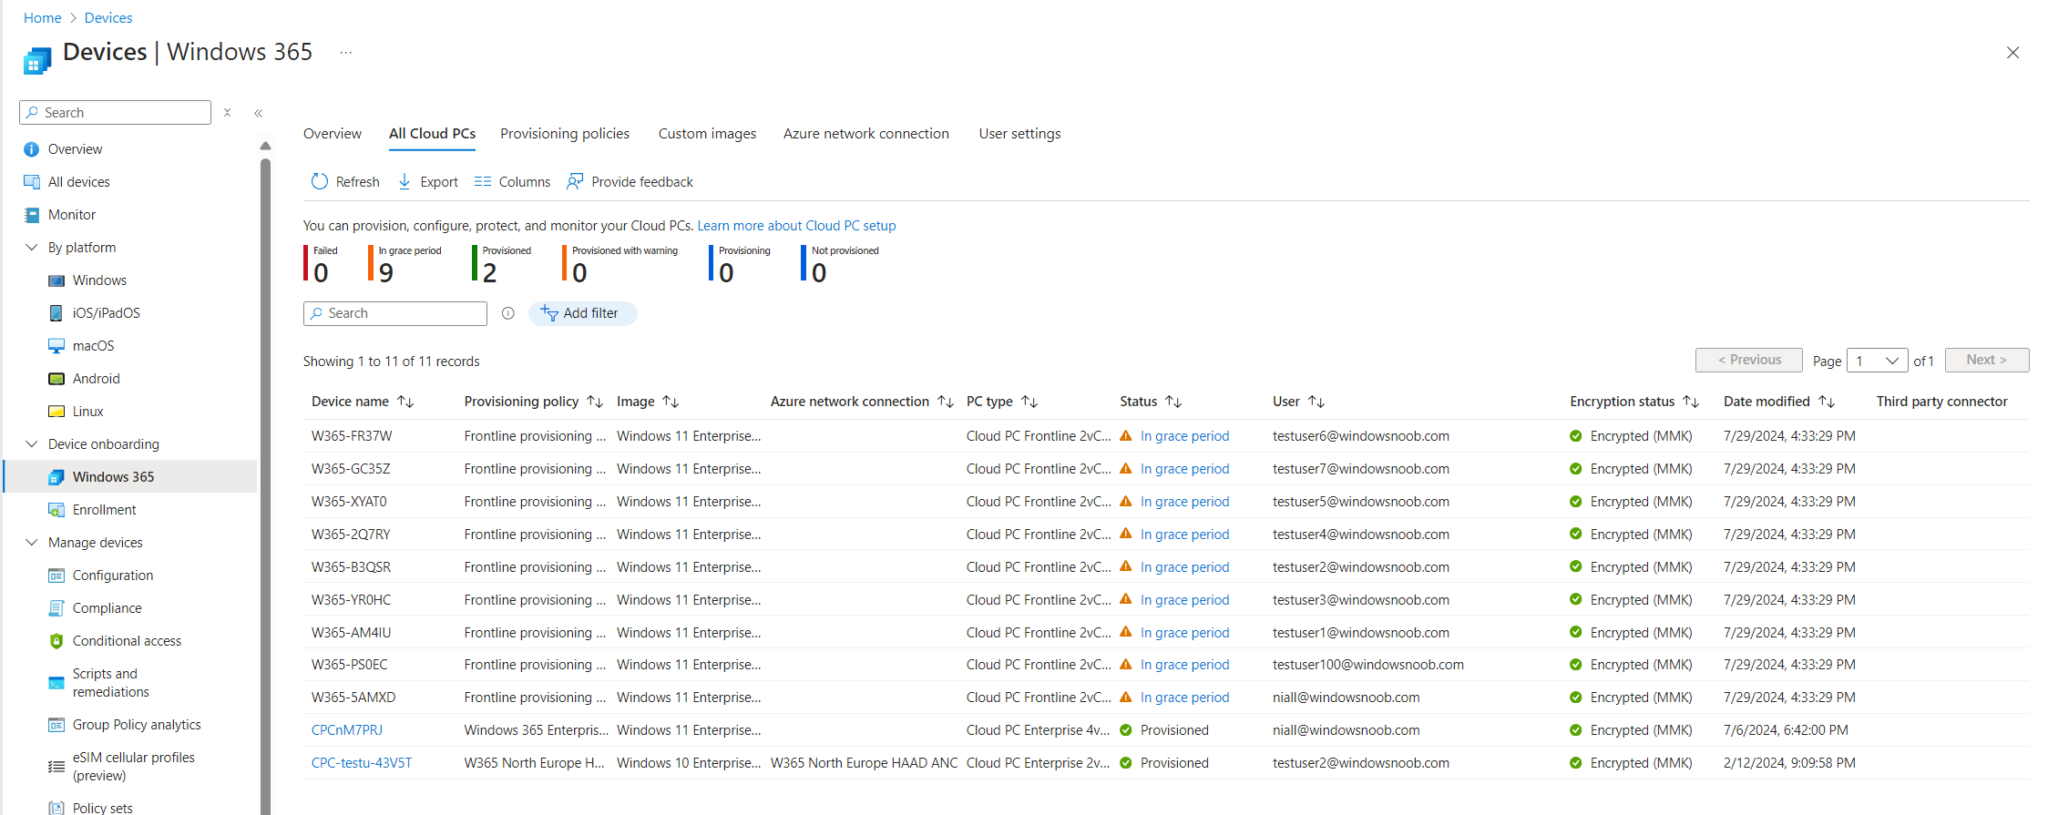
Detailed information about Microsoft Managed Key (MMK) information can be found here > https://techcommunity.microsoft.com/t5/security-compliance-and-identity/understanding-microsoft-information-protection-encryption-key/ba-p/2214589
Watermarking
- Watermarking / Screen Capture
Requirements – a remote desktop client that supports An Azure Virtual Desktop profile - Watermarking
Set QR height, opacity etc. Adjust to suit. - Screen capture:
Block screen capture on client or Block screen capture on client and server (22H2+ only)
To enable Watermarking and Screen capture you need to create a settings catalog policy

and search for Azure Virtual
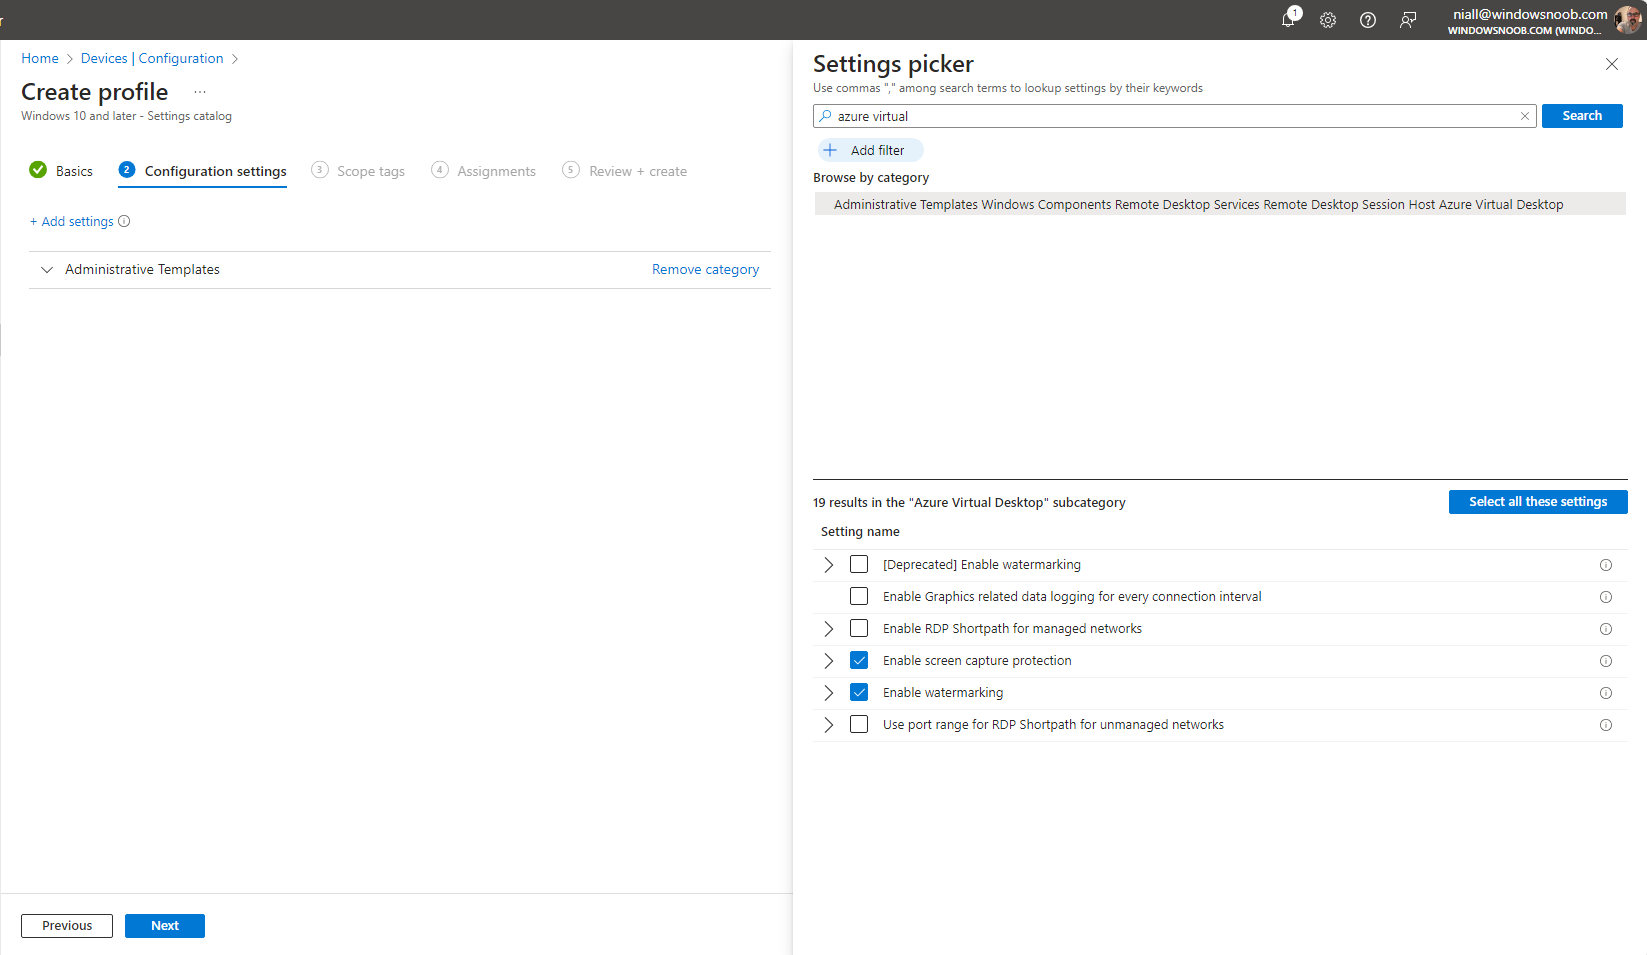
and review the settings in that policy and enable and then change as appropriate.
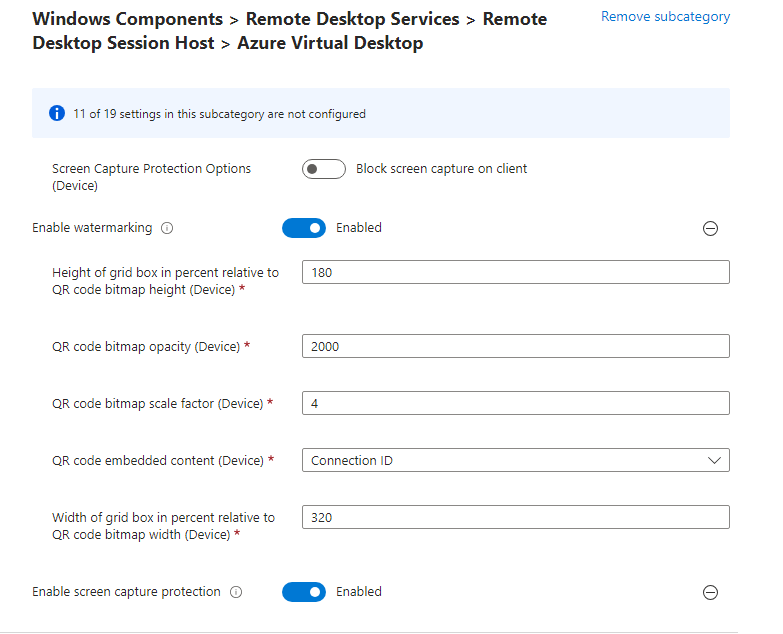
In the screenshot above you can see a setting called QR code embedded content (Device) and that drop down can show Connection ID (default) or Device ID.
Note that the Screen Capture Protection Options button will show “block screen capture on client” or “block screen capture on client and server” where server means the Cloud PC in this case.
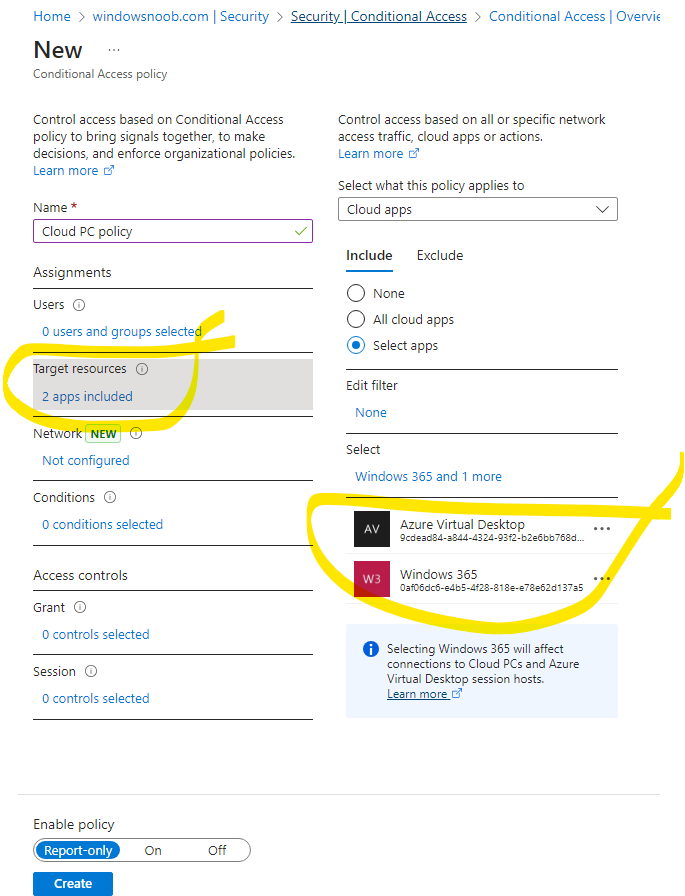
Conditional Access policies
When using conditional access, to allow or disallow connections to/from Windows 365 Cloud PC’s include the following apps in the Target Resources, the below example is not configured and shown purely to reveal the apps.
That’s it for this blog post, see you in the next one !
