Introduction
This is Part 1 of a new series of guides which will cover managing Windows 365 Cloud PC’s using PowerShell and Microsoft Graph. This mini series should help you get started with automating and managing your Cloud PC’s using PowerShell via Microsoft Graph. If you are new to Windows 365 Cloud PC’s then please read our previous series called Getting started with Windows 365 available here. At the time of writing, Paul is a 7 times Enterprise Mobility MVP based in the UK and Niall is a 13 times Enterprise Mobility & Windows and Devices MVP based in Sweden.
Below you can find all parts in this series:
- Automating Windows 365 part 1 – Introducing Graph and setting up Visual Studio code <- you are here
- Automating Windows 365 part 2 – Using Graph X-Ray
- Automating Windows 365 part 3 – Provisioning Cloud PC’s
- Automating Windows 365 part 4 – Managing your Cloud PC
- Automating Windows 365 part 5 – Cloud PC reports
In this part we’ll cover the following:
- Introducing Graph
- Setup Visual Studio Code
- Installing Visual Studio Code
- Installing the PowerShell Extension
- Enabling ISEMode
- Initial connection to Graph
- Permissions
- Testing permissions using Graph Explorer
- Related reading
- Summary
Introducing Graph
Microsoft have summarized Graph as:
“the gateway to data and intelligence in Microsoft 365. It provides a unified programmability model that you can use to access the tremendous amount of data in Microsoft 365, Windows, and Enterprise Mobility + Security. Use the wealth of data in Microsoft Graph to build apps for organizations and consumers that interact with millions of users.”
ChatGPT summarized it as follows:
Microsoft Graph is a powerful and comprehensive API (Application Programming Interface) that provides developers with access to a wide range of data and services from Microsoft 365 and Azure Active Directory. This API allows developers to build applications that can interact with and leverage data from Microsoft’s cloud-based services.
Key features and aspects of Microsoft Graph include:
- Data Access: Microsoft Graph provides access to a wide array of data, including user profiles, emails, calendars, files, and more from Microsoft 365 services like Outlook, SharePoint, and OneDrive.
- Security and Identity: Developers can integrate security and identity features through Azure Active Directory to ensure secure access and authentication for users and applications.
- Rich Data Relationships: Microsoft Graph is designed to expose the relationships between different types of data, making it easier to navigate and retrieve related information.
- Cross-Platform Support: It offers cross-platform compatibility, allowing developers to create applications for various platforms, including web, mobile, and desktop.
- RESTful API: Microsoft Graph follows RESTful principles, using standard HTTP methods for requests and JSON for data format, making it easy to work with and integrate into applications.
- Real-time Updates: Developers can subscribe to real-time notifications and changes in data, ensuring that applications stay up-to-date without continuous polling.
- Extensible: Microsoft Graph can be extended with custom data and functionality to meet specific application requirements.
By using Microsoft Graph, developers can create applications that leverage the data and capabilities of Microsoft’s cloud services, enhancing productivity and collaboration for users across various platforms and devices.
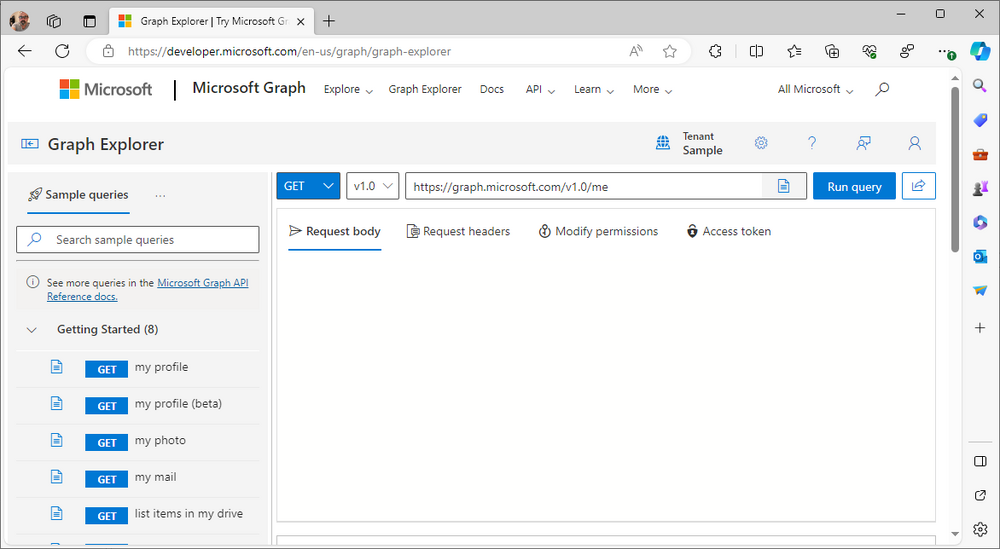
OK so now we know that we can use Microsoft Graph to our advantage, to interact with data that we have access to and build scripts and apps to automate common tasks. But before we do let’s take a look at one quick way of interacting with Graph, and that is via an online tool called Microsoft Graph Explorer which in turn uses the Graph API. Microsoft Graph Explorer lets you make requests and see responses against Microsoft Graph.
To launch Graph Explorer click here.
You’ll be presented with a view such as below.
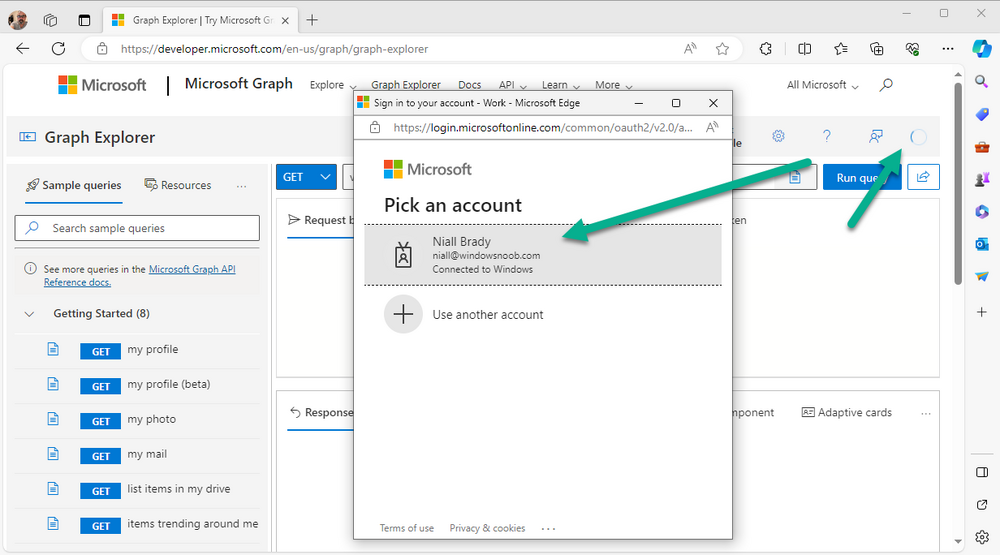
Login to your tenant
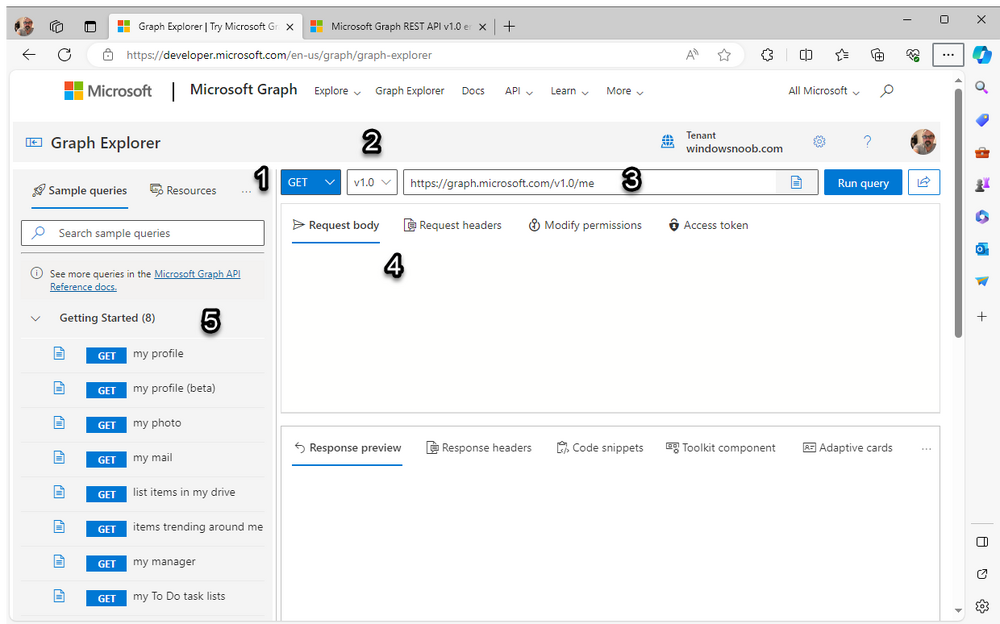
If you are new to Graph Explorer, there are a few things to keep in mind:
1. Allows you to select the method, eg: GET, POST, PUT, PATCH, DELETE
2. Select the context: v1.0 or beta
3. The address of your API call, including any variables or filters
4. Tabs containing more info
5. Sub set of Graph REST API examples
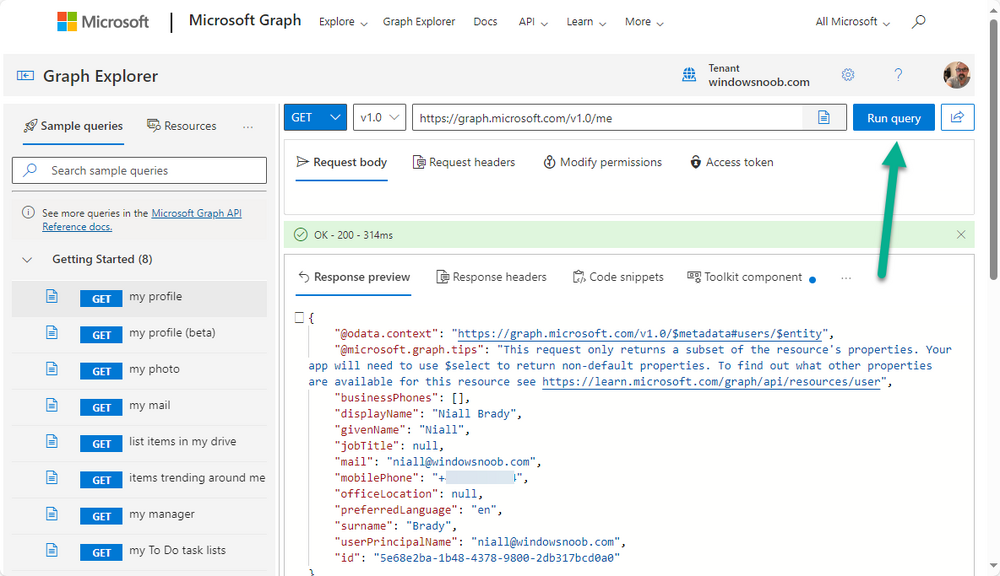
Now you are ready to perform your first query, so go with the default selection and click on Run Query
As you can see it returns a lot of data which we can use in our automation. Cool!
Setting up Visual Studio Code
Now that we know a little bit about Microsoft Graph, the next step is to install and configure a tool to connect with it effectively, and to do that we’ll use Visual Studio Code. Visual Studio Code is more powerful and feature rich than the built in free PowerShell Integrated Scripting engine in Windows (PowerShell ISE) so let’s use it.
Installing Visual Studio Code
It’s free, to get started you’ll need to download it first – https://code.visualstudio.com/docs/?dv=win
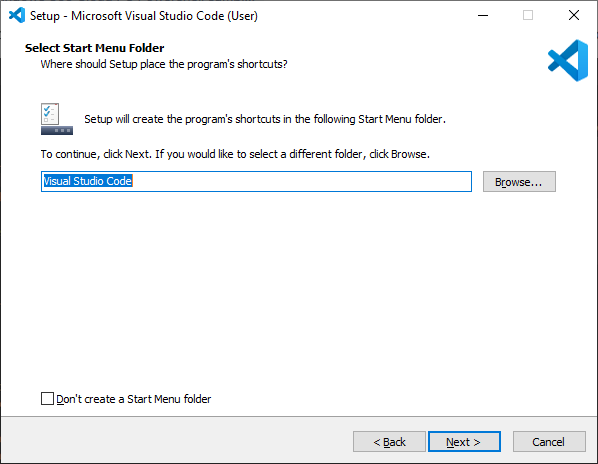
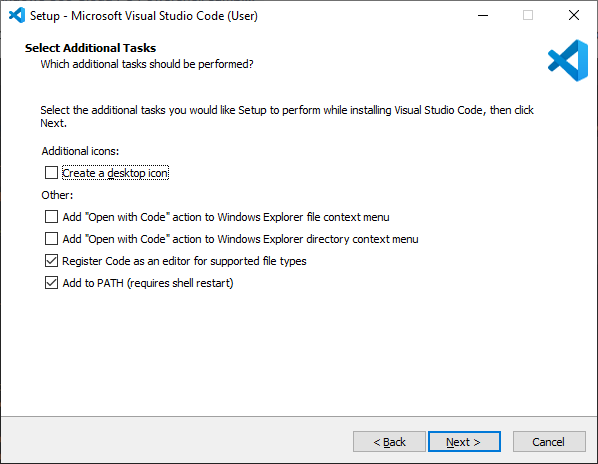
Once downloaded, launch the executable to start setup.
select your options
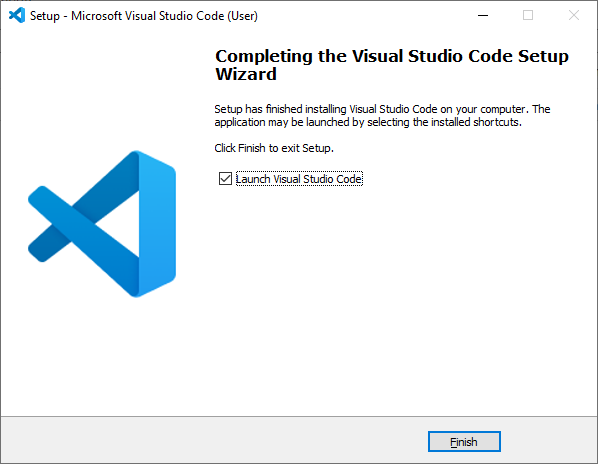
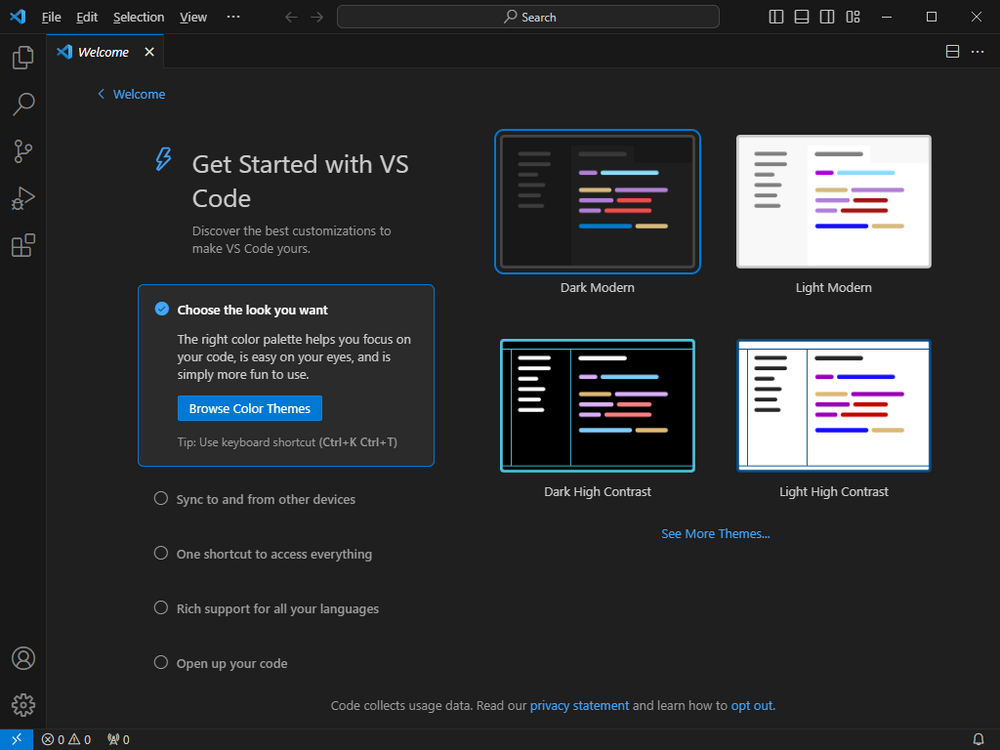
and it’s done. Click on Finish to launch Visual Studio Code.
Installing the PowerShell Extension
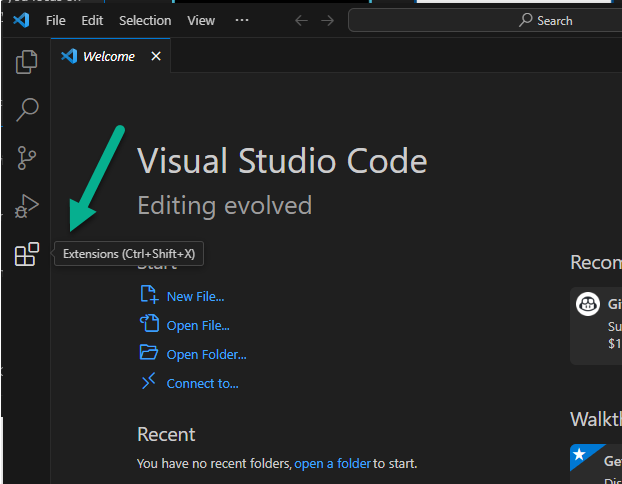
After installation, it’s time to add a PowerShell extension.
Click on Extensions.
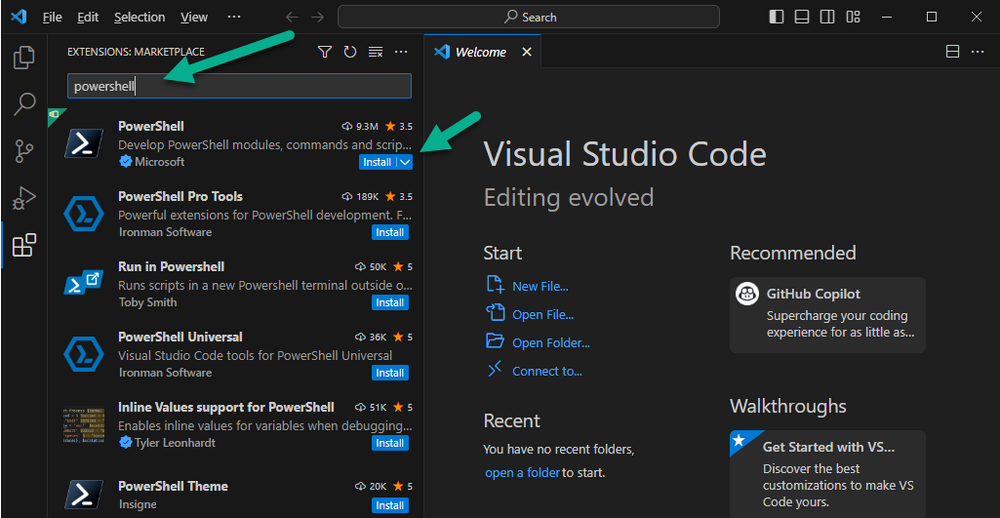
Search for PowerShell and click on Install
Connect with Visual Studio Code
Once you’ve installed the PowerShell extension, close Visual Studio Code and launch it again as an Administrator (Run As Administrator).
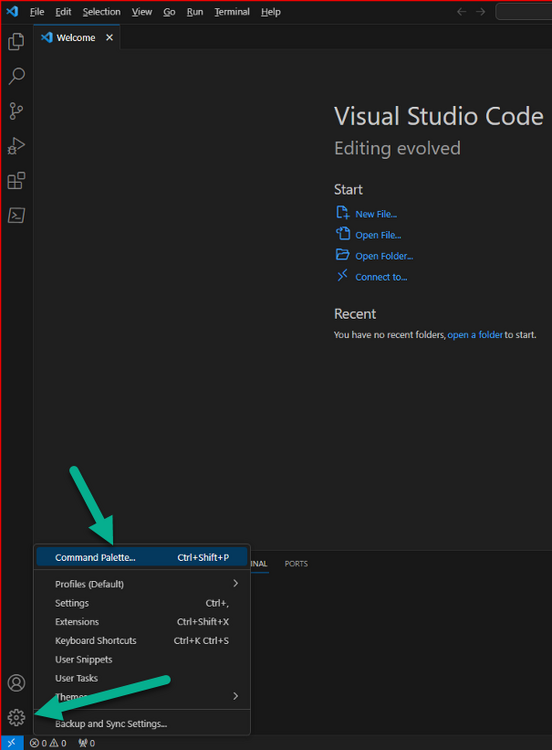
Click on the Settings icon, and choose Command Palette
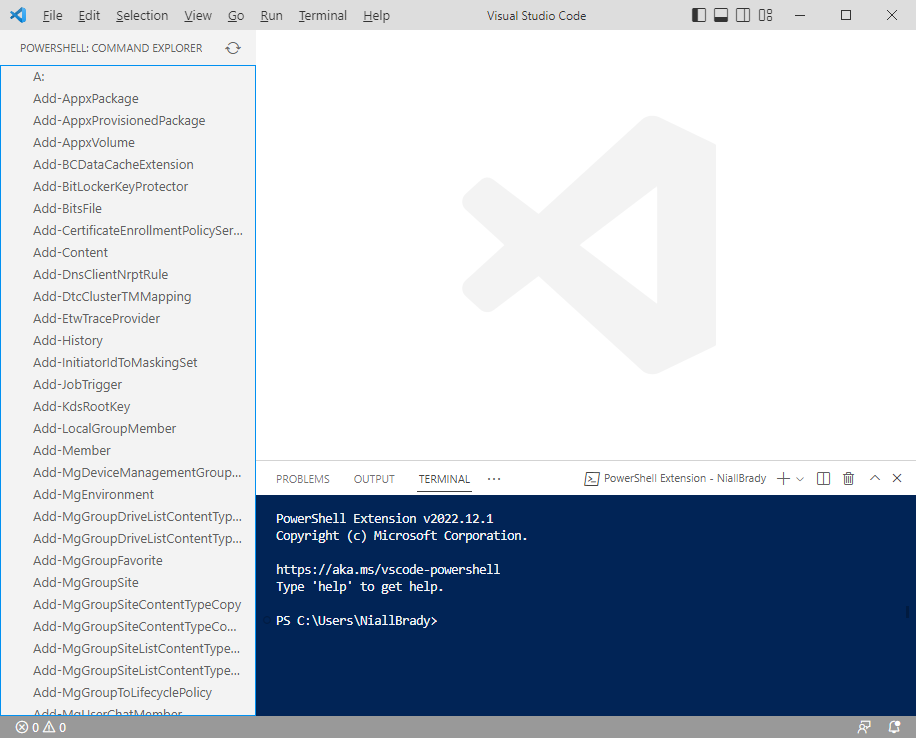
Search for IseMode and select Enable IseMode from the list of choices
This will force Visual Studio Code to look like PowerShell ISE.
Initial connection to Graph
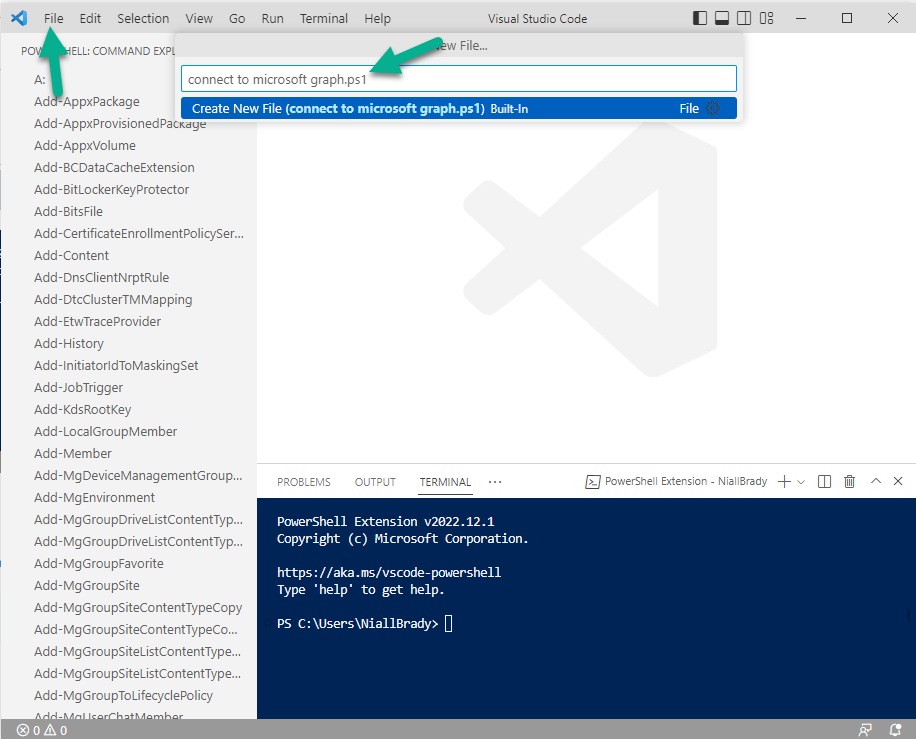
Now we have everything in place, let’s create our first script to make our initial connection to Graph from Visual Studio Code. To do that, click on File, give your script a suitable name such as connect to microsoft graph.ps1
Visual Studio Code now knows how to deal with the PowerShell commands as we’ve installed the PowerShell extension.
Type in the following command:
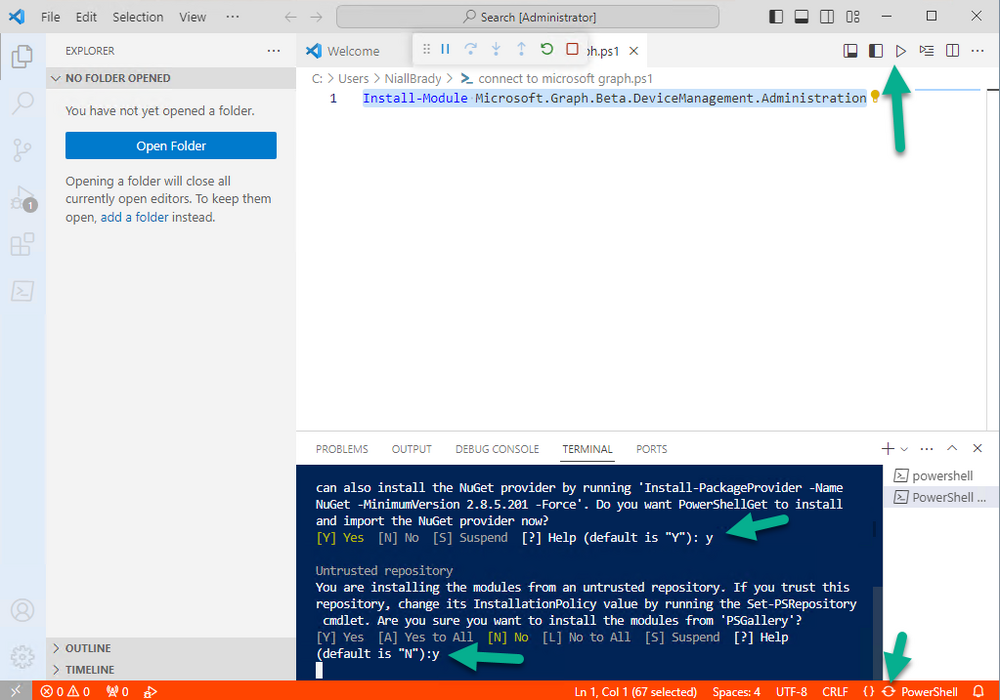
Install-Module Microsoft.Graph.Beta.DeviceManagement.Administration
Once done, click on the run symbol (triangle) and notice the question. After answering Yes, PowerShell will start downloading the needed bits.
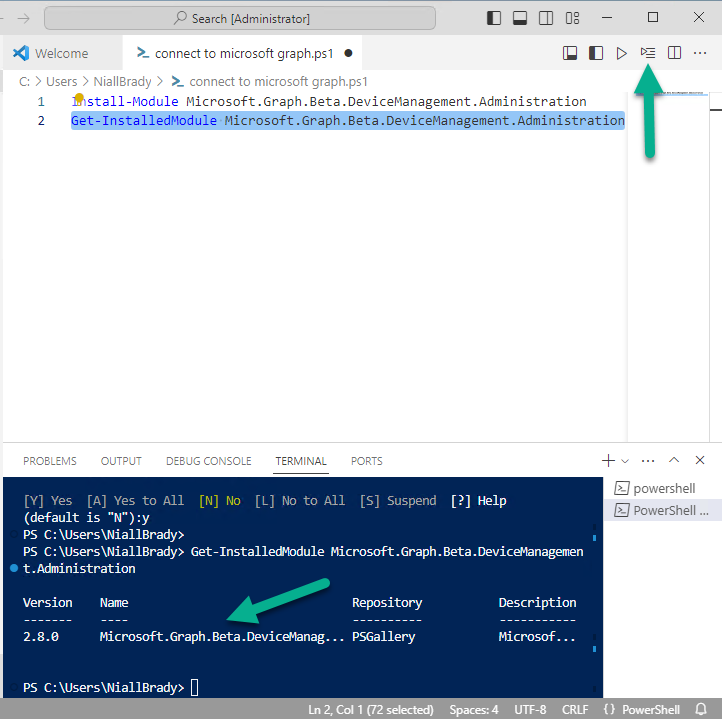
After it has finished installing you can verify by running the following code
Get-InstalledModule Microsoft.Graph.Beta.DeviceManagement.Administration
You can do that in Visual Studio Code by typing the command, selecting it and then running the selected code.
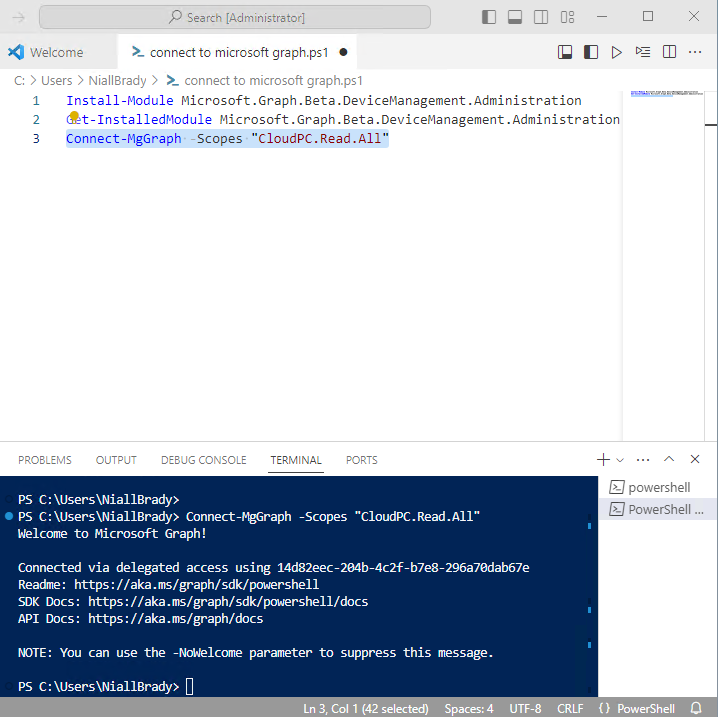
Finally, we want to connect to our installed module by using the the Connect-MgGraph command.
Connect-MgGraph -Scopes "CloudPC.Read.All"
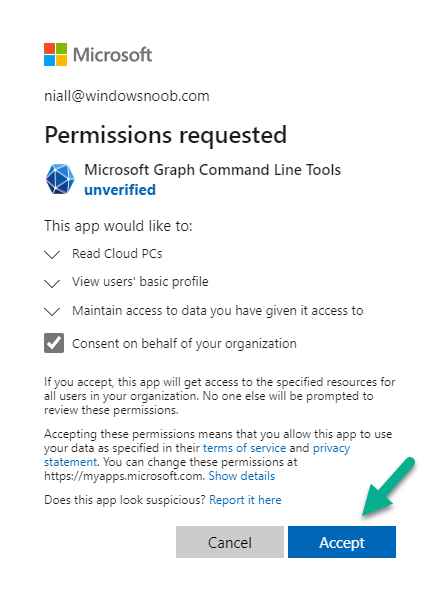
You may get prompted for permissions (more on that below), if so click Accept. If required, you can also select the check box “Consent on behalf of your organization” to make it easier for other admins to do the same requests.
Permissions
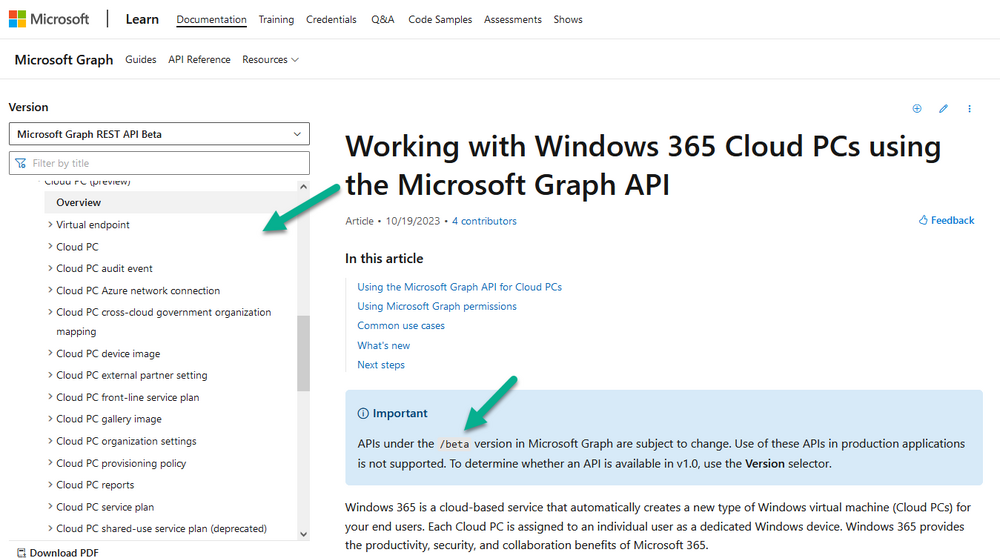
In order to access the wealth of data in Microsoft Graph you’ll need to provide permissions. For Cloud PC management, we can add an initial subset of permissions to review data. To review the permissions see the Graph API Documentation for what permissions are needed, keep in mind that these are currently in Beta and subject to change.
Those permissions are basically broken down into three areas, License, Group and Cloud PC
License permissions
- User.ReadWrite.All
- Directory.ReadWrite.All
Group permissions
- GroupMember.ReadWrite.All,
- Group.ReadWrite.All
- Directory.ReadWrite.All
CloudPC permissions
- CloudPC.ReadWrite.All
Testing permissions using Graph Explorer
Launch Graph Explorer.
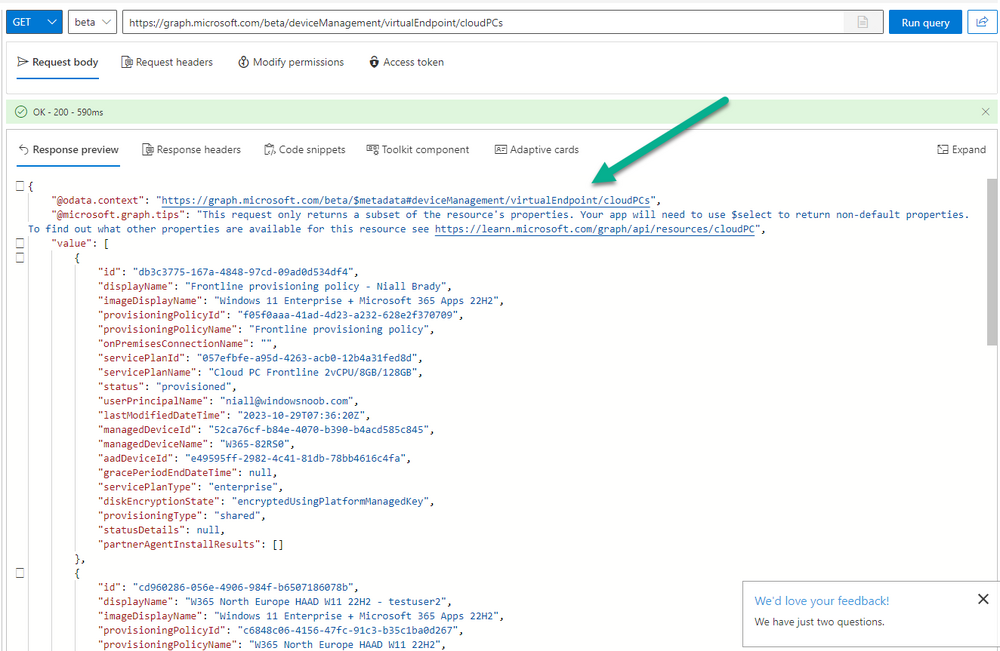
To verify our permissions we’ll try a simple Cloud PC related task, List all Cloud PCs. To list all your Cloud PC’s using Graph Explorer and Microsoft Graph API, try the following.
GET https://graph.microsoft.com/beta/deviceManagement/virtualEndpoint/cloudPCs
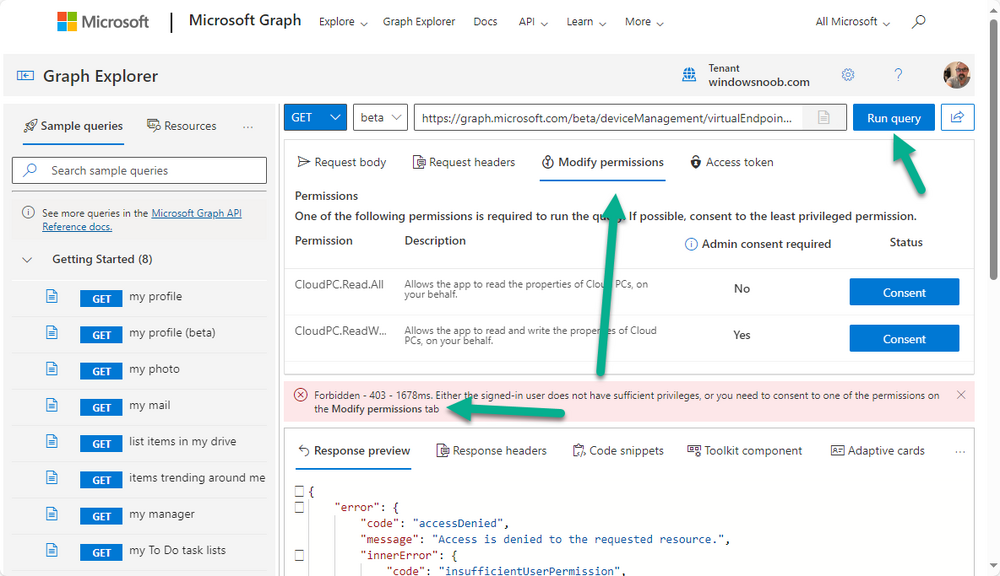
You’ll probably see permission errors if they are not yet set or if you have not yet elevated your role in Azure (PIM). Notice how it helpfully points us to the Modify Permissions tab.
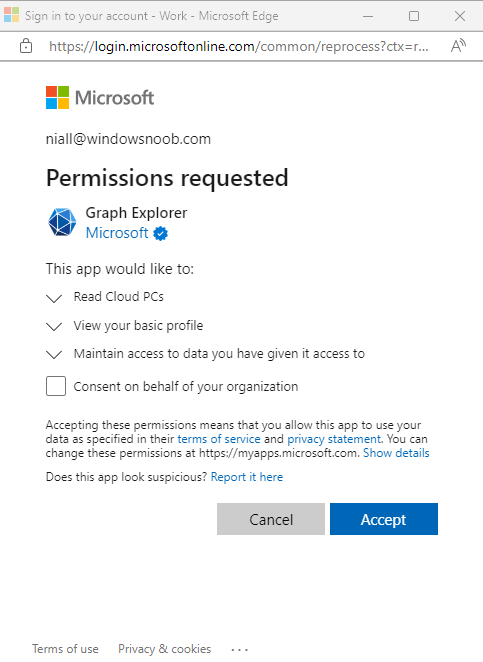
As an account that has permissions to grant consent, click on Consent for the permissions listed. You’ll get one or more prompts to accept these permissions and you can revoke them at any time. Again, if required, you can also select the check box “Consent on behalf of your organization” to make it easier for other admins to do the same requests.
After consenting to the permissions and running the query again in Graph Explorer, the result is shown. Note that it’s only a subset of the available info and it informs you that if you want more data you’ll need to modify the request to include $select to return non-default properties.
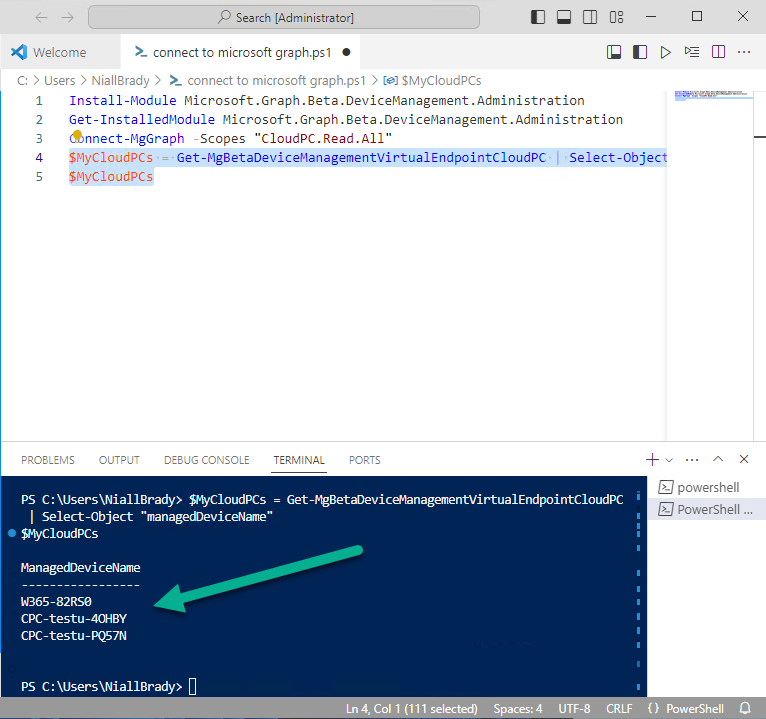
So now we’ve seen how to modify the permissions to review Cloud PC data in Graph Explorer, let’s gather the same data using Visual Studio Code and a PowerShell cmdlet for Cloud PC. In addition, we’ll filter on the managedDeviceName property shown in the output above so that it will only list that data.
$MyCloudPCs = Get-MgBetaDeviceManagementVirtualEndpointCloudPC | select-object "managedDeviceName"
$MyCloudPCs
and here’s the output:
Success !
Related reading
- Overview of Microsoft Graph –https://learn.microsoft.com/en-us/graph/overview
- Graph Explorer API – https://developer.microsoft.com/en-us/graph/graph-explorer
- Working with Windows 365 Cloud PCs using the Microsoft Graph API – https://learn.microsoft.com/en-us/graph/api/resources/cloudpc-api-overview?view=graph-rest-beta
- Download Visual Studio Code – https://code.visualstudio.com/docs/?dv=win
- Permissions – https://learn.microsoft.com/en-us/graph/permissions-reference
- Permissions overview – https://learn.microsoft.com/en-us/graph/permissions-overview?tabs=http
- Overview of Cloud PC with Graph – https://learn.microsoft.com/en-us/graph/cloudpc-concept-overview
- Working with Windows 365 Cloud PCs using the Microsoft Graph API – https://learn.microsoft.com/en-us/graph/api/resources/cloudpc-api-overview?view=graph-rest-beta&preserve-view=true
- Graph API examples for Cloud PC – https://learn.microsoft.com/en-us/graph/api/virtualendpoint-list-cloudpcs?view=graph-rest-beta&tabs=http
- Microsoft Graph Beta – https://learn.microsoft.com/en-us/powershell/module/Microsoft.Graph.Beta.DeviceManagement.Administration/get-mgbetadevicemanagementvirtualendpointcloudpc?view=graph-powershell-beta
Summary
Microsoft Graph and Visual Studio Code with the PowerShell Extension gives admins a useful and powerful way of managing their Windows 365 Cloud PC’s and automating repetitive actions. Please join us in the next part where we’ll look at how Graph X-Ray can help us further.


