Introduction
This is Part 8 in a new series of guides about getting started with Windows 365. This series of guides will help you to learn all about Windows 365 in a clear and insightful way. This series is co-written by Niall & Paul, both of whom are Enterprise Mobility MVP’s with broad experience in the area of modern management. At the time of writing, Paul is a 6 times Enterprise Mobility MVP based in the UK and Niall is a 12 times Enterprise Mobility MVP based in Sweden. In this series we aim to cover everything we learn about Windows 365 and share it with you to help you to deploy it safely and securely within your own organization. In Part 1 we introduced you to Windows 365, selecting the right edition with the level of management that you need, choosing the plan that suits your users needs at a cost you can afford, or modifying the configuration to make it more suited to your individual needs, purchasing licenses and saving money for your organization via the Windows Hybrid Benefit. In Part 2 you learned how to provision an Azure Ad joined Cloud PC and take a look at the different network options available when provisioning an Azure Ad joined Cloud PC. In Part 3 you learned about the steps needed to successfully provision a Hybrid Azure Ad Joined Cloud PC. In Part 4 you saw the many different ways you can connect to your Cloud PC from many device be it Android, Mac, Windows, Linux or iPhone and you learned that not all connection options have the same abilities. In Part 5 we covered the management capabilities of your Cloud PCs and explained the different options available depending on which version (Business versus Enterprise) that you purchase. In Part 6 we looked at the built in configurable backup technology in Windows 365 which is known as Point-in-time restore, which gives the admin (or user) the ability to restore Cloud PC’s to an earlier time before a problem such as a Ransomware incident occurred. In Part 7 we looked at the ability to use Windows Autopatch to patch your Cloud PC’s with ease and covered how to allow access to admins without licenses, enrolling into Windows Autopatch, the Readiness assessment tool, device registration and moving devices between deployment rings. Finally we looked at Windows Autopatch reports and the overall User Experience. In this part we’ll take a look at the long awaited Windows 365 Boot feature and learn all about it.
Below you can find all parts in this series:
- Getting started with Windows 365 – Part 1. Introduction
- Getting started with Windows 365 – Part 2. Provisioning an Azure Ad Joined Cloud PC
- Getting started with Windows 365 – Part 3. Provisioning a Hybrid Azure Ad Joined Cloud PC
- Getting started with Windows 365 – Part 4. Connecting to your Cloud PC
- Getting started with Windows 365 – Part 5. Managing your Cloud PC
- Getting started with Windows 365 – Part 6. Point in time restore
- Getting started with Windows 365 – Part 7. Patching your Cloud PCs with Windows Autopatch
- Getting started with Windows 365 – Part 8. Windows 365 boot <- you are here
- Getting started with Windows 365 – Part 9. Windows 365 switch
- Getting started with Windows 365 – Part 10. Windows 365 offline
In this part we’ll cover the following:
- Introduction to Windows 365 Boot
- Prerequisites
- Enabling Windows 365 Boot
- Preparing devices for Windows 365 Boot
- Using Windows 365 Boot
- Recommended reading
- Summary
Introduction to Windows 365 Boot
Windows 365 Boot is currently in Public Preview (at time of writing), so any screenshots and functionality shown here may change before it becomes Globally Available (GA). In addition, during the Preview it’s designed for the following scenario, shared PC scenarios.
Windows 365 Boot lets admins configure Windows 11 physical devices so that users can:
- Avoid signing in to their physical device.
- Sign in directly to their Windows 365 Cloud PC on their physical device.
If that’s confusing, then keep in mind that Windows 365 Boot is defined by Microsoft as follows:
When a user turns on their physical device and signs in, Windows 365 Boot signs them in directly to their Cloud PC, not their physical device. If single sign-on is turned on for their Cloud PC, they don’t have to sign in again to their Cloud PC. This expedited sign in process reduces the time it takes the user to access their Cloud PC.
Multiple users can use the same physical device to sign in to their own personal Cloud PCs. When each user signs in to the physical device, their unique identity takes them to their assigned and secure Cloud PC. This flexibility makes Windows 365 Boot a good solution for workers such as nursing, salespeople, and call centers, who share company physical devices. Such workers might frequently switch between physical tasks and computer interaction. Windows 365 Boot lets them bypass the lengthy startup process and boot directly into their secure Cloud PC to pick up right where they left off.
Prerequisites
To setup Windows 365 Boot the following prerequisites need to be met on the physical devices:
- Each device must be running the latest Dev Channel Windows Insider Preview Build. You can download the Windows Insider Preview build ISO and use that for testing or deploy Windows 11 version 22H2 and then update it to the Insider Preview developer channel using Windows Settings.
- Enroll each physical device into Windows Autopilot.
- Assign the physical device to the Windows 365 Boot ESP
- Assign the physical device to the Windows 365 Boot Azure AD group you created in the guided scenario wizard.
Enabling Windows 365 Boot
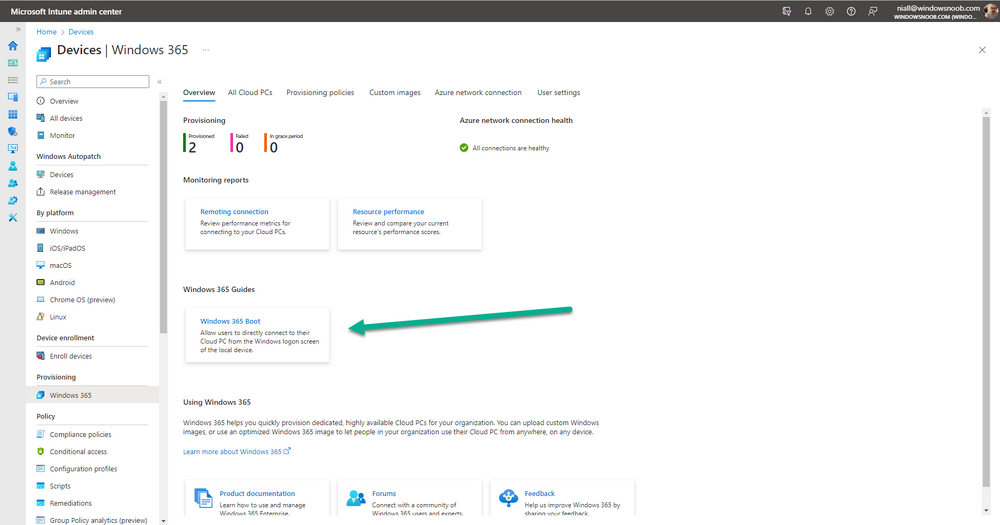
To enable Windows 365 Boot in your tenant do as follows. Remember, this will most likely change when it goes GA, we’ll update the guide when that happens. But for now, navigate to the Windows 365 provisioning node and you should see a Windows 365 Boot guide as shown in the screenshot below. You need to click on that to start the guided scenario.
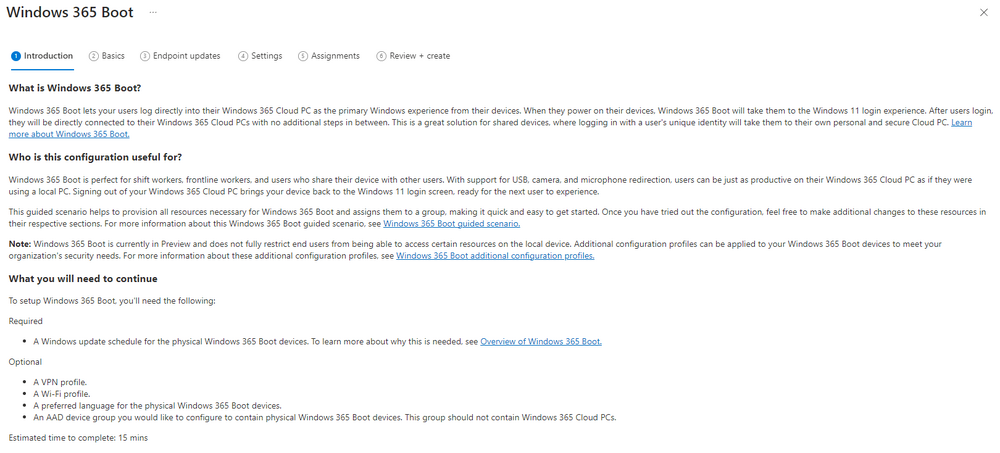
And here it is, the Introduction screen of the guided scenario for Windows 365 Boot.
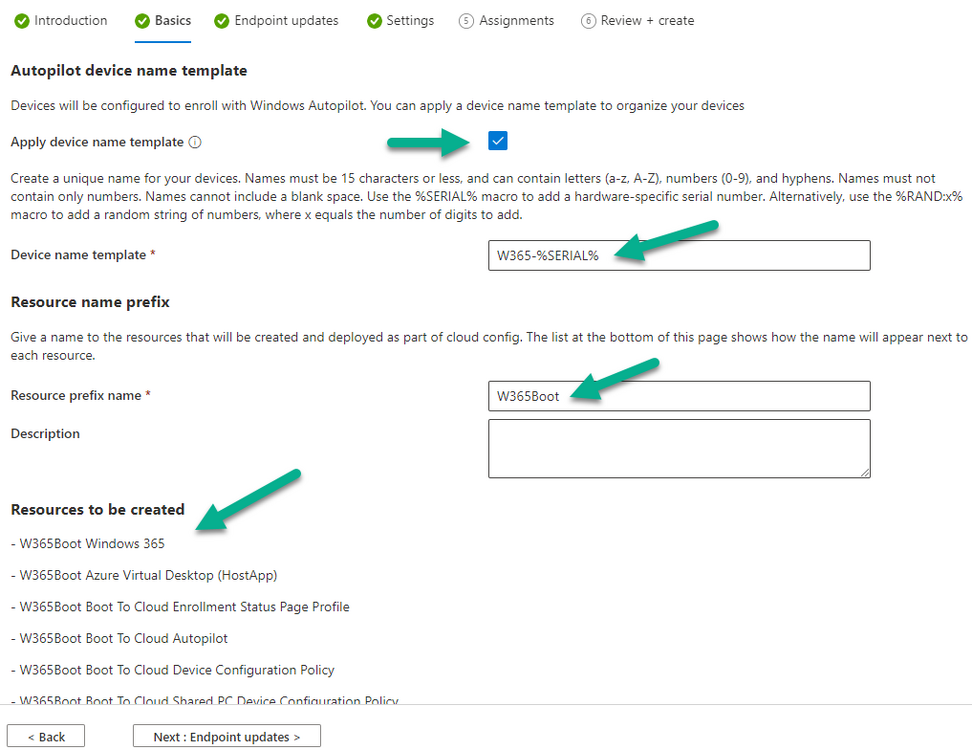
Clicking Next gathers the basic info, including whether or not you want to use a device name template (as you do for Windows Autopilot devices…). Once you’ve confirmed the resource name prefix, it’ll list a list of resources that will be created using that naming convention.
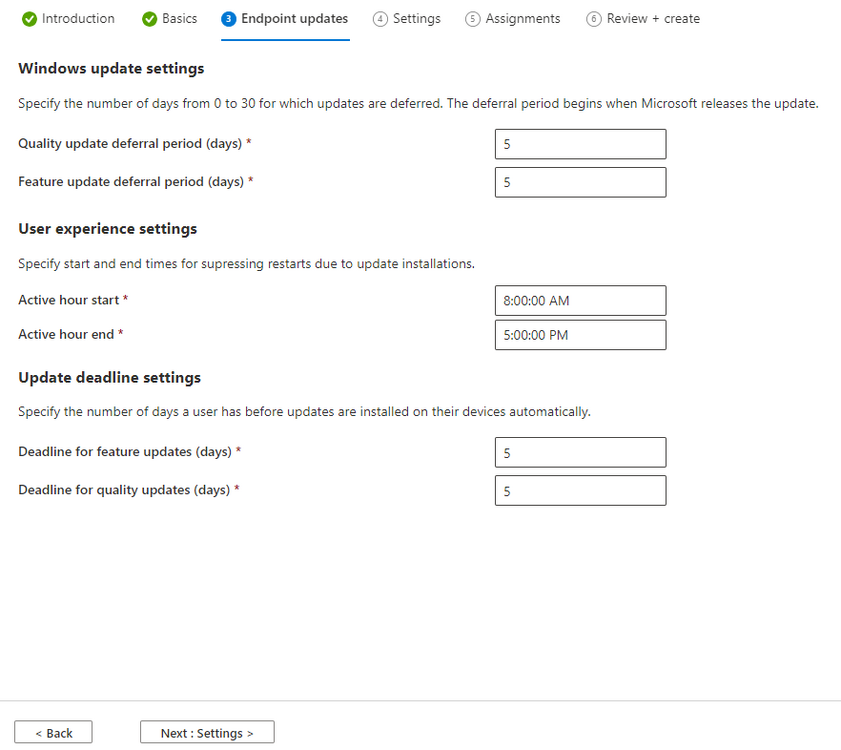
Even though you can use Windows Autopatch to patch your Windows 365 Boot devices, there’s no easy way to do that (yet) in this wizard, we’ve provided that feedback already to the Product Group. For now, configure the settings as appropriate.
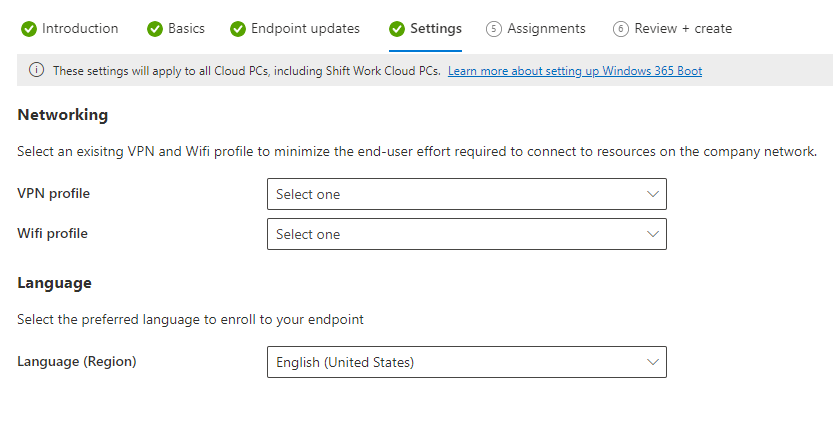
On the next screen (Settings) you get to choose an option VPN and Wi-Fi setup, and to decide which language to use.
On the next screen you add your assignments. We chose to create a new group and gave it a suitable name.
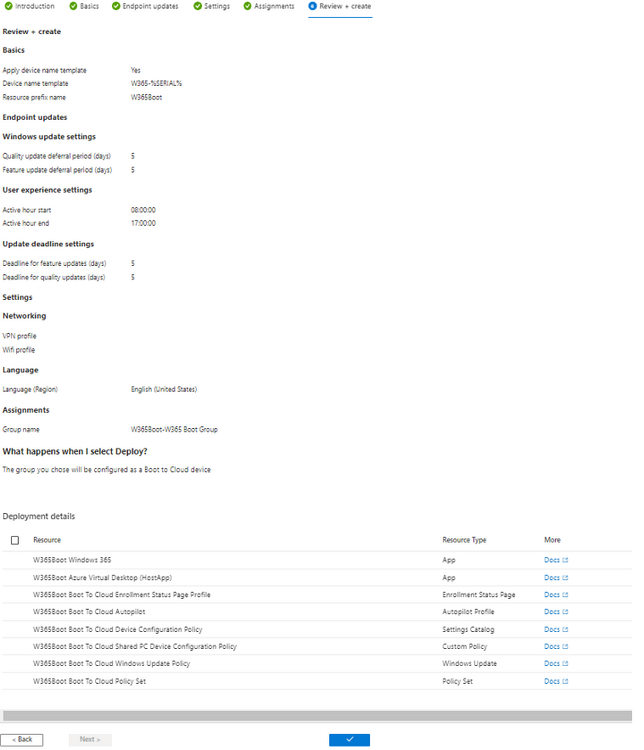
Finally you’ll get a summary of the settings you’ve chosen along with a list of resources it will create.
Note that the guided scenario creates several things as part of the setup including an Enrollment Status Page profile, a Windows Autopilot deployment profile, and some apps which must be installed before the device can be logged on to.
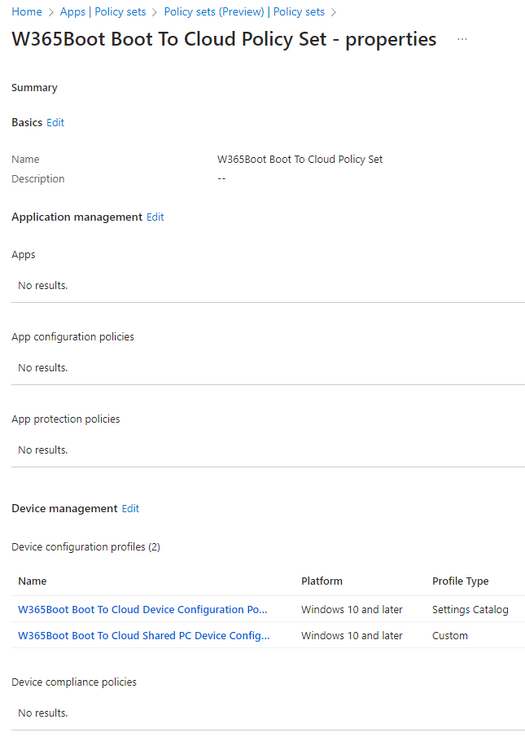
These and other configuration profiles are listed/defined in the policy set created during the wizard. You can find the Windows 365 Boot policy set in Apps, Policy Sets.
Also to note, when the Windows 365 Boot ESP is created, it’s at the lowest priority so if you want your shared devices/hosts to get that profile, make sure to increase the priority or change the assignments.
Preparing devices for Windows 365 Boot
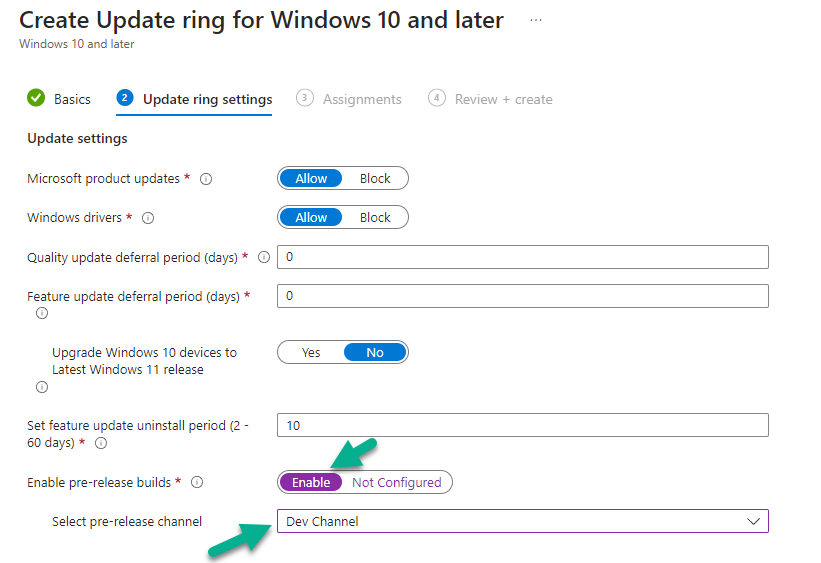
Now you are ready to test Windows 365 Boot, and to do so you’ll need a device that matches the prerequisites mentioned earlier. You can use Intune Update Rings to target Windows 11 devices with that Windows 11 developer edition (dev channel).
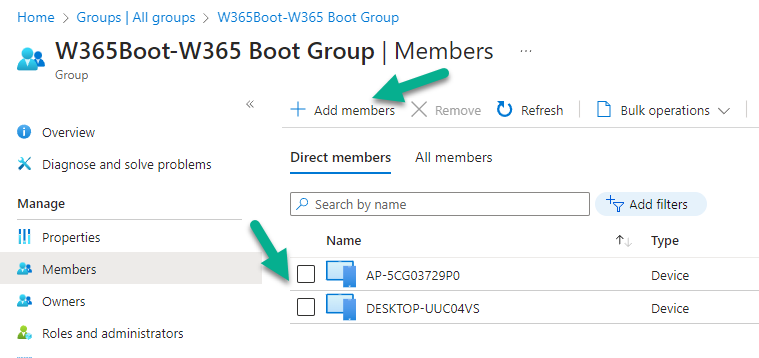
Once those devices are upgraded then add them to the Windows 365 boot group that you defined during the wizard.
If you don’t want to automate it, and want to simply test this on the fly, open Windows settings on a Windows 11 22H2 device, select Windows Update settings, choose Windows Insider Program and select the Dev Channel during the sign up.
Make sure to update Windows as prompted until it’s at the required level, in the below screenshot you can see it’s installing the Windows 11 Insider Preview (dev channel) release version 23471.1000 (ni_prerelease).
After the device is upgraded to the dev channel release, you can reset it via Intune or via Windows Settings and then go through a Windows Autopilot enrollment as normal.
Using Windows 365 Boot
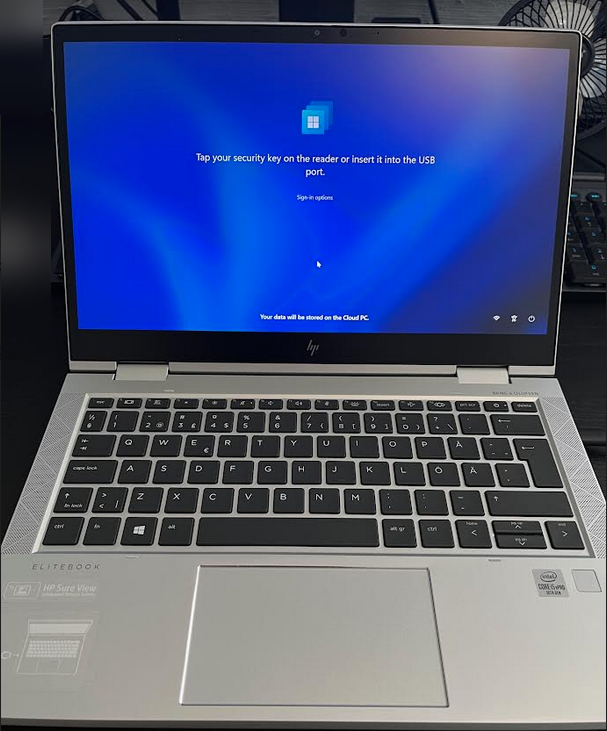
After Windows Autopilot enrollment is complete on your shared physical device it will be ready for Windows 365 Boot and that will become obvious as the logon screen changes.
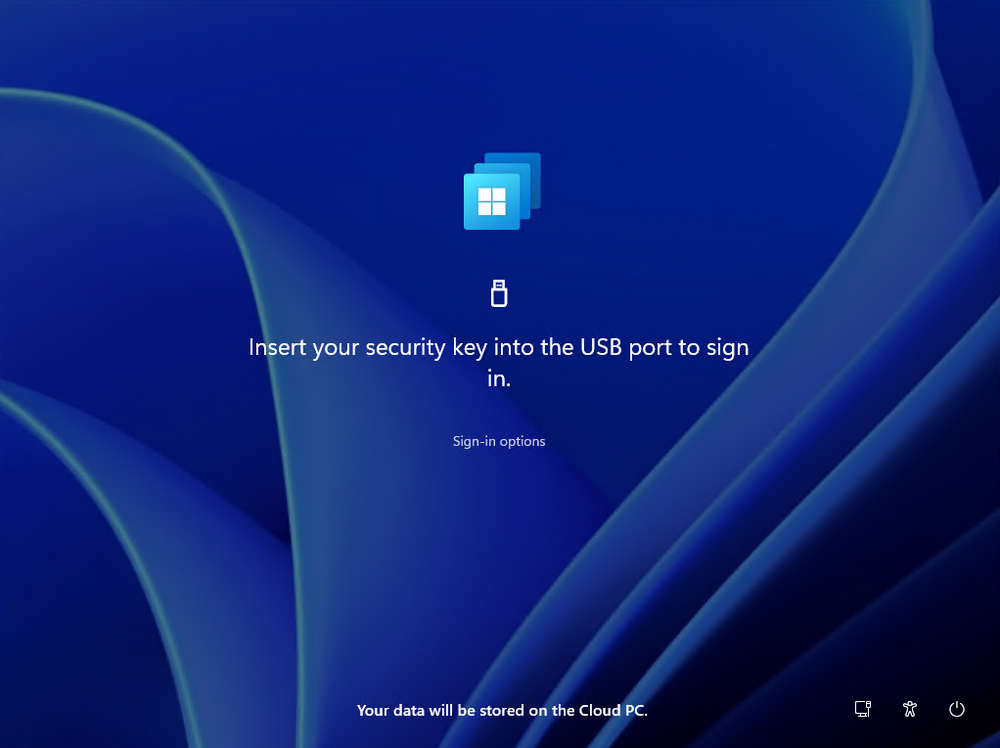
You’ll get the following login screen, which is the new Windows 365 Boot login UI with a cool Windows 365 logo. Note how it clearly states that your data will be stored on your Cloud PC.
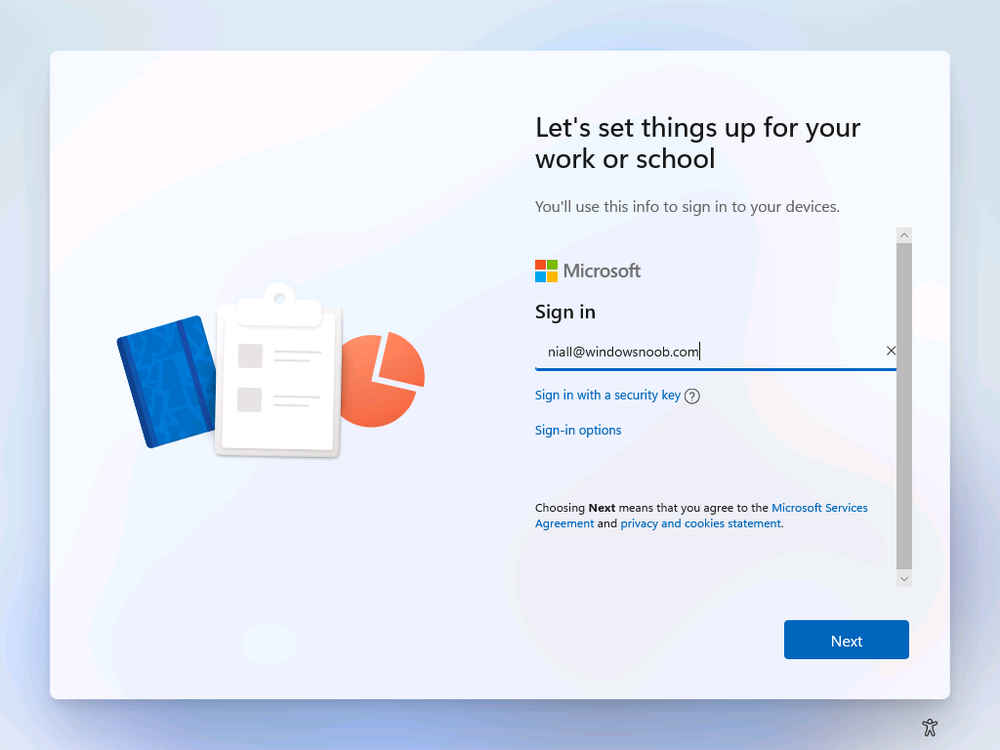
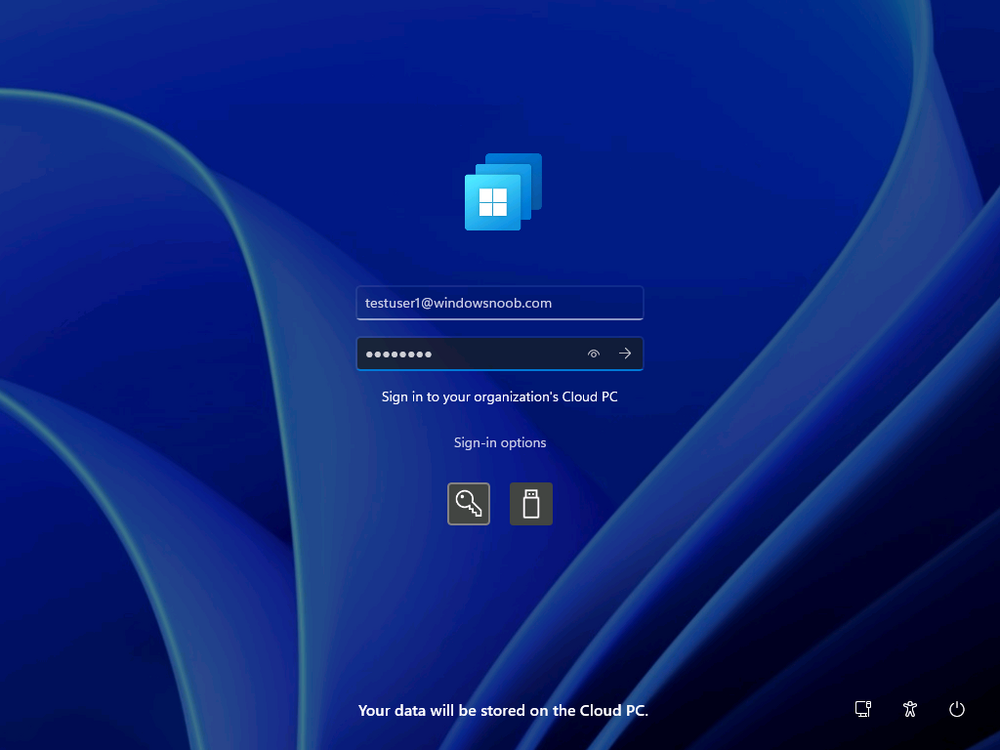
To login, click Sign-in options and enter the credentials of a user with a Windows 365 license.
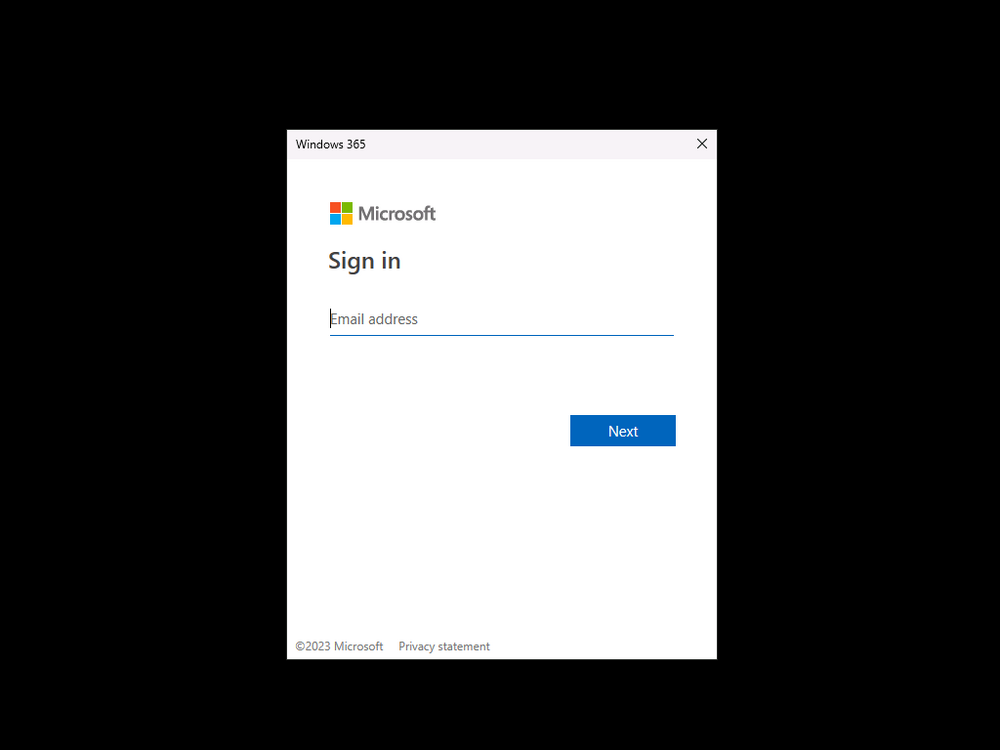
It’ll state “preparing Windows” for a moment followed more excitingly by this.
However, we are using a hybrid azure ad joined Cloud PC the next part is less exiting as their is no possibility to configure single sign on (SSO) yet.
After signing in again (and completing MFA) it will show your Cloud PC !
And here’s where the fun starts, as this is a shared PC scenario, multiple users can login (after the other users logs off…) as long as they are assigned a Cloud PC.
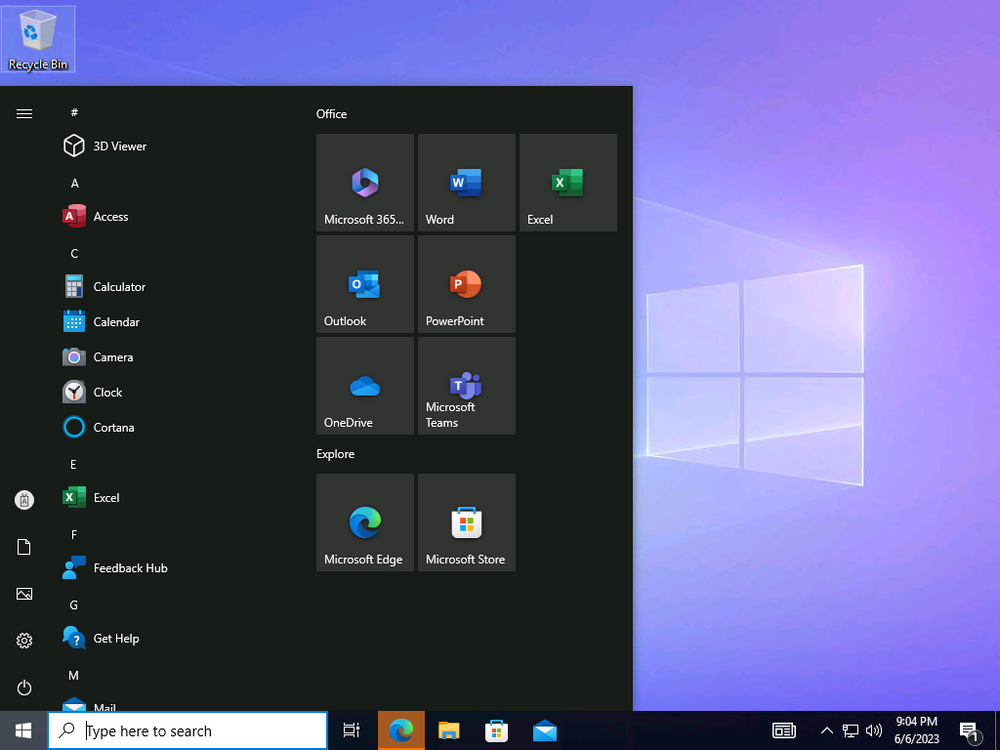
So here for example is another user logged on to the same Windows 365 Boot device, however their Cloud PC is running Windows 10.
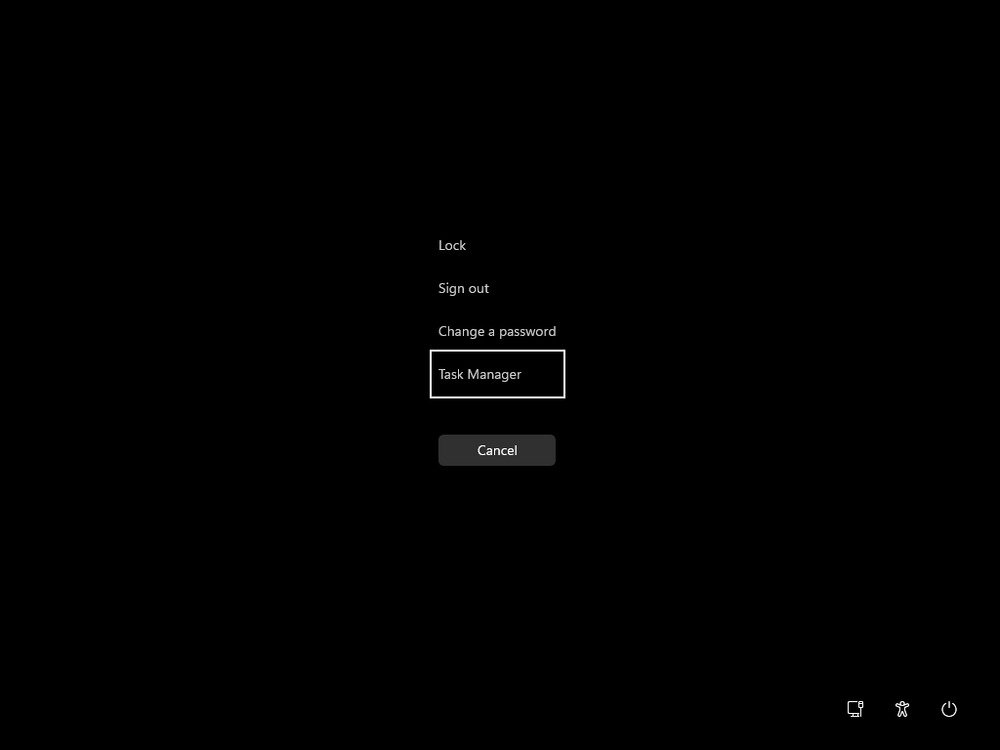
As the physical device is connected directly to your Cloud PC, resources such as the MIC, Camera are shared with the Cloud PC allowing you to use them in Teams calls etc. One thing to be aware of however is that once Windows 365 Boot ‘takes over’ a physical device you can no longer get back to the main UI on that device without first removing the physical device from the targeted device configuration profiles in Intune. You can however bring up task manager to run Explorer.exe and browse your local files on the physical device if needed.
Note that Microsoft will most likely remove the ability to start the Task Manager on physical devices once Windows 365 Boot exits from Preview.
Recommended reading
- Deploy the public preview today – Windows 365 Boot
- What is Windows 365 Boot? | Microsoft Learn
- Windows 365 Boot guided scenario
- Windows 365 Boot physical device requirements.
- Restrict user access to Windows 365 Boot physical device.
- Troubleshoot Windows 365 Boot.
- Visit the Microsoft tech community blog
- Restrict user access to Windows 365 Boot physical device. | Microsoft Learn
- Windows 365 Boot guided scenario | Microsoft Learn
Summary
Windows 365 Boot in its current form (preview) allows shared PC’s to be used for connecting straight to a Windows 365 Cloud PC, you could say booting to the Cloud PC but in reality the host device must boot up first. It is seamless however, and very well executed. You simply prepare the device, hand it over to the user and they logon to their Cloud PC. Once they are done, they can hand the physical device back and another user can use it to connect to their Cloud PC. This is a great way of simplifying this scenario, and having all the back end bits created by the wizard makes it a breeze to setup. The downside is that once you’ve targeted a device with this policy, there’s not a whole lot you can do on it other than connect to Cloud PC’s, but all you have to do to restore it’s former glory is to remove it from the device configuration profiles targeted to it.


