Introduction
Cloud PCs can come in certain preset configurations based on templates, or you can choose to customize your own. Sometimes you may find that a Cloud PC is not powerful enough for a user, or is too powerful and not being used to it’s full potential (low utilization). With the Windows 365 Cloud PC resize remote action you can resize low utilization (or high utilization) PCs on the fly.
Identifying low utilization
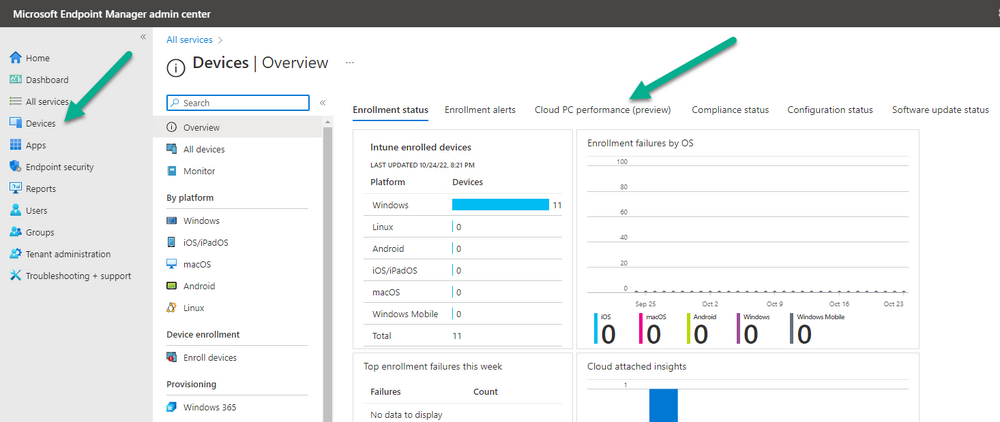
You can now identify low utilization on Windows 365 Cloud PCs in the Intune portal directly. In the Devices overview click on the Cloud PC performance (preview) tab highlighted.
This will reveal Cloud PCs with connection quality issues or Cloud PCs with low utilization.
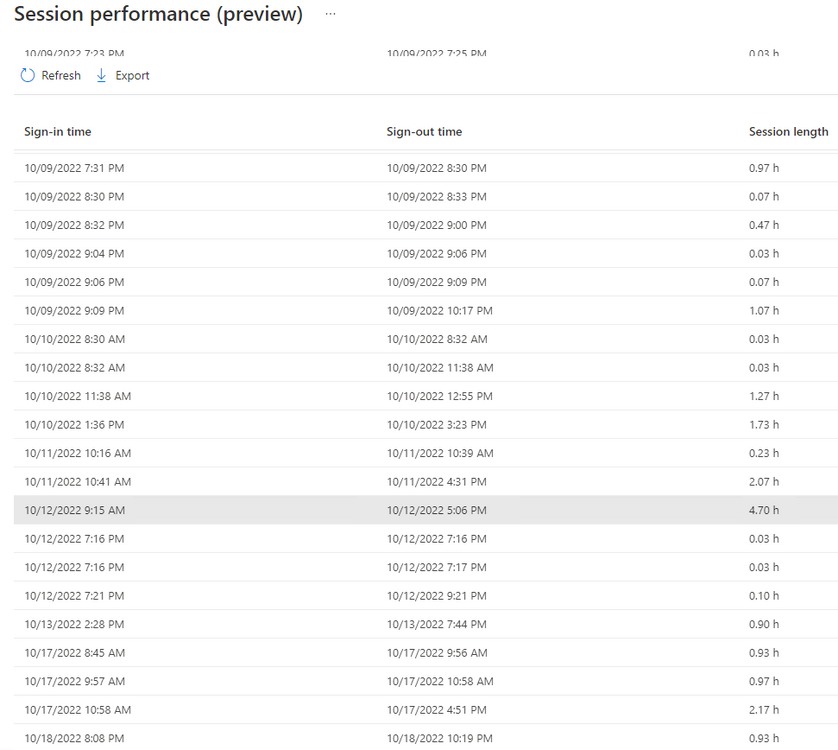
clicking on View report under Cloud PCs with low utilization reveals more data. You can see the Total time connected and even the Days since last sign-in which easily gives you an idea of how often your Cloud PCs are used and when they were last used.
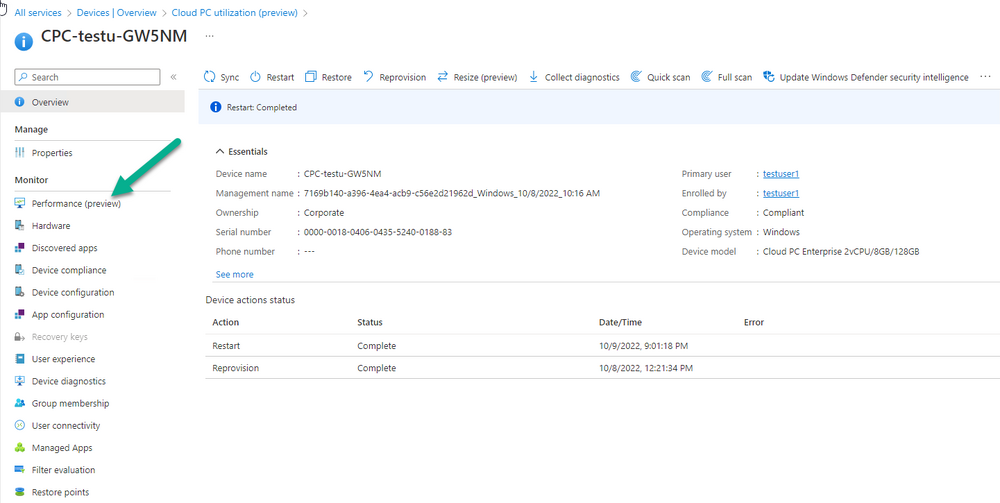
Clicking on any of the devices will reveal even more data. Below is the overview of one of our low utilization devices. Notice the Performance (preview) option.
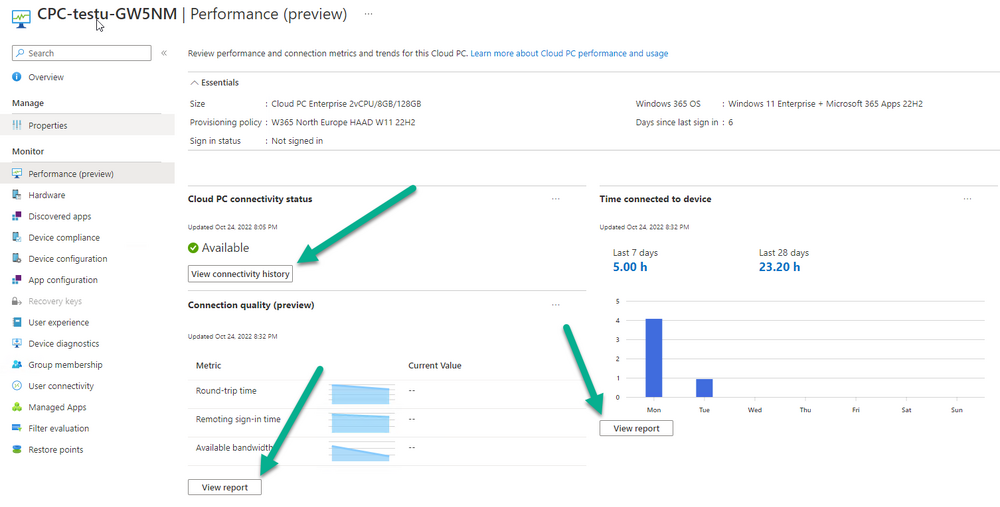
clicking on Performance (preview) reveals data about it’s utilization. And you can dig deeper by clicking on any of the three highlighted reports.
for example, in the Time connect to device report, we can see how long a user was actively connected to the Cloud PC over a given period (7 days/28 days)
You can use this data to help decide which Cloud PCs are low utilization and based on that resize them to a more cost efficient model.
Resizing Cloud PC requirements
You’ll need one of the following (or custom equivalent) roles:
- Global Admin
- Intune Service Admin
- Intune Reader + Cloud PC Admin roles
The Cloud PC must have a status of Provisioned in the Windows 365 provisioning node
The Resize remote action supports the following licenses
- paid
- preview
- trial
Note: Resizing isn’t supported for Cloud PCs provisioned through group-based licenses. Resizing is only supported for Gen 2 Cloud PCs. I’ve asked Microsoft PG to explain how we can determine the Generation (Gen 1 versus Gen 2) of a Cloud PC and will update this blog post when they reply.
The Resize remote action
Now that you’ve identified a Cloud PC to resize you are ready to perform that action, but before you do it would be a good idea to communicate this to your end user as the resize action will logoff any logged on user. Not only will it logoff the user but that action will not send any notification to the end user on the Cloud PC itself, nothing will popup on the device it will just shutdown. Depending on how the user is connected to the device they might even see the following shortly after the device has shutdown.
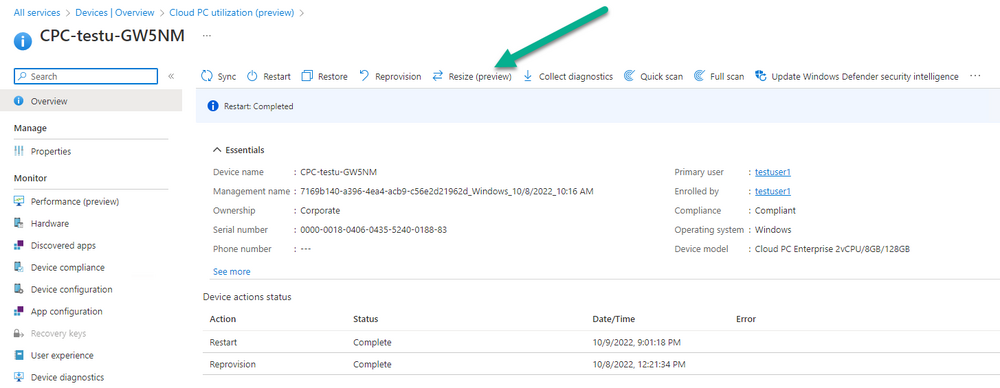
In the Intune Portal, select the Cloud PC you intend to resize and you’ll see the Resize (preview) option.
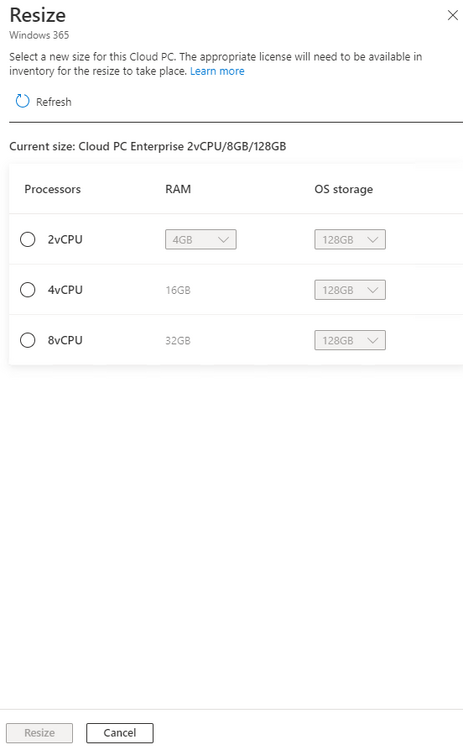
Clicking Resize (preview) brings up available resize options, note that you can resize up or down (the resize down was added based on customer feedback, so yes Microsoft does listen to feedback).
Note: You can submit feedback for anything Windows 365 related via https://aka.ms/w365feedback.
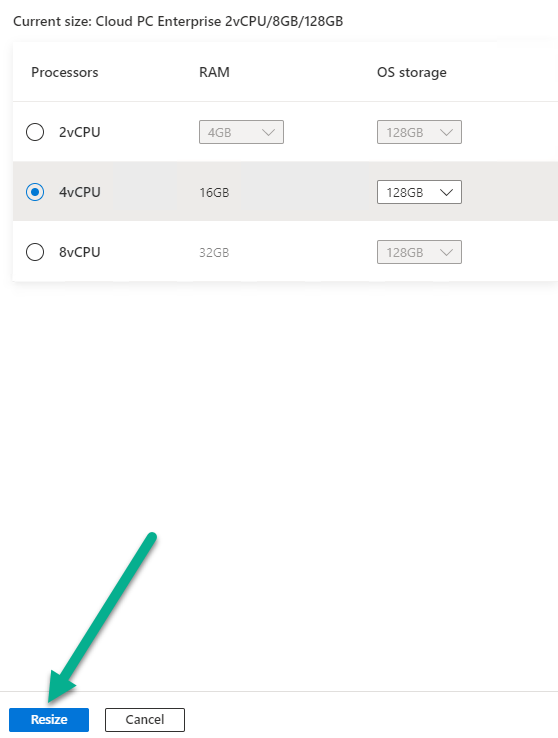
I have one license available for 4 vCPU, 16GB ram so I’ll select that (it’s actually an upgrade, but let’s give it a test). Here is the current spec of my Cloud PC (8GB ram, 2vCPU). The specs of your existing Cloud PC that you intend to Resize are listed in your Resize options also under the Current size heading.
Select a resize option that is available to you and then click Resize. Note that if you click a SKU upgrade that isn’t available then you’ll get a red warning informing you of that.
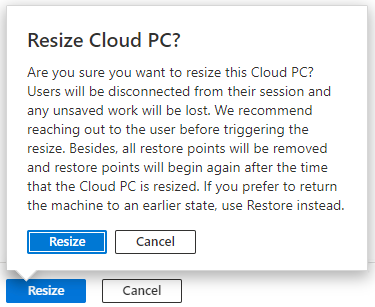
You’ll be prompted to confirm the resize operation, and have to click Resize for a third time.
In the Intune portal you’ll get a notification that the remote action was started
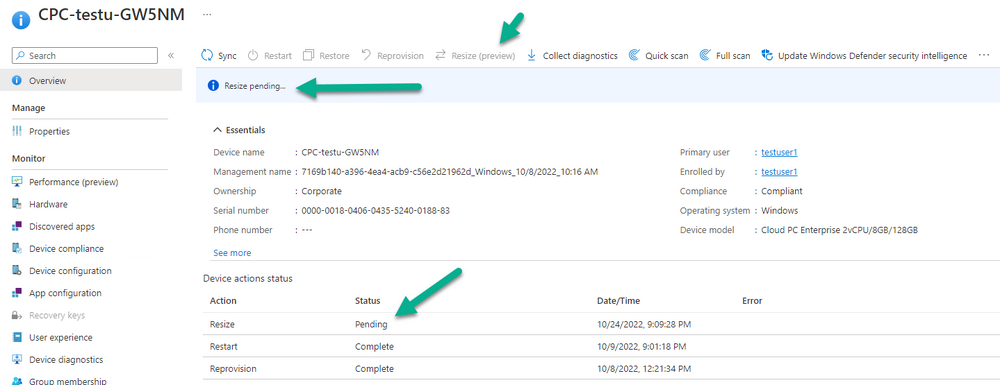
Back in the Intune portal, the resize option is now greyed out for the selected Cloud PC and the status has changed to Resize pending.
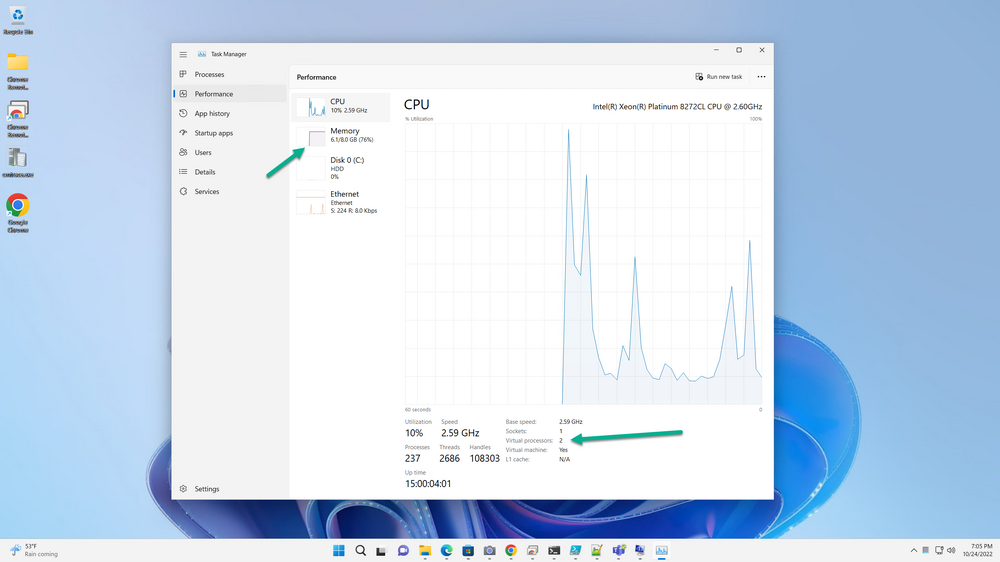
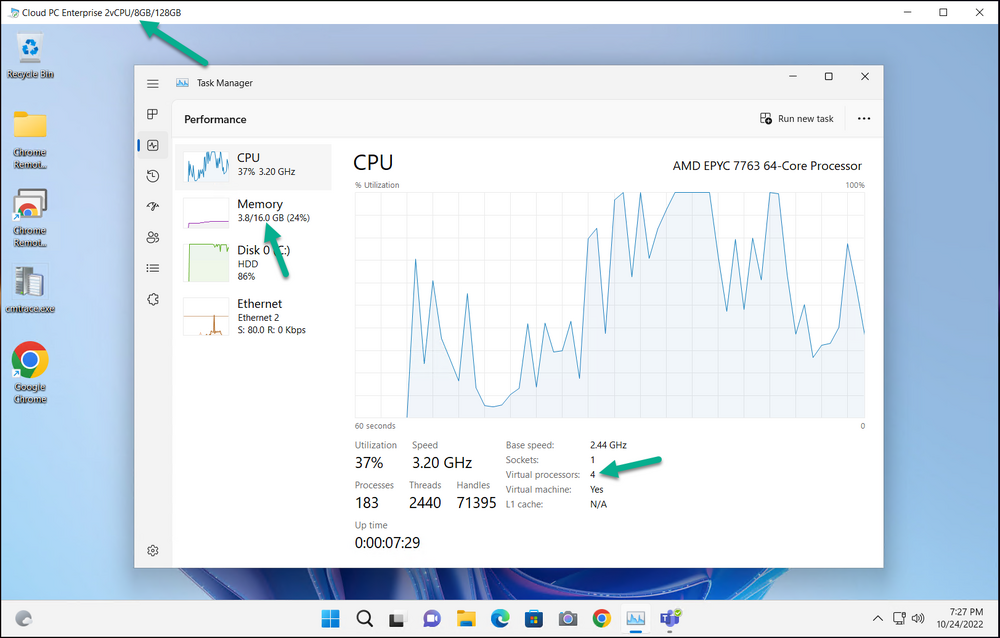
You can probably refresh this view in Intune for a few minutes/hours, but I got impatient and attempted to RDP back to the device. To my surprise it was already resized, however the RDP session was not yet aware of that.
Side note: That disk sure looks busy after the resize ? It did calm down shortly after, but it’s probably worth keeping in mind that directly after a resize things might need a few minutes to stabilize.
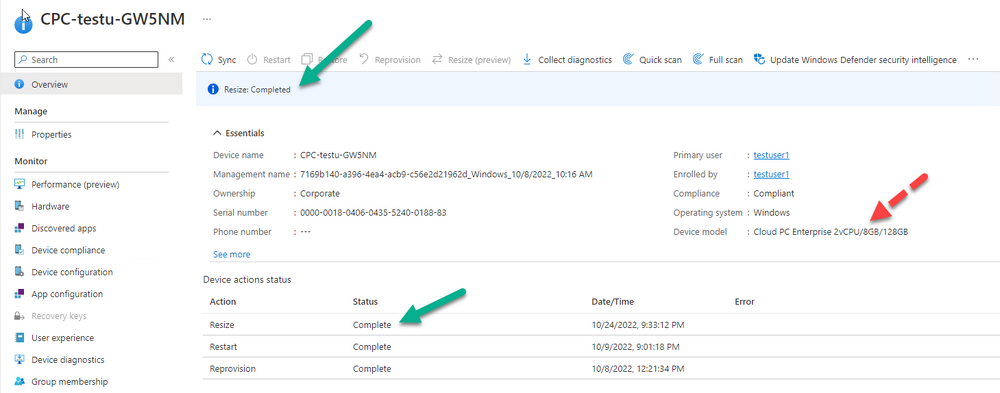
At this point, I went back to Intune and refreshed, and now it updated the remote Resize (preview) action to Completed. However, it still listed the old specs under Device Model.
This may change after a hardware inventory is sent back to Intune but I did trigger a SYNC and it’s still wrong.
If you look at Provisioned PC’s, the data their is correct and it shows the new size under PC Type.
I have got to admit the Resize remote action was impressive, and very fast, but I’d like to see some improvements however such as:
- Custom email notification (to user/group/admin about the resize about to occur)
- Customizable ALERT toast notification sent to the user warning them to save their data
- Custom alert/email sent to user/admin notifying them that the resize is completed or if there was an issue, describe it
that was it for this blog post, see you in the next one
If you’d like to get started with Windows 365, checkout our brand new series here.
cheers
niall


