Note: This guide involves manually editing driver inf files and is for lab use only, modifying drivers is not supported by either Intel, Lenovo or Microsoft, so use at your own risk. I’ve used this method on my Lenovo P1, and it worked for me ! That said, your mileage may vary.
Remember, this is NOT Supported by Lenovo, or Intel, or Microsoft and especially not me. Due to the aforementioned lack of support from this modification, use at your own risk.
Introduction
My home lab (which I use for creating all those step-by-step guides about SCCM, Intune or PKI) runs Hyper V and it’s an awesomely fantastic Lenovo P1 installed with Windows Server 2019.
It originally shipped with Windows 10 Professional for Workstations but I installed Windows Server 2019 on it to avail of the built-in support for Data-Deduplication. Data-deduplication allows you to squeeze lots of data into a limited space by only taking one copy of a block of data that is repeated more than once and then indexing it, thereby saving lot’s of storage space.
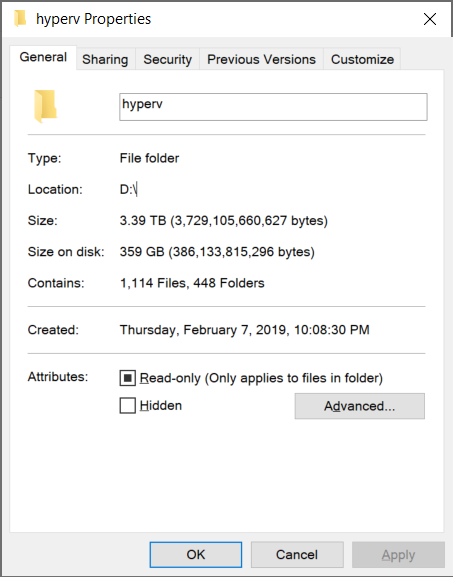
This screenshot should give you an idea of how efficient data-deduplication is. 3.39TB of data taking up only 359GB of space. Amazing.
 So data-deduplication was enough of a reason to install Windows Server 2019, but the downside was some functionality of the Lenovo P1 would be lost, namely Thunderbolt.
Problem
When you install Windows Server 2019 on a Lenovo P1, and then proceed to install all the drivers either manually or via the Lenovo System Update tool, you are left with a mostly complete system, the exception is that Thunderbolt won’t work and the drivers won’t install (even though System Update detects them and downloads the Windows 10 drivers).
The problem is that Intel have blocked the drivers from installing on Windows Server 2019 and that becomes apparent by looking in Device Manager after installing all available drivers for the Lenovo P1.
In the screenshot below you can see 2 devices listed under Other Devices which have issues installing drivers, the first Base System Device is the Thunderbolt device, whereas the Unknown Device is a Bluetooth adapter which I’m not concerned with yet.

Solution
You can get around the drivers not installing by hacking the INF file for the Thunderbolt driver and by instructing the operating system that you are going to install an unsigned driver.
In a nutshell, this guide modifies the INF file to prevent it from installing a service and to prevent it from trying to install the setup.msi file (which is in itself hard locked to not install on anything but Windows 10), therefore some functionality may be missing from Thunderbolt as a result. In addition, the INF file is modified to allow installation on Windows Server 2019.
So let’s look at that process.
Note: I got the inspiration to attempt this process via the following blog post where Didier Van Hoye hacked the INF drivers (also from Intel) to get the network cards working on his server operating system. Kudos to Didier for the info.
Step 1. Get the drivers
You can download the Thunderbolt driver directly from Lenovo here or from Intel here. Once you have the drivers extract them somewhere useful like C:\Drivers\Thunderbolt
Note: The drivers from Intel and Lenovo are the same as you can see via the DriverVer string in the associated INF file.
DriverVer=05/16/2018,17.4.77.13
Step 2. Identify the HardwareID
In device manager, right click on one of the devices that needs drivers and click on Properties. Select the Details tab and in the drop down menu select Hardware IDs. Make note of the value.
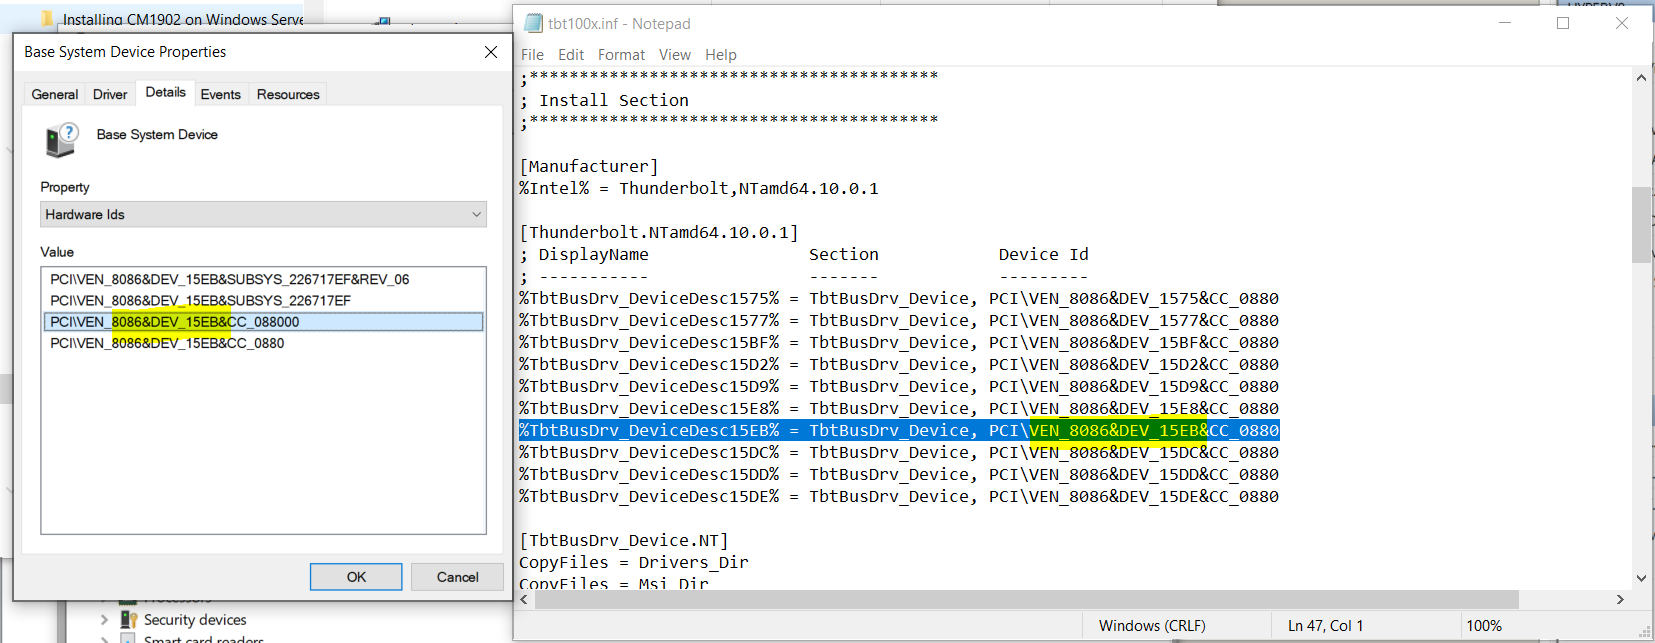
In the screenshot below you can see that the hardware ID in this case was PCI\VEN_8086&DEV_15EB&…
And for comparison purposes I’m showing you the same hardware id highlighted in the actual driver INF file. But how can we be sure that this is the file to use.
Step 3. Identify the INF file
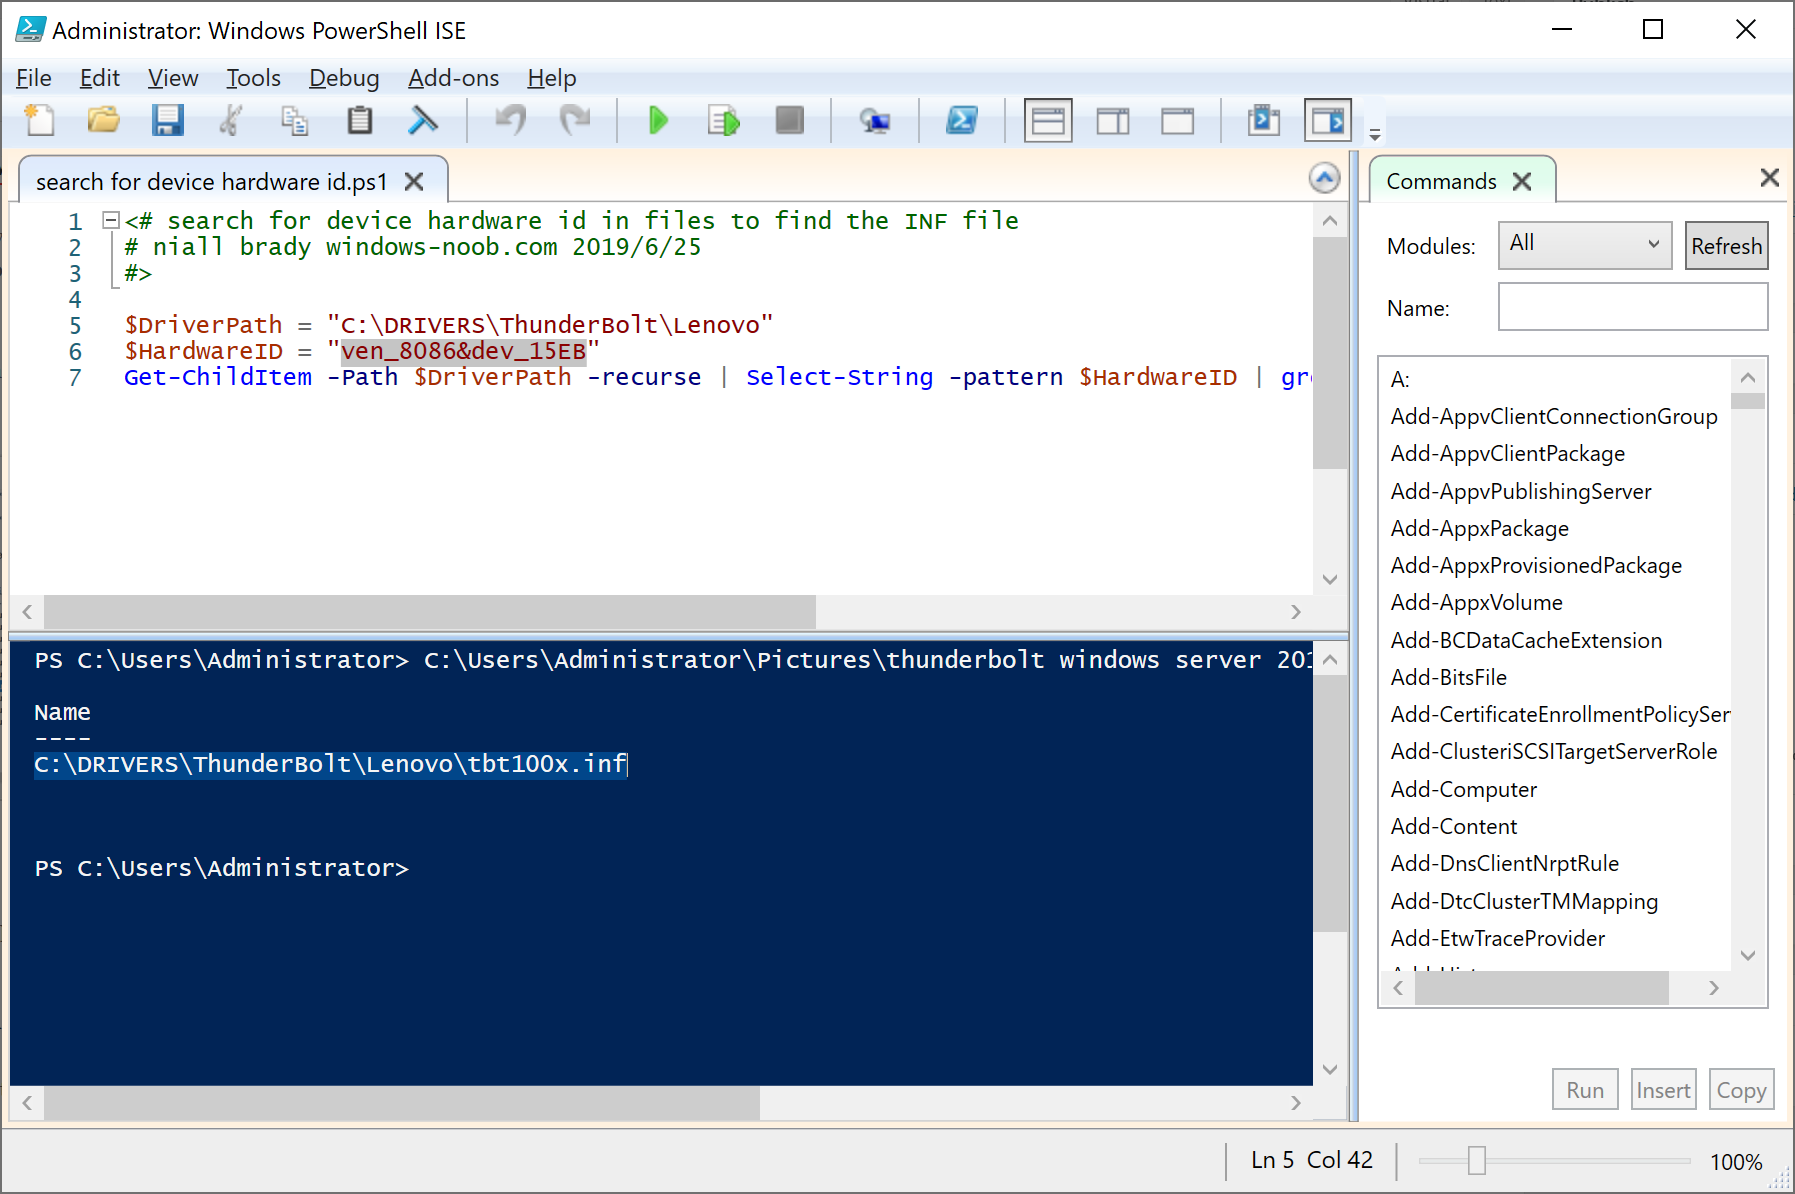
Use the following PowerShell script to identify the INF file to edit. You need to modify the two variables to match your environment.
The $DriverPath variable should point to the folder where you extracted the ThunderBolt Drivers.
The $HardwareID variable is composed of the VendorId (Intels Vendor Id which is 8086) and DeviceId (15EB) and should match the ven_xxxx&dev_xxxx from device manager.
In other words, only replace the values above that I’ve marked in red.
<# search for device hardware id in files to find the INF file
# niall brady windows-noob.com 2019/6/25
#>

$DriverPath = "C:\DRIVERS\Thunderbolt\Lenovo"
$HardwareID = "ven_8086&dev_15EB"
Get-ChildItem -Path $DriverPath -recurse | Select-String -pattern $HardwareID | group path | select name
Once done, run the script and it will list the INF file you need to edit, in this particular example it’s C:\DRIVERS\Thunderbolt\Lenovo\tbt100x.inf.
Step 4. Edit the inf file
In the INF file identified above, locate the following line
[Manufacturer]
%Intel% = Thunderbolt,NTamd64.10.0.1
And append the following to it
,NTamd64.10.0
so it becomes
[Manufacturer]
%Intel% = Thunderbolt,NTamd64.10.0.1,NTamd64.10.0
Next, locate the following [DestinationDirs] section and rem out the Msi_Dir line by placing a semi-colon in front of it.
[DestinationDirs]
DefaultDestDir          = 12
TbtCoInstallerCopyFiles = 11
Msi_Dir                 = 24,\Intel\Thunderbolt
so it becomes like this:
[DestinationDirs]
DefaultDestDir          = 12
TbtCoInstallerCopyFiles = 11
;Msi_Dir                 = 24,\Intel\Thunderbolt
Next copy the entire section [Thunderbolt.NTamd64.10.0.1] highlighted below
[Thunderbolt.NTamd64.10.0.1]
; DisplayName Section Device Id
; ----------- ------- ---------
%TbtBusDrv_DeviceDesc1575% = TbtBusDrv_Device, PCI\VEN_8086&DEV_1575&CC_0880
%TbtBusDrv_DeviceDesc1577% = TbtBusDrv_Device, PCI\VEN_8086&DEV_1577&CC_0880
%TbtBusDrv_DeviceDesc15BF% = TbtBusDrv_Device, PCI\VEN_8086&DEV_15BF&CC_0880
%TbtBusDrv_DeviceDesc15D2% = TbtBusDrv_Device, PCI\VEN_8086&DEV_15D2&CC_0880
%TbtBusDrv_DeviceDesc15D9% = TbtBusDrv_Device, PCI\VEN_8086&DEV_15D9&CC_0880
%TbtBusDrv_DeviceDesc15E8% = TbtBusDrv_Device, PCI\VEN_8086&DEV_15E8&CC_0880
%TbtBusDrv_DeviceDesc15EB% = TbtBusDrv_Device, PCI\VEN_8086&DEV_15EB&CC_0880
%TbtBusDrv_DeviceDesc15DC% = TbtBusDrv_Device, PCI\VEN_8086&DEV_15DC&CC_0880
%TbtBusDrv_DeviceDesc15DD% = TbtBusDrv_Device, PCI\VEN_8086&DEV_15DD&CC_0880
%TbtBusDrv_DeviceDesc15DE% = TbtBusDrv_Device, PCI\VEN_8086&DEV_15DE&CC_0880
And paste it directly after the first block, and then edit the heading of the second pasted block so that it reads [Thunderbolt.NTamd64.10.0] like so (placed directly under the [Thunderbolt.NTamd64.10.0.1] section.
[Thunderbolt.NTamd64.10.0]
; DisplayName Section Device Id
; ----------- ------- ---------
%TbtBusDrv_DeviceDesc1575% = TbtBusDrv_Device, PCI\VEN_8086&DEV_1575&CC_0880
%TbtBusDrv_DeviceDesc1577% = TbtBusDrv_Device, PCI\VEN_8086&DEV_1577&CC_0880
%TbtBusDrv_DeviceDesc15BF% = TbtBusDrv_Device, PCI\VEN_8086&DEV_15BF&CC_0880
%TbtBusDrv_DeviceDesc15D2% = TbtBusDrv_Device, PCI\VEN_8086&DEV_15D2&CC_0880
%TbtBusDrv_DeviceDesc15D9% = TbtBusDrv_Device, PCI\VEN_8086&DEV_15D9&CC_0880
%TbtBusDrv_DeviceDesc15E8% = TbtBusDrv_Device, PCI\VEN_8086&DEV_15E8&CC_0880
%TbtBusDrv_DeviceDesc15EB% = TbtBusDrv_Device, PCI\VEN_8086&DEV_15EB&CC_0880
%TbtBusDrv_DeviceDesc15DC% = TbtBusDrv_Device, PCI\VEN_8086&DEV_15DC&CC_0880
%TbtBusDrv_DeviceDesc15DD% = TbtBusDrv_Device, PCI\VEN_8086&DEV_15DD&CC_0880
%TbtBusDrv_DeviceDesc15DE% = TbtBusDrv_Device, PCI\VEN_8086&DEV_15DE&CC_0880
Locate the [TbtBusDrv_Device.NT] section and rem out the CopyFiles = Msi_Dir line by placing a semi-colon in front of it.
[TbtBusDrv_Device.NT]
CopyFiles = Drivers_Dir
CopyFiles = Msi_Dir
so it becomes like this:
[TbtBusDrv_Device.NT]
CopyFiles = Drivers_Dir
;CopyFiles = Msi_Dir
Locate the [TbtBusDrv_Device.NT.HW] section and rem out the AddReg = MSI.reg line by placing a semi-colon in front of it.
[TbtBusDrv_Device.NT.HW]
AddReg = MSI.reg
AddReg = Security.reg
so it becomes like this:
[TbtBusDrv_Device.NT.HW]
;AddReg = MSI.reg
AddReg = Security.reg
Finally, locate the [TbtCoInstallerReg] section and rem out the HKR,,CoInstallers32,0x00010000,”tbtcoinx_17_4_77_13.dll, CoDeviceInstall” line by placing a semi-colon in front of it.
[TbtCoInstallerReg]
HKR,,CoInstallers32,0x00010000,"tbtcoinx_17_4_77_13.dll, CoDeviceInstall"
so it becomes like this:
[TbtCoInstallerReg]
;HKR,,CoInstallers32,0x00010000,"tbtcoinx_17_4_77_13.dll, CoDeviceInstall"
Save the file and close it.
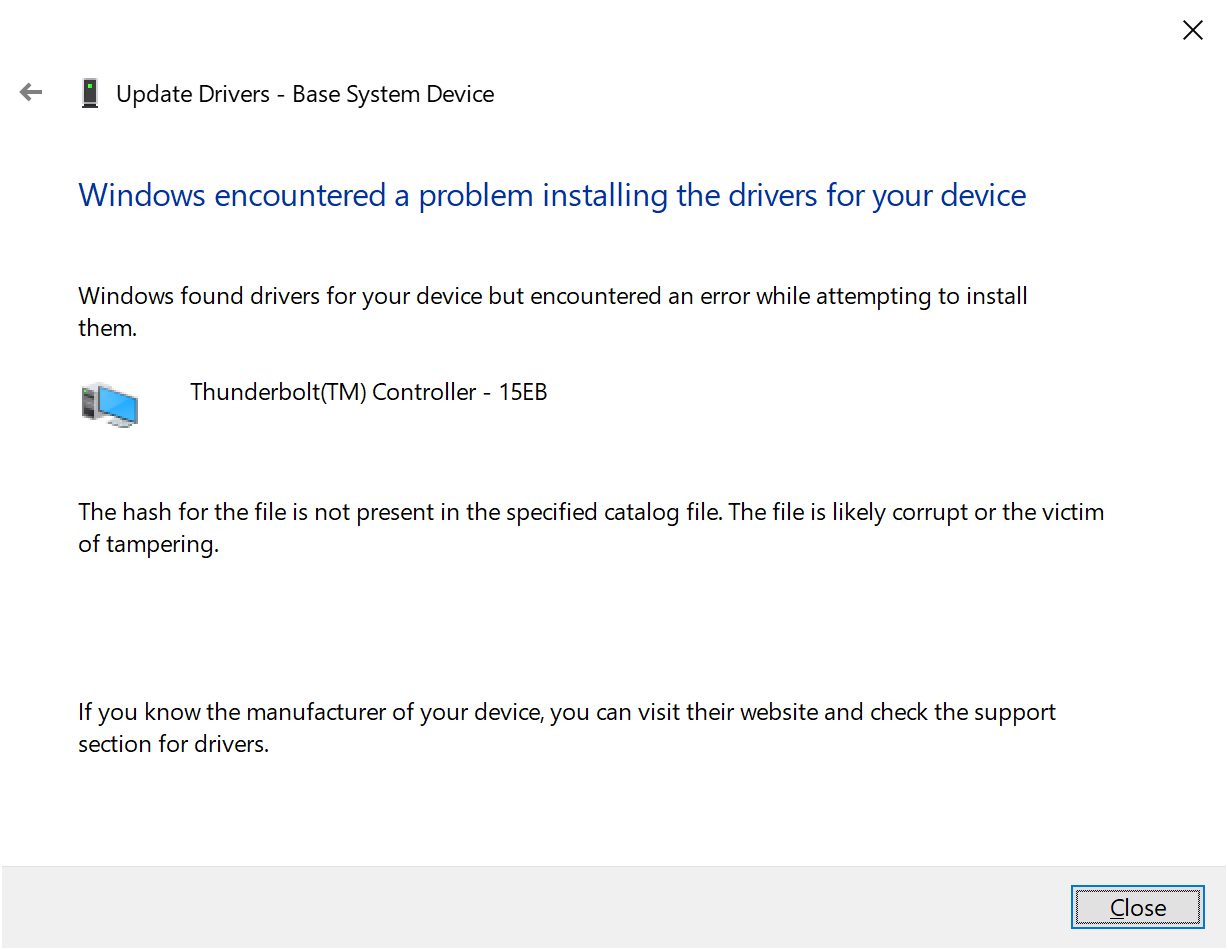
Note: If you attempt to install the modified inf without having completed the below steps you’ll get a HASH error as shown here.
Step 5. Restart in Advanced mode
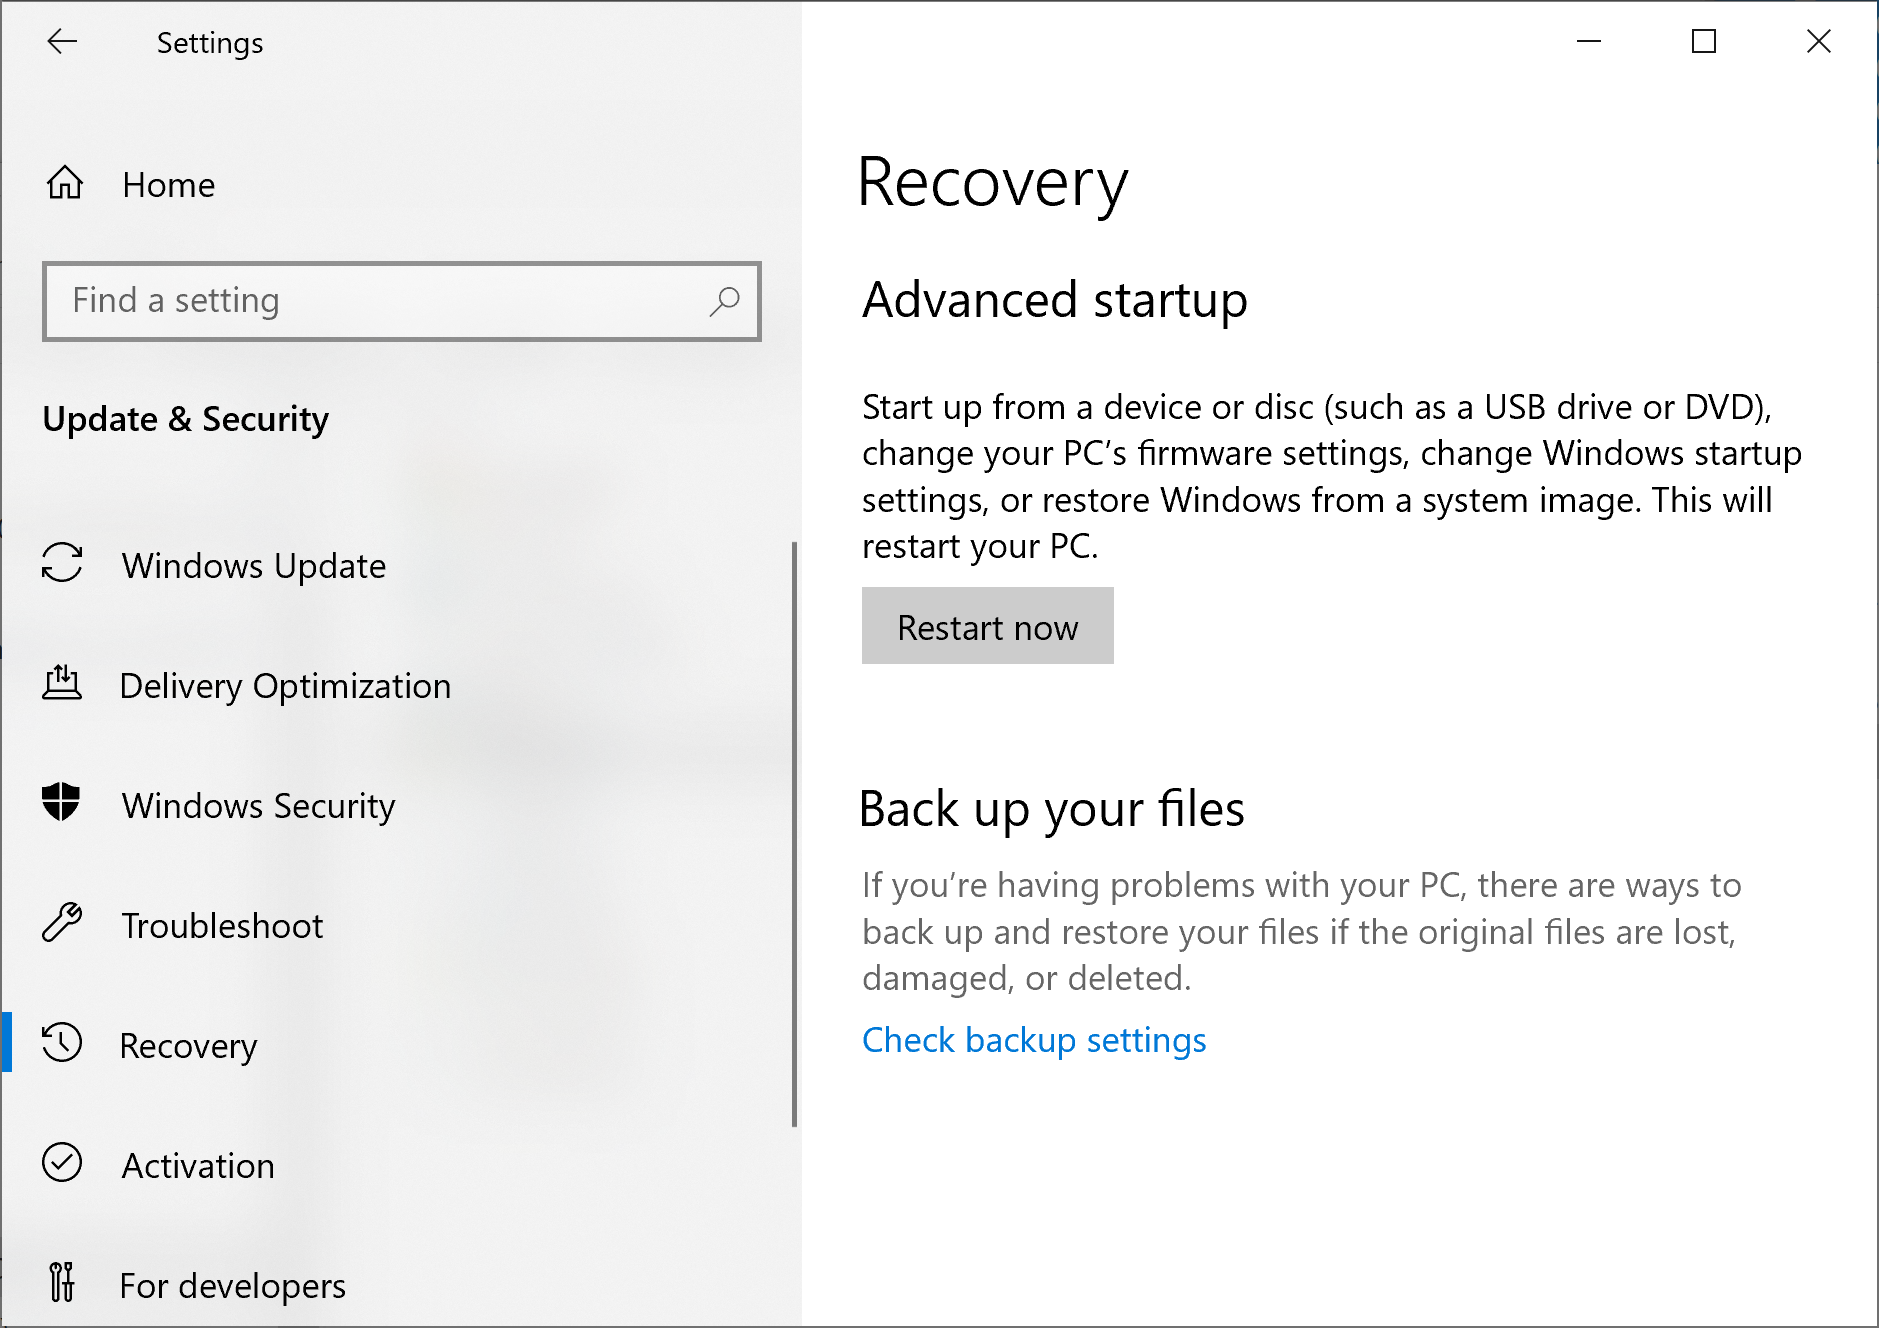
In Windows Settings, select Update & Security and click on Recovery, select Restart Now. Do this locally on the computer (Do not try this via RDP as the Restart Now option will not appear in RDP).
Step 6. Disable Driver Signature Enforcement
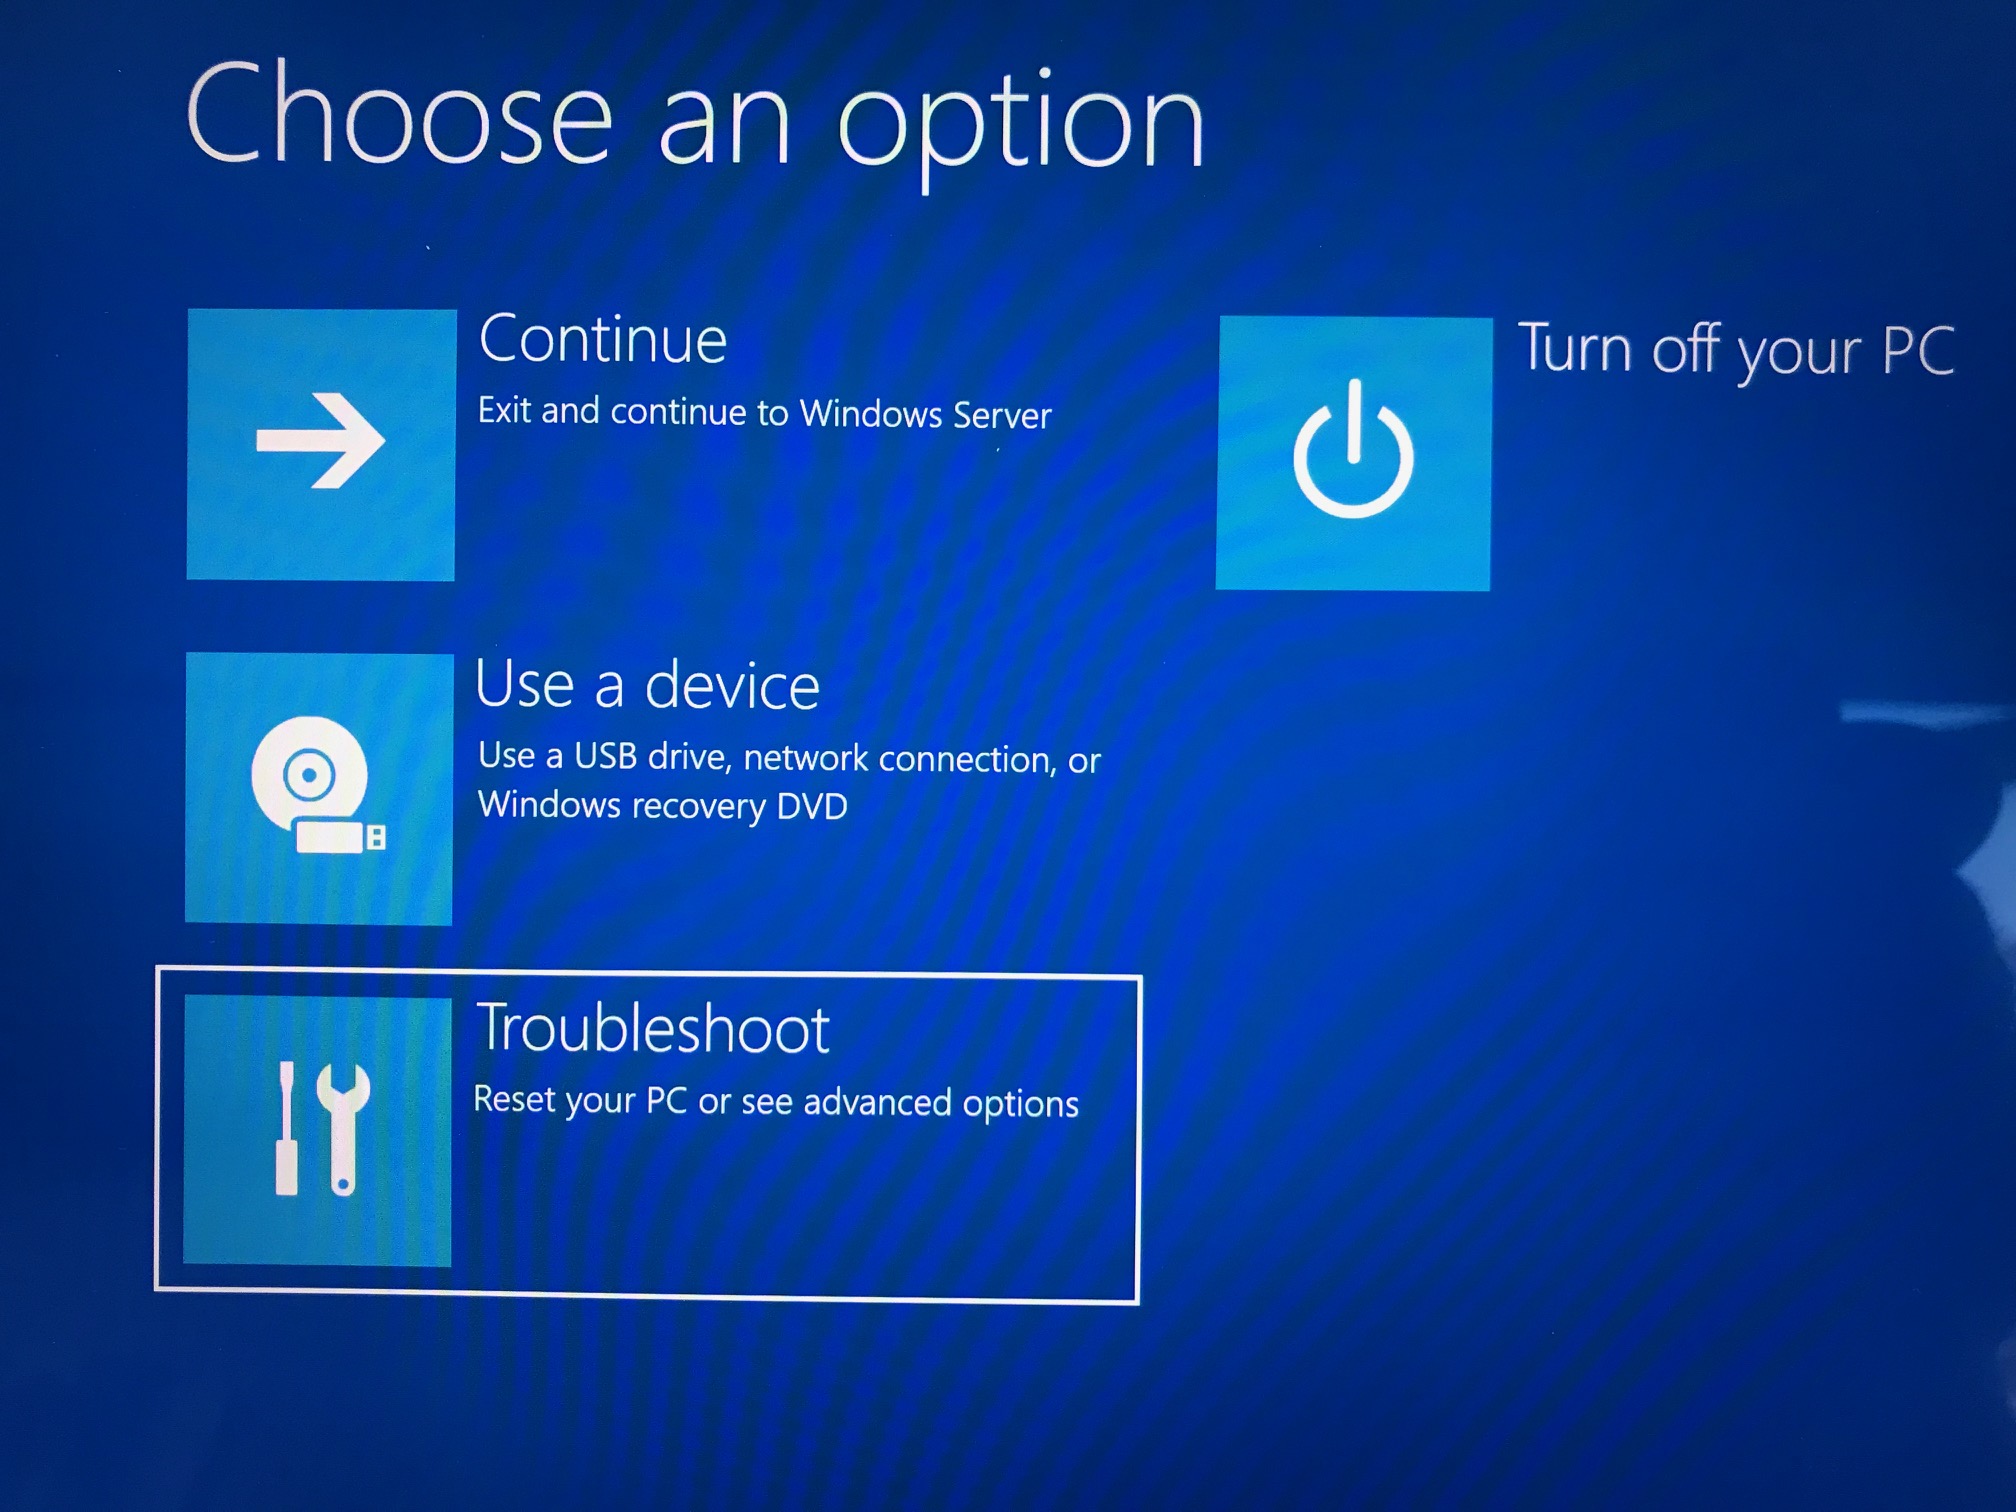
Select Troubleshoot from the menu.
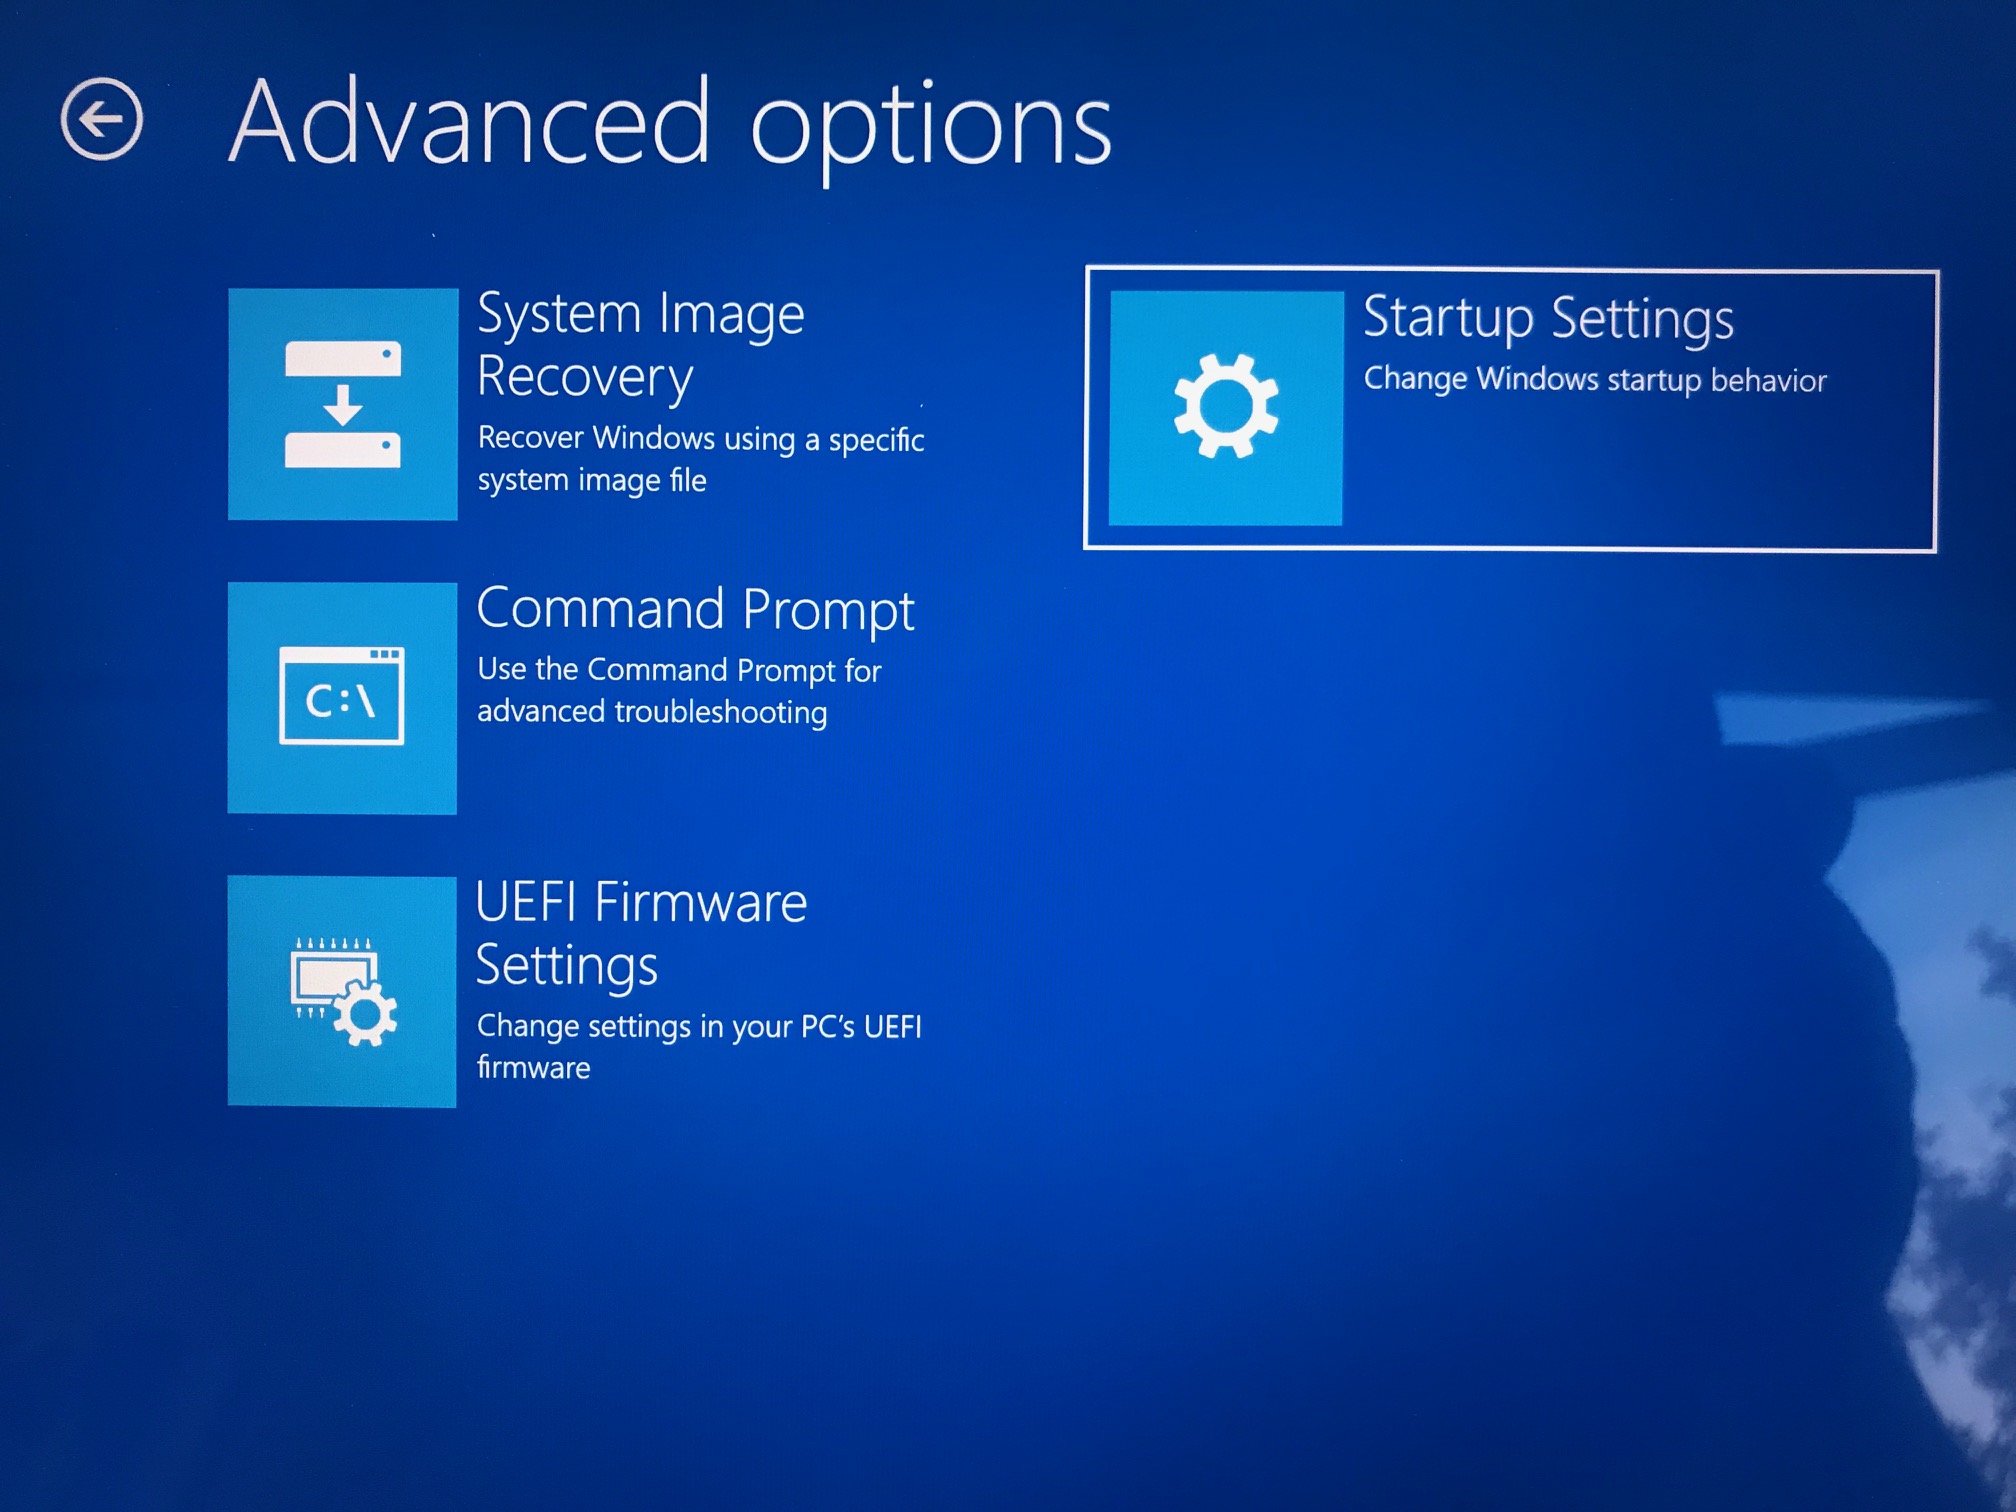
Click Restart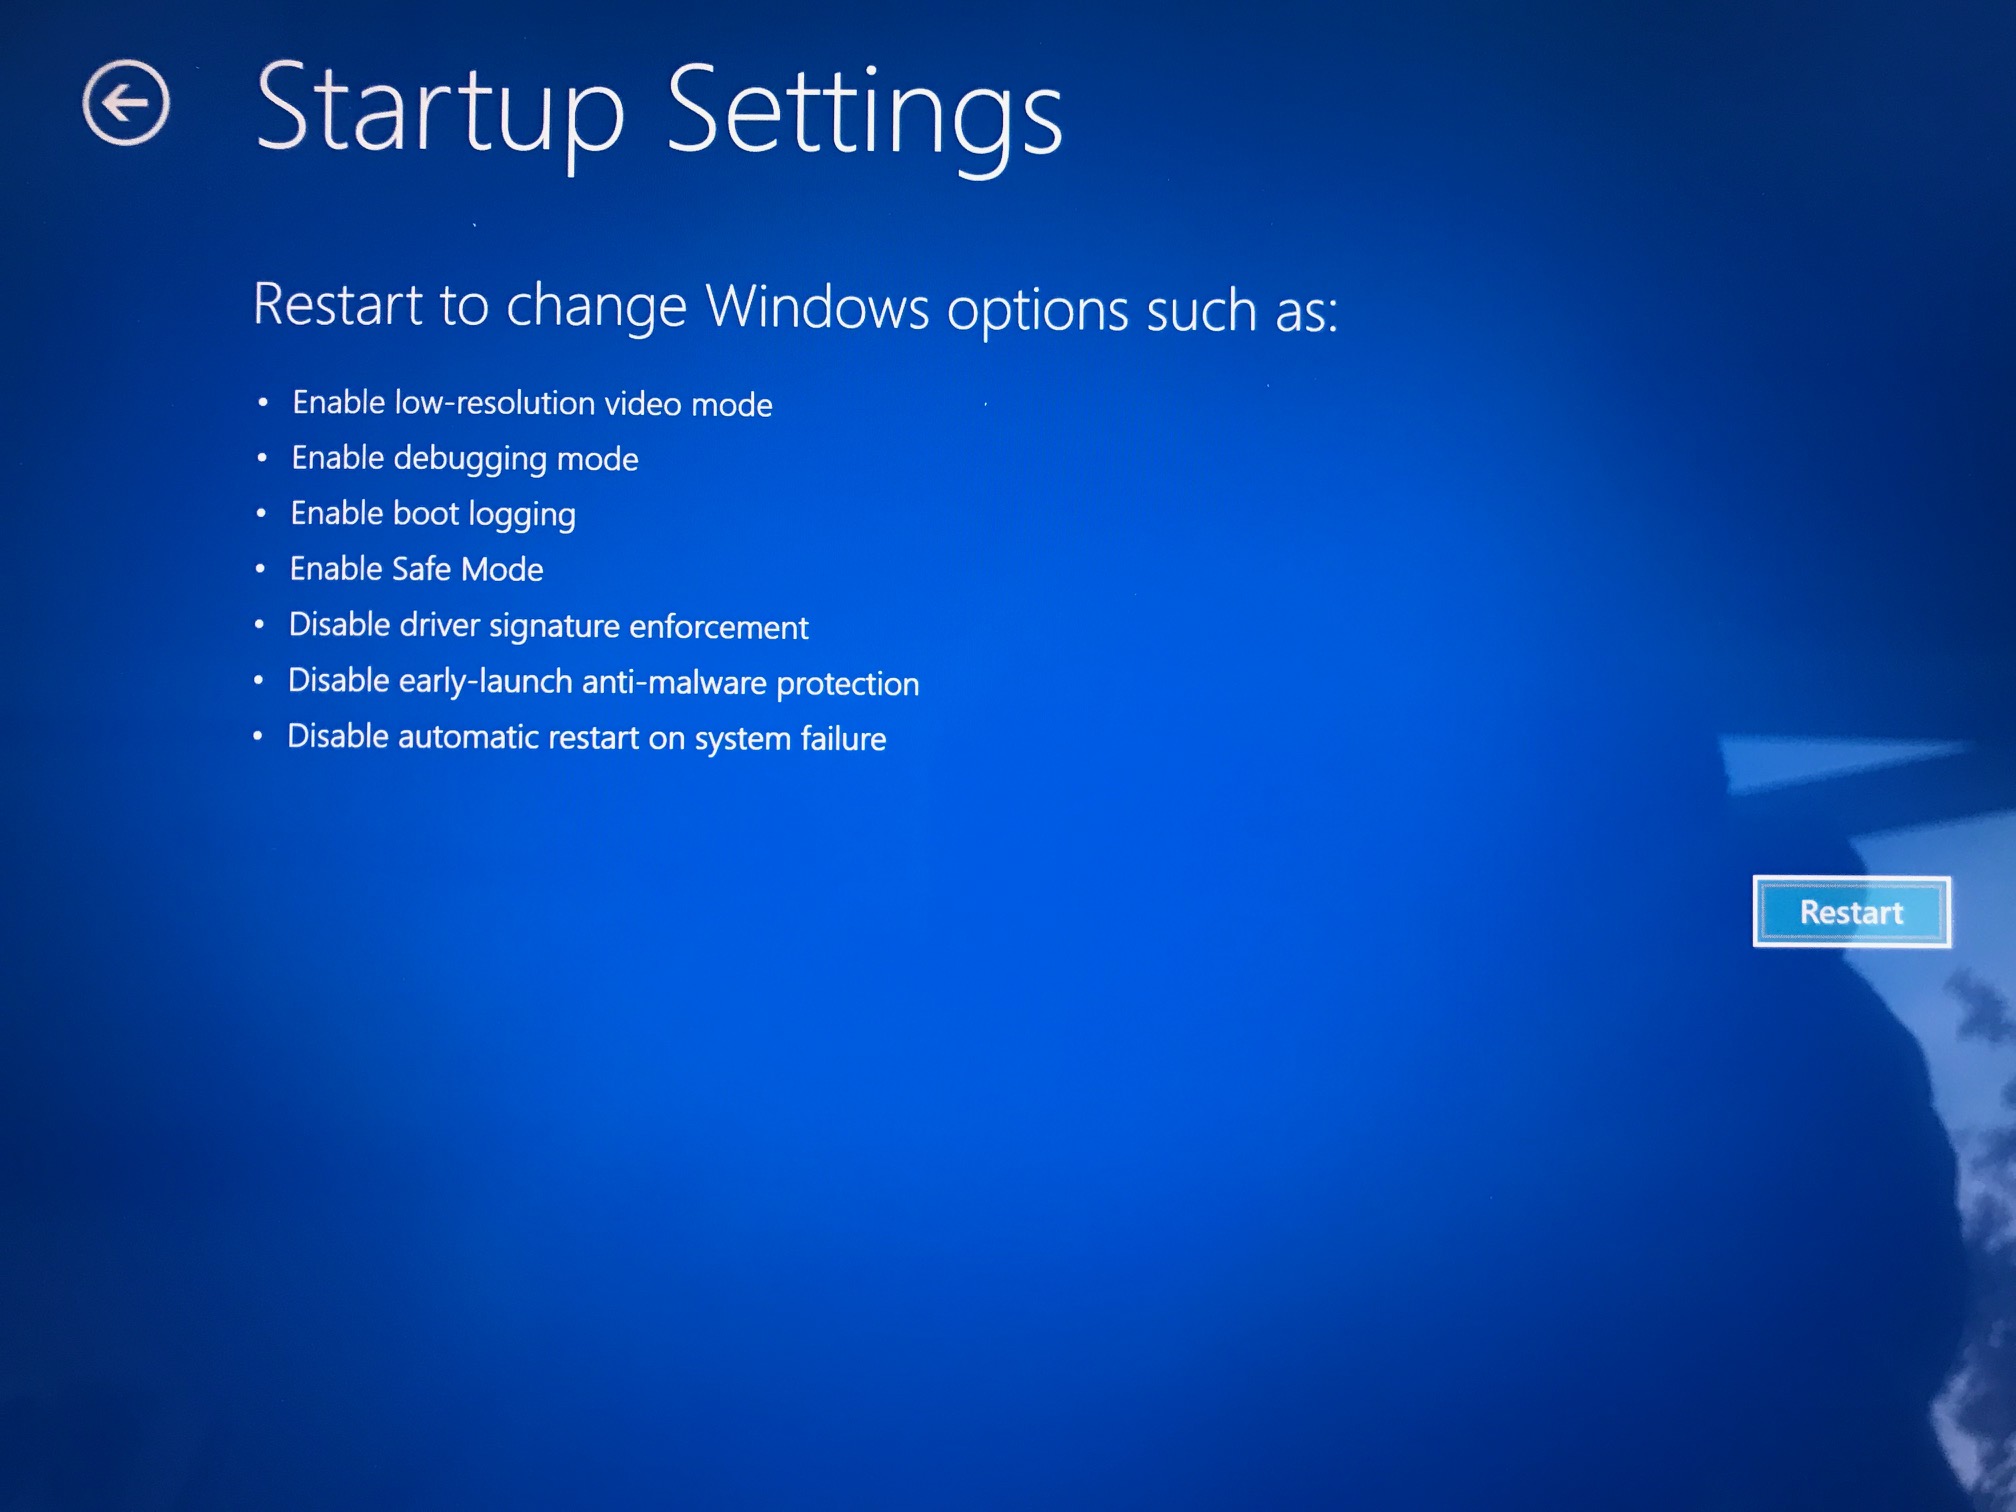 And in the Advanced Boot Options, select Disable Driver Signature Enforcement
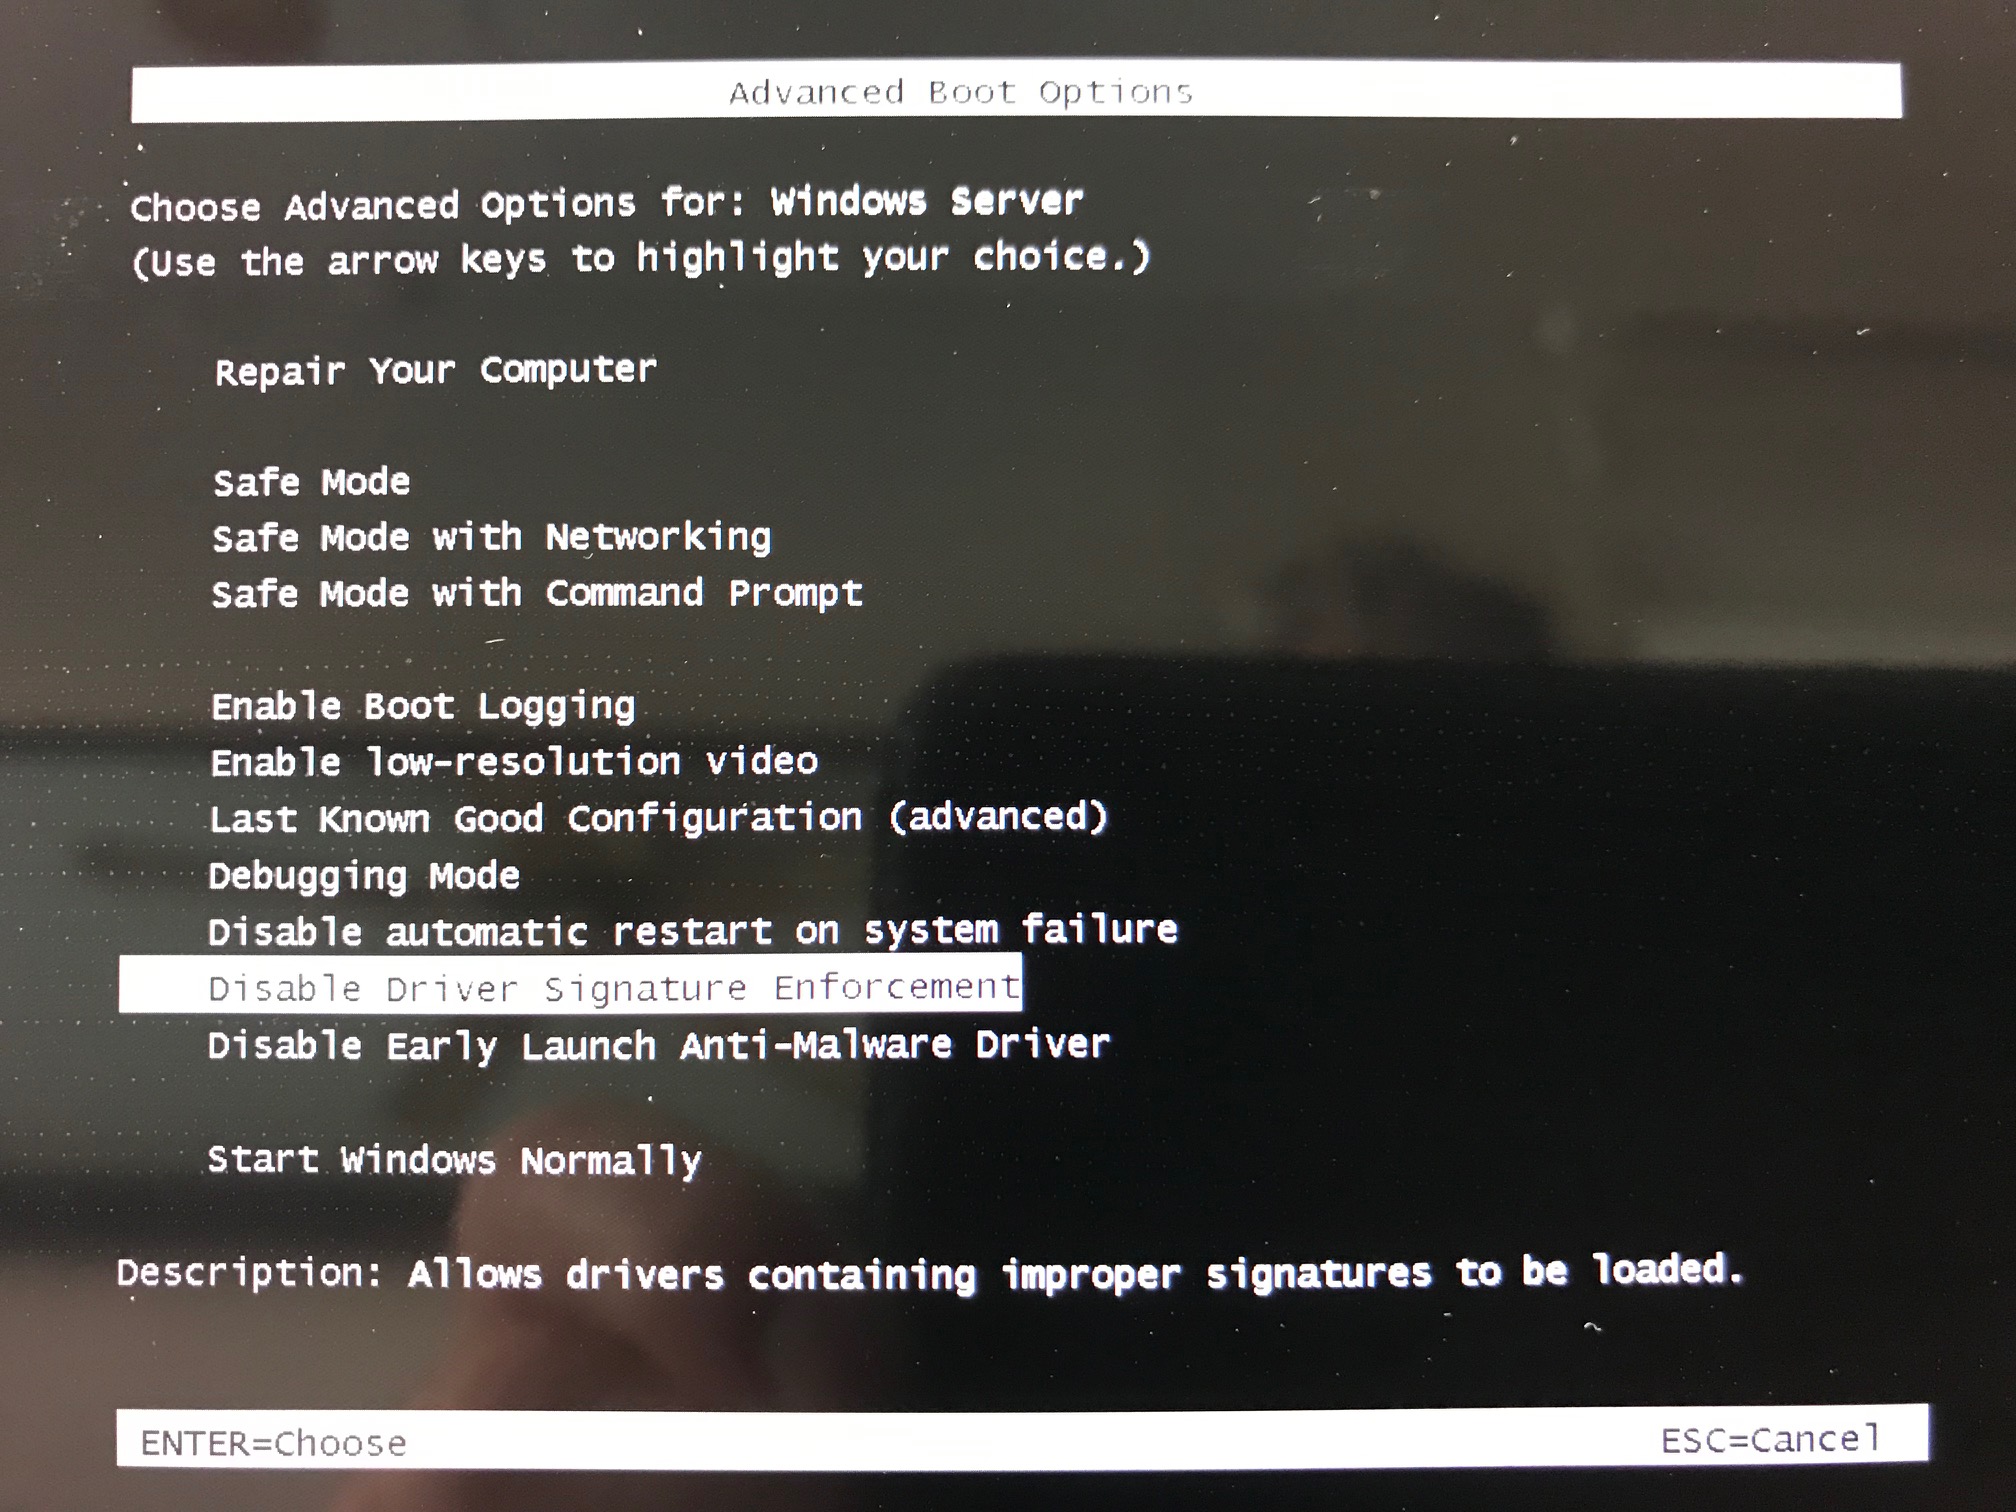 The computer will boot into Windows.
Step 7. Load the edited inf in Device Manager.
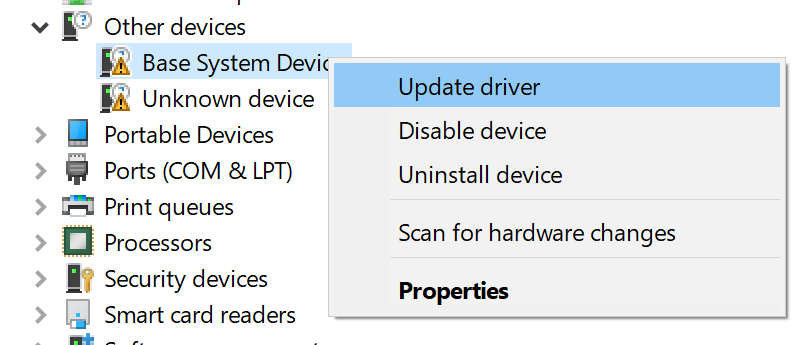
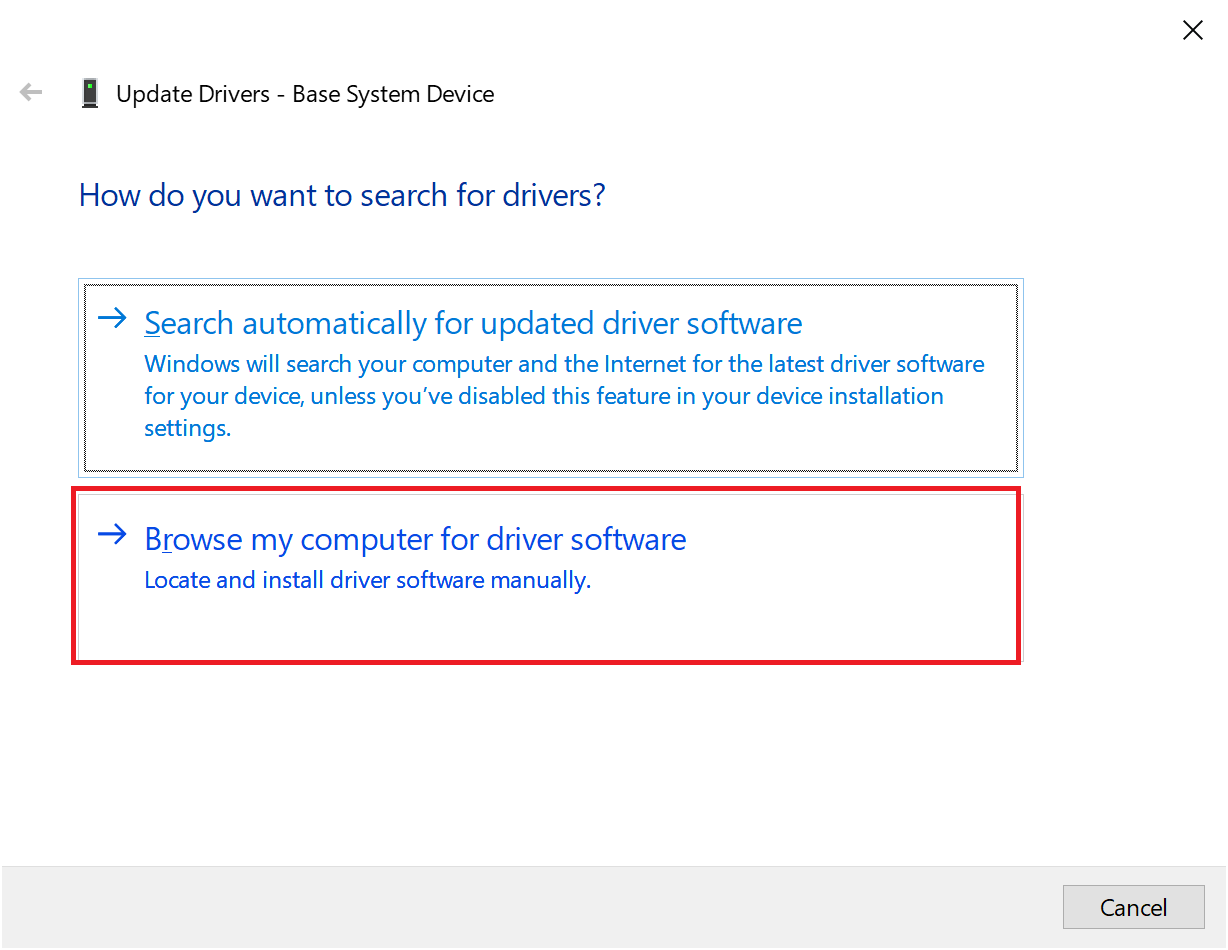
In Device Manager, select the device you want to update, and choose Update Driver.
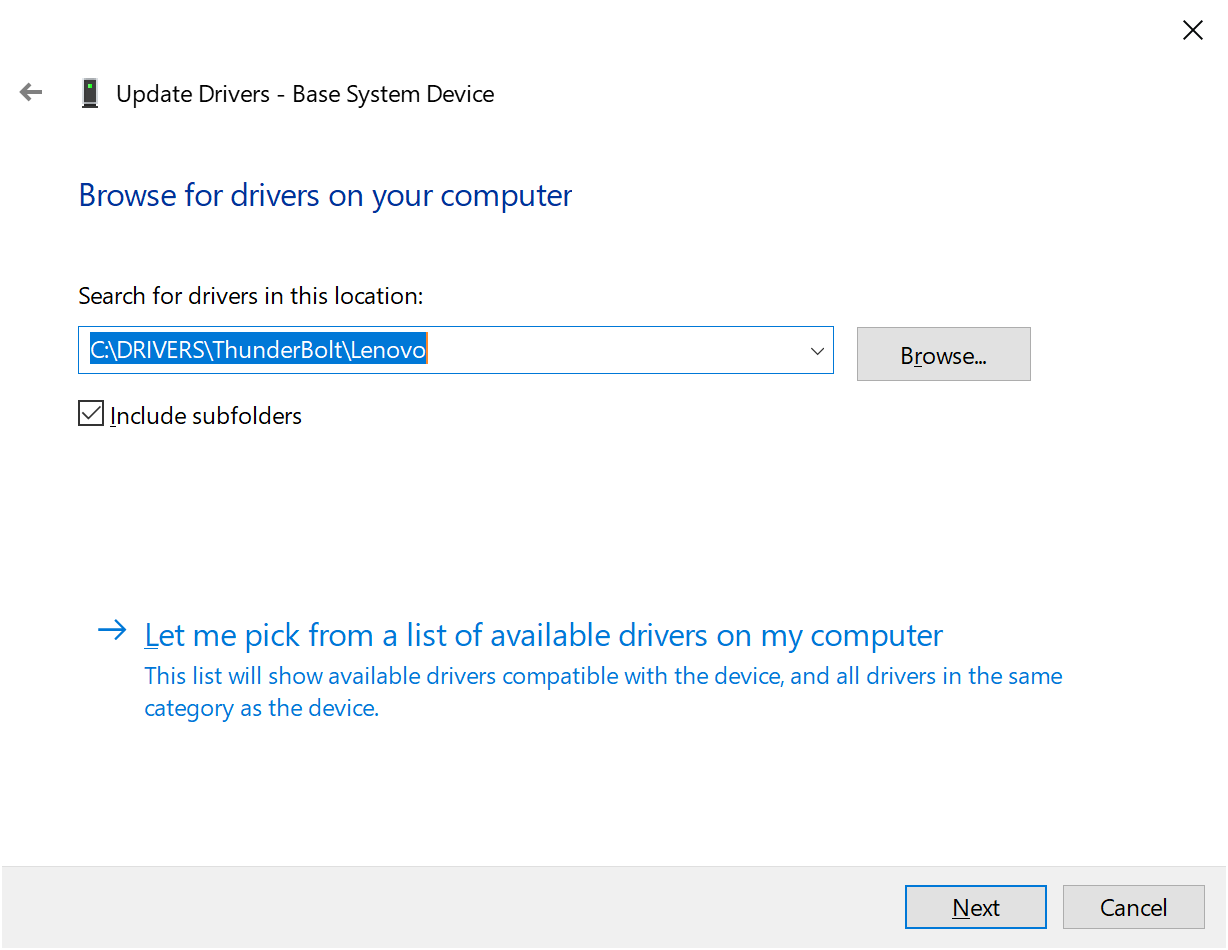
 Choose Browse my computer for driver software,
And point to the path of the edited INF file from before.
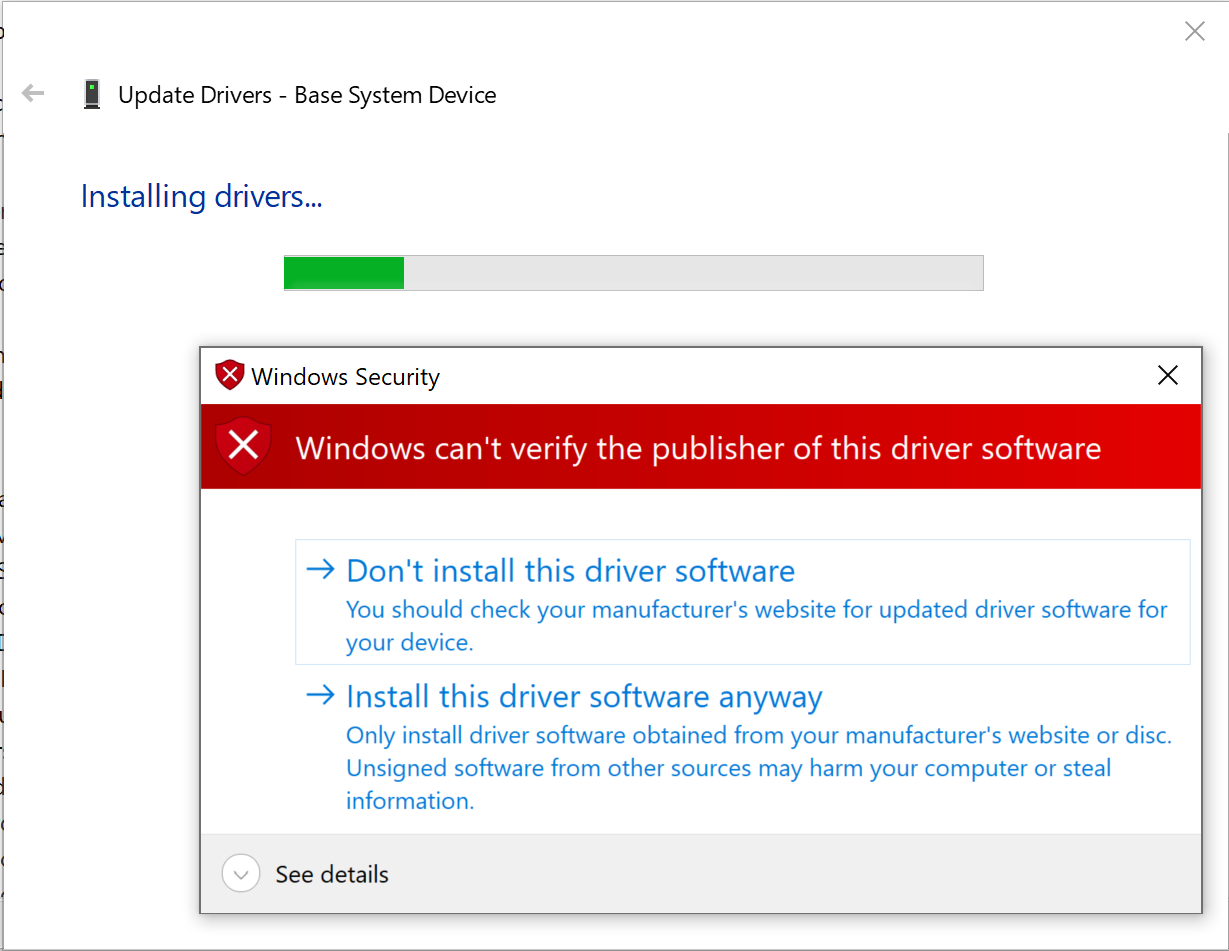
When prompted choose Install this driver software anyway.
And if everything goes according to plan, it will install.
Note: If you get a Fatal error message, then you most likely still have remnants of the INF file pointing to one or more files contained within the setup.msi, and they need to be removed.
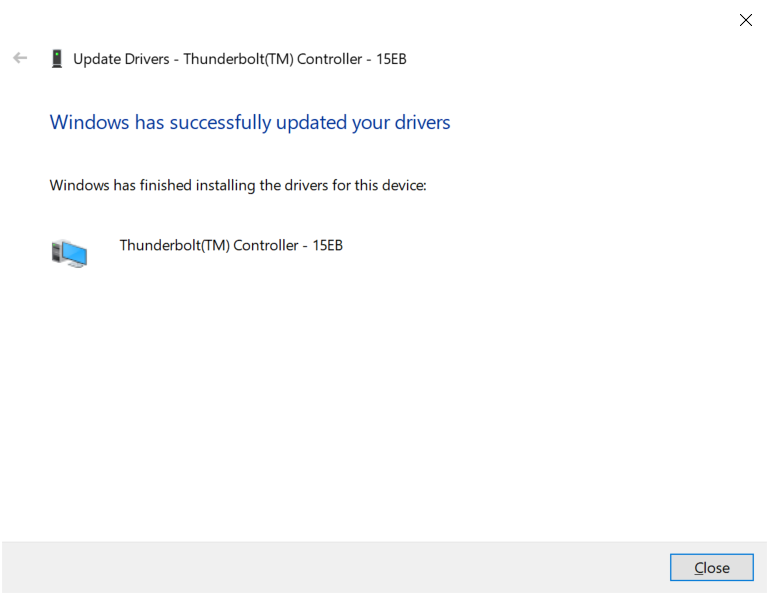 And the new device can be viewed in Device Manager.
Result !
It works ! I’ve got a USB c to B flash drive connected and I can read/write to the device at speeds that look impressive enough !
I’d be very interested to hear how this works for you (or not), please let me know by commenting below.
cheers !
Niall
Recommended reading
- https://www.niallbrady.com/2019/02/09/installing-windows-server-2019-on-a-lenovo-p1-for-data-dedup-my-rough-notes/
- https://docs.microsoft.com/en-us/windows-hardware/drivers/install/general-syntax-rules-for-inf-files
- https://blog.workinghardinit.work/2017/06/19/installing-intel-i211-i217v-i218v-i219v-drivers-windows-server-2016-eufi-boot/




Pingback: Installing Windows Server 2019 on a Lenovo P1 for data dedup, my rough notes | just another windows noob ?
Pingback: Got a Surface Pro 4 with a flickering screen, try this hack. | just another windows noob ?
This is very helpful. Many, many thanks!! Do you have a Thunderbolt 3 dock? I have version 2. Unfortunately, the Lenovo-sourced Windows 10 Thunderbolt Software is not running under Windows Server 2019 – says a different OS release. Have you had a chance to fix the Bluetooth issue? I am not able to find a compatible driver as the Hardware ID is not specific enough…
i don’t, but you’d need to modify the msi installer for the dock software to get around that i guess.
These instructions are great and I had high hopes! But – things aren’t working out. My issue is odd: 9 of 10 times (or more!) after a reboot – either advanced w/ signature disabled or normal – the “base system device” doesn’t show up in device manager: it is “hidden”. You can display it (via view menu) and then update the driver as outlined above – and it _says_ it was updated – but in fact there’s no change.
I’ve fiddle in the BIOS enabling & disabling thunderbolt but nothing’s changed.
Very frustrating! And a second issue is that with lenovo power manager installed I was getting a dll missing error every time I logged in – this is a long time issue with lenovo power manager going back years! – reinstall doesn’t help, deleting doesn’t help, disabling doesn’t help – in all cases after the next reboot the lenovo power manager is back! how the heck do I get rid of it …
I’m close to moving back to Win 10 Pro Workstation – I wanted to use the dedup feature for the same reason you did ….
— David
I should have added this is on a P70, not a P1, but there really should be no difference because of that.
And this doesn’t take away from this terrific blog post – informative, perfect screenshots, etc. – just a well done post.
to disable the lenovo message on login simply disable the Lenovo Power Manager/Background Monitor scheduled task (i’ll add a screenshot to the original blog post)
I have a P1 Gen1 with 64 GB RAM and would like to ‘fill out’ my recent Windows 2019 server install. I was surprised how many unknown devices remained. Did you happen to set aside the compatible drivers as you were going through the process–setting aside bluetooth and thunderbolt of course. I’d happily offset your time.
i’ll check mine to see what’s still there, it’s happily doing it’s thing (a hyperv host) so that’s all good, I did use the Lenovo system update several times, did you try that ?