In a previous series of guides I showed you how to configure PKI in a lab on Windows Server 2016. In another series, I also showed you how to install System Center Configuration Manager (Current Branch) version 1802 on Windows Server 2016 with SQL Server 2017. In this lab, I will show you how to configure SCCM to utilize that PKI environment.
This series is based upon an excellent video by the talented former Microsoft Premier Field Engineer Justin Chalfant here. If you haven’t seen it yet, do check it out.
The intention here is that after you’ve completed this PKI enabled SCCM lab you can then use this in future guides, and to dig deeper into new technologies from Microsoft, for example enabling a Cloud Management Gateway and/or Cloud Distribution Point and using later on, using Co-Management.
Note: To complete this lab you must first complete the PKI Lab series (8 parts) and then install a new virtual machine within that PKI lab running System Center Configuration Manager (Current Branch) version 1802 utilizing this series (4 parts), that installation of Configuration Manager will be in HTTP mode. In addition, you must configure the Software Update Point role (in HTTP mode) on CM01 See this guide (step 2 onward) for details. For details how to configure that, see this post. It will take some time to setup but you’ll be glad you did. Also, don’t do this in production without consulting with a PKI Expert. I don’t claim to be one, I’m just helping you get it up and running in a lab. This is intended for use in a lab only.
In part 1 of this series you created an Active Directory Security Group to contain your SCCM servers that host IIS based roles such as Distribution Point, Management Point and Software Update Point, you then rebooted that server after adding it (CM01) to the group. You then created 3 certificate templates for SCCM on the Issuing CA server (IssuingCA) and issued them so that they could be available to applicable computers. You verified that you had a GPO in place for AutoEnrollment before requesting the IIS and DP/OSD Certificates on the IIS Site System (CM01) using certlm.msc.
Step 1. Edit bindings in IIS for the Default Web Site and WSUS Administration Websites
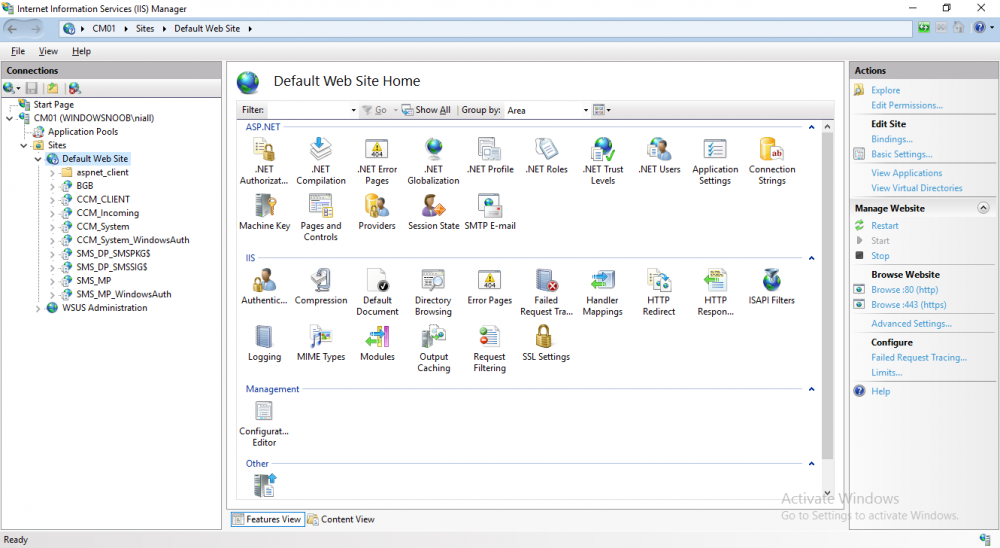
On the SCCM server (CM01), start Internet Information Services (IIS) Manager, expand Sites so that you can see the Default Web Site and the WSUS Administration websites listed. Select the Default Web Site, this web site is where the management point, distribution point and other SCCM roles such as Application Catalog can be found (if they are installed).
Edit bindings on the Default Web Site
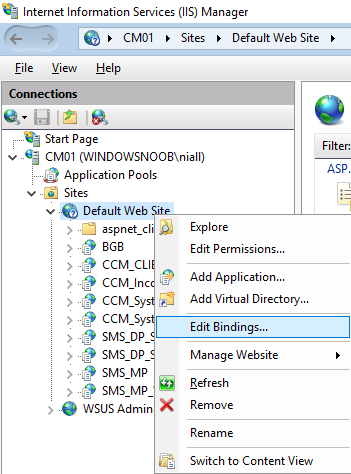
Right click on the Default Web Site and choose Edit Bindings from the options available.
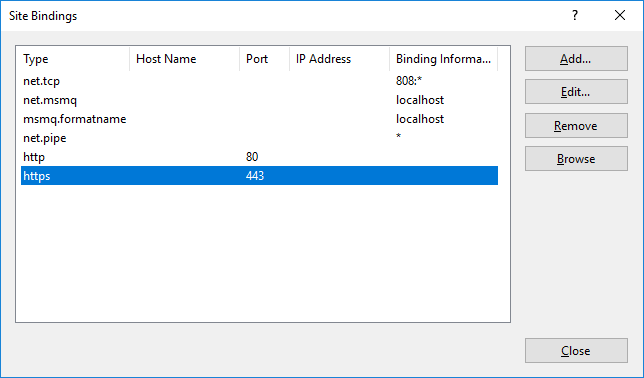
In the window that appears, select the https section (port 443) and choose Edit.
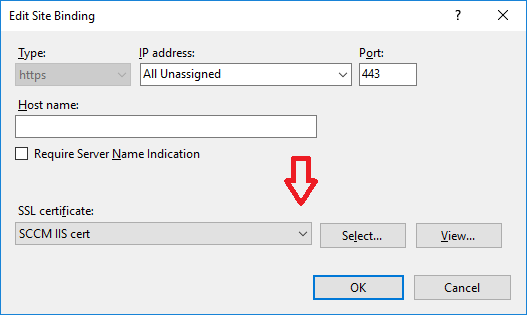
In the SSL certificate dropdown menu, select SCCM IIS Cert.
Click OK and then click Close.
Verify changes made
Once done, you can open up Internet Explorer and verify that it’s reporting back in HTTPS mode for the default web site by browsing to the following addresses to verify the Netbios name and FQDN resolve in HTTPS mode. Click on the Lock in the address bar to get info about the connection.
you can continue reading this guide @ windows-noob.com here.


