Introduction
At the start of this series of step by step guides you installed System Center Configuration Manager (Current Branch), then you configured discovery methods. Next you configured boundaries to get an understanding of how automatic site assignment and content location works. After that you learned how to update ConfigMgr with new features and fixes using a new ability called Updates and Servicing and you learned how to configure ConfigMgr to use Updates and Servicing in one of these two modes:
To prepare your environment for Windows 10 servicing (this guide) you learned how to setup Software Updates using an automated method (via a PowerShell script) or manually using the ConfigMgr console. Next you used a PowerShell script to prepare some device collections, then you configured client settings for your enterprise and finally you’ll deployed the ConfigMgr client agent using the software updates method which is the least intensive method of deploying the Configuration Manager client agent.
As System Center Configuration Manager (current branch) is being delivered as a service now, version 1602 was made available (March 11th, 2016) and you used Updates and Servicing to do an in-place upgrade to that version as explained here. Next you learned about how to use the Upgrade task sequence to upgrade your Windows 7, Windows 8 (and 8.1) and even your Windows 10 devices to a later build of Windows 10.
You then learned about the new Windows 10 servicing features which use Servicing Plans in ConfigMgr (Current Branch). In this guide you will integrate MDT 2013 update 2. MDT integration with ConfigMgr is useful as it provides additional functionality for operating system deployment scenarios such as Offline Language Package installation or User Driven Integration (UDI).
Note: This guide assumes that you have not yet enabled or configured a PXE distribution point or Network Access Account, if you have, then you can skip those steps. In addition, this guide assumes you have created a DHCP scope on your Active Directory Domain Controller and activated it.
Step 1. Download MDT 2013 Update 2
Download the MDT 2013 Update 2 x64 MSI from the following link.
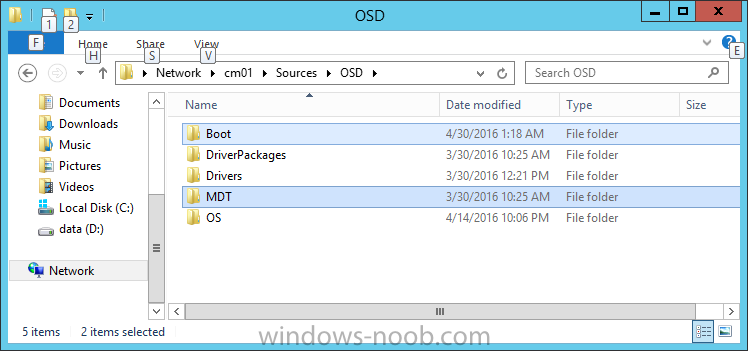
In addition to downloading MDT 2013 Update 2, you might want to download the MDT ZIP file (located in the downloads section at the end of this post) which contains pre-created folders and files for use in the Create MDT Task sequence wizard. Simply extract it to the desired sources folder on your ConfigMgr server, for example:
\\<ConfigMgrServer>\sources\osd\
the folders it creates are highlighted below after extraction
Step 2. Install MDT 2013 Update 2
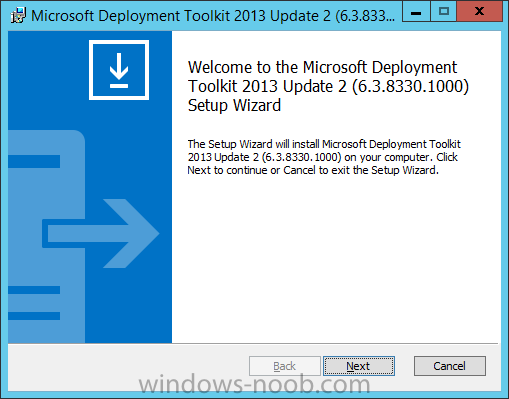
After you’ve downloaded the msi, it’s time to install it. On your ConfigMgr server double-click the MSI and the wizard will appear
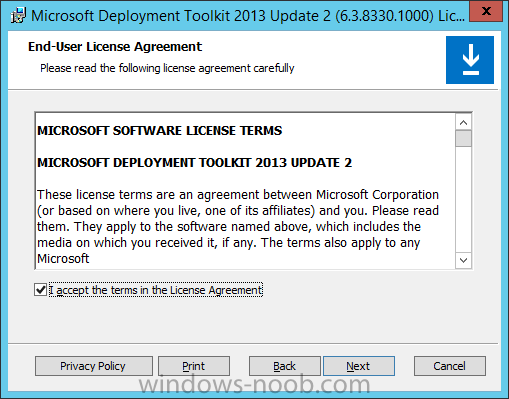
accept the EULA and click next
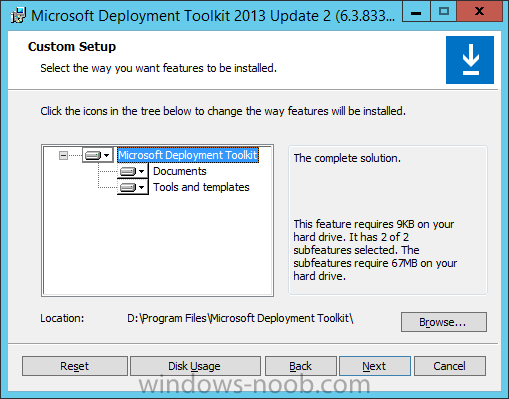
choose where you want to install MDT, for example on D:\Program Files\Microsoft Deployment Toolkit\
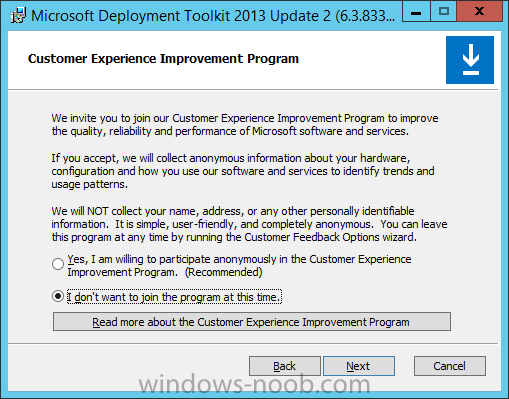
select if you want to participate in the CEIP or not
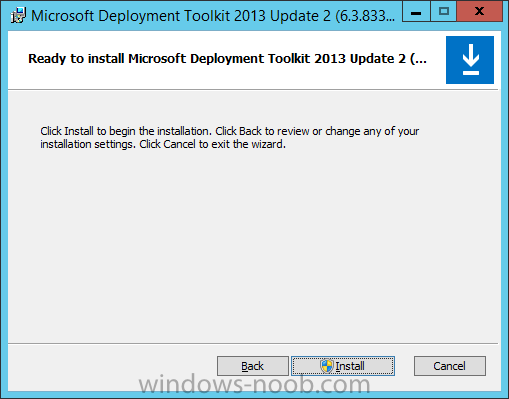
and then click Install and accept the UAC prompt
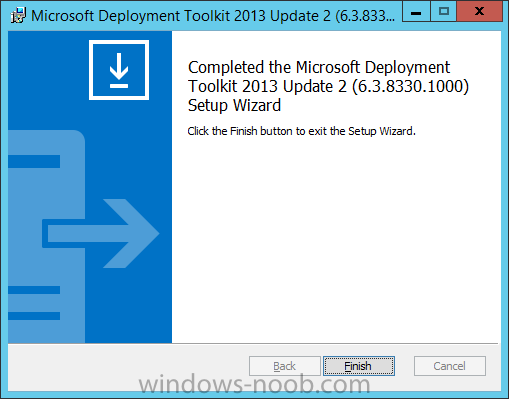
when complete, click Finish to close the wizard
Step 3. Integrate MDT 2013 Update 2 with ConfigMgr
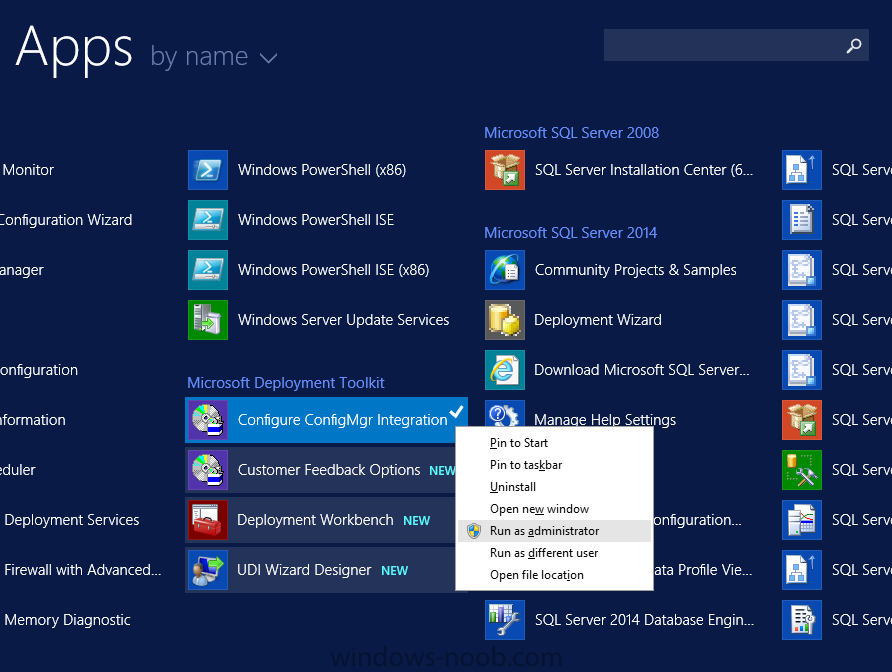
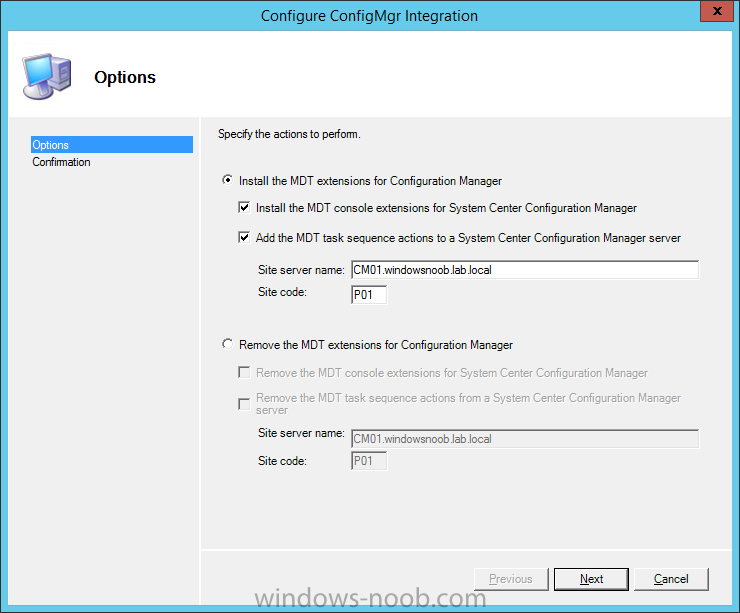
Now that you have installed MDT you should integrate it with ConfigMgr. You do this to gain access to tools and features that MDT provides from within the ConfigMgr console. In the start screen, locate the newly installed Microsoft Deployment Toolkit application group, right click Configure ConfigMgr Integration shortcut and right click, choose Run as Administrator.
The wizard settings will default to Install the MDT extensions for Configuration Manager the first time you run the integration
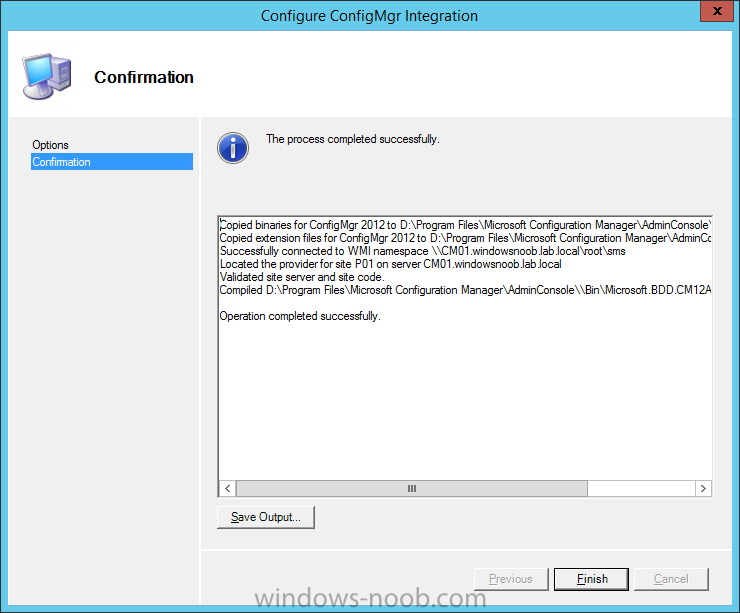
after clicking next you should see output similar to below, if not, make sure you chose Run As Administrator
Note: If the ConfigMgr console was open during this process, close it and then open it again to view the MDT integration.
Step 4. Add the latest Windows 10 Enterprise x64 media
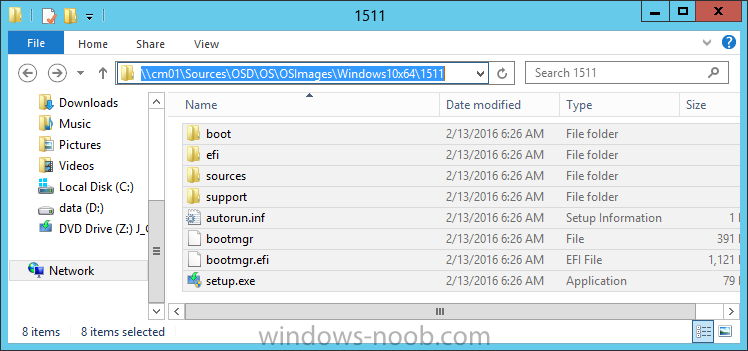
I’d recommend you use the latest Windows 10 Enterprise x64 media from Microsoft Volume License site (or MSDN for a lab). The latest available media is updated with February Cumulative Updates for 1511. Mount the ISO using Windows File Explorer. After mounting the ISO, copy the contents to somewhere useful like:
\\<ConfigMgrServer>\\Sources\OSD\OS\OSImages\Windows10x64\1511
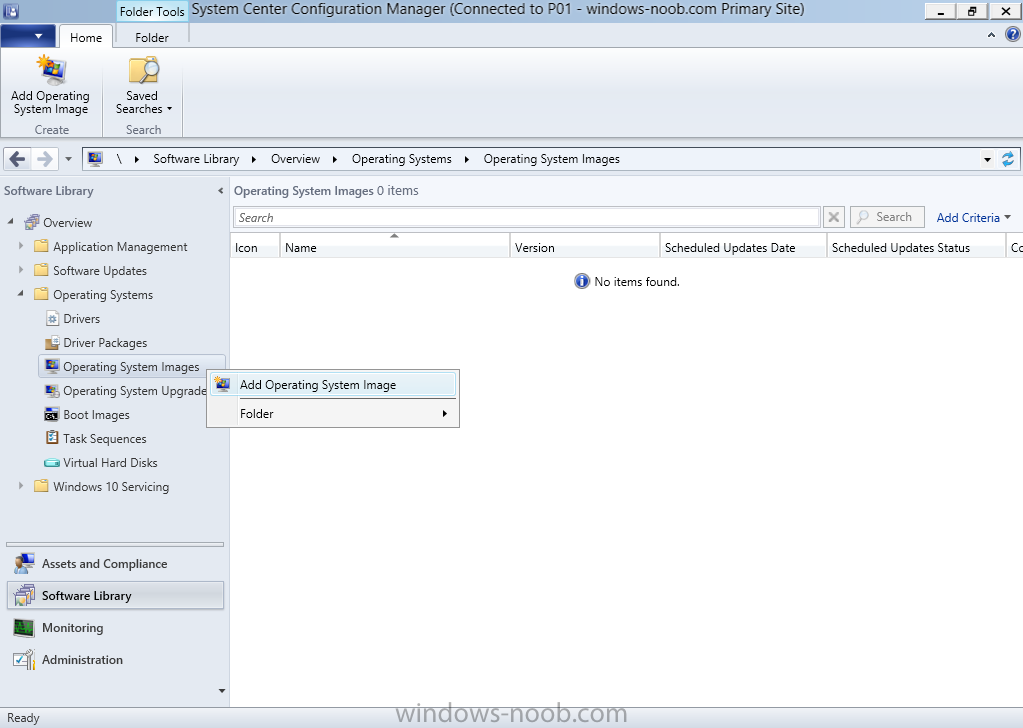
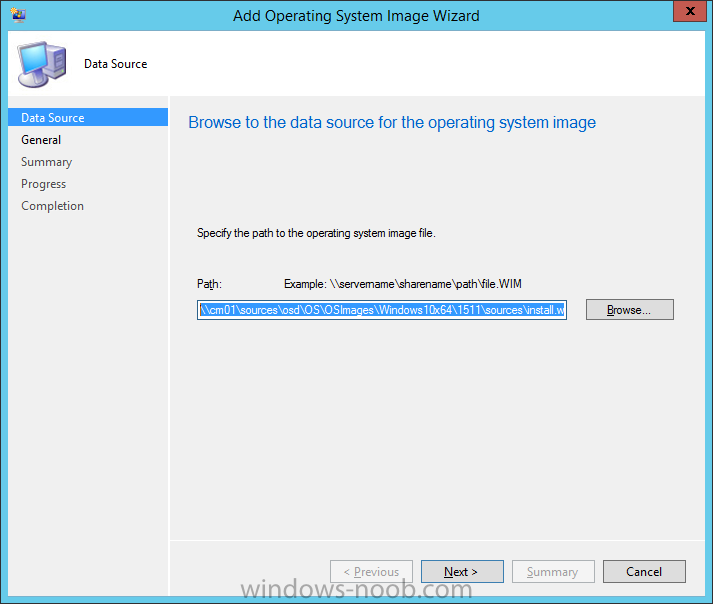
to add the operating system do as follows. In the ConfigMgr console, select Software Library, then Operating Systems then Operating System Images. Right click and choose Add Operating System Image.
Point it to the install.wim file in the sources folder of the Windows 10 Enterprise x64 media you just added
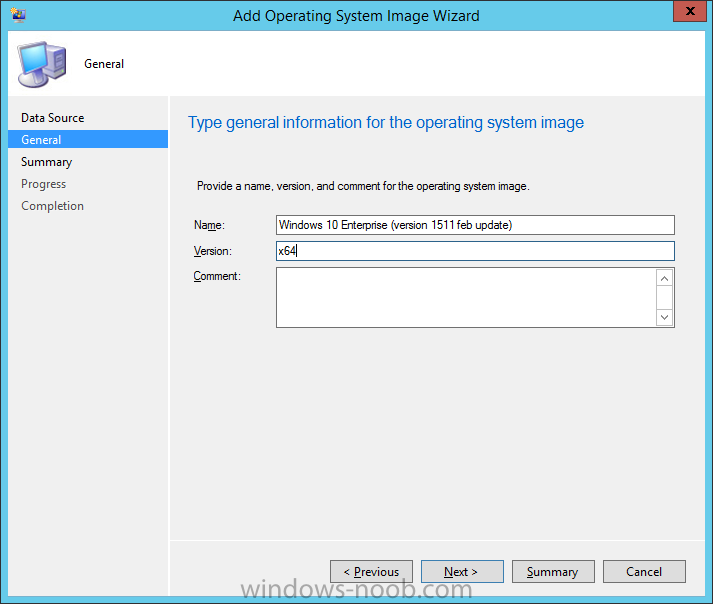
and fill in some details about the image before continuing through that wizard until completion.
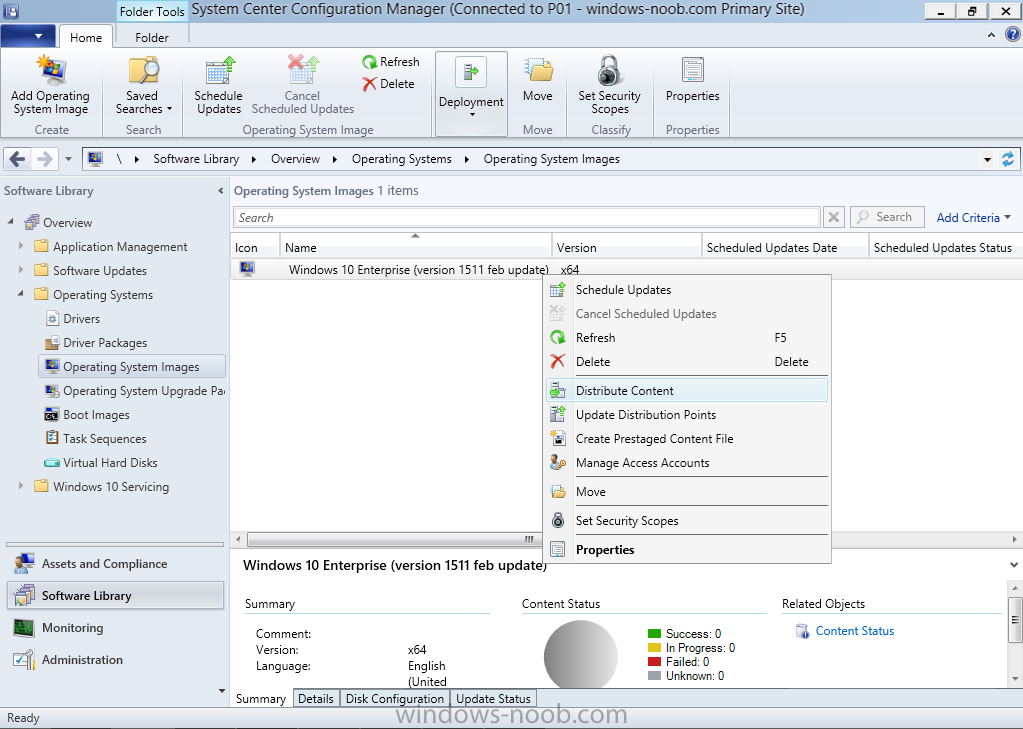
Note: To make the image available on the network, distribute it to your distribution points by right-clicking and choose Distribute Content.
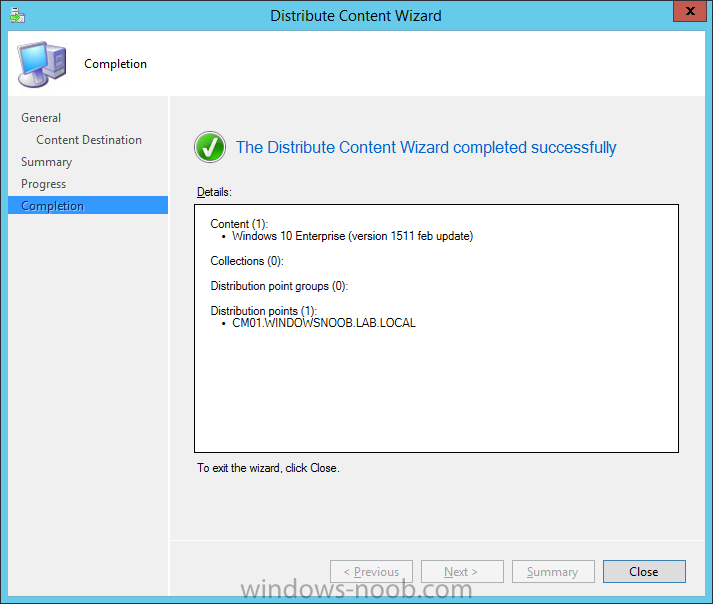
Select one or more distribution points, and continue through that wizard until completion.
Step 5. Configure a Network Access Account
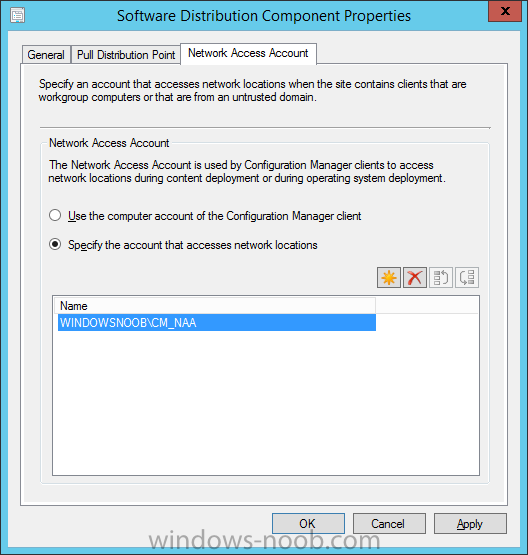
You’ll need to configure a Network Access Account to allow content to be downloaded while in WinPE. To configure the Network Access Account do as follows:
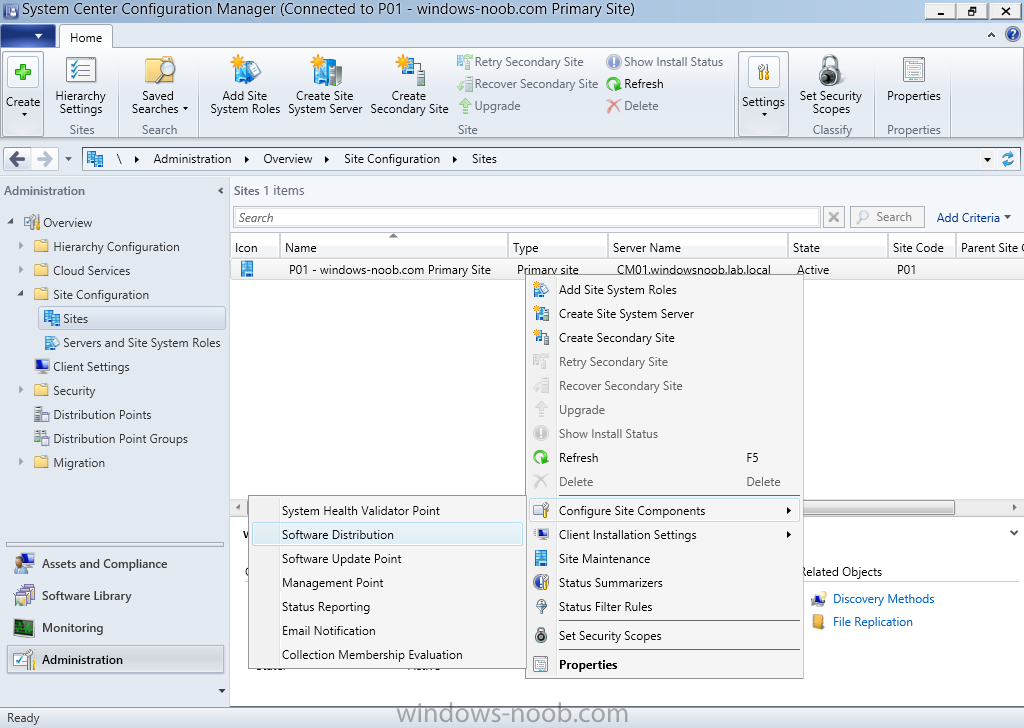
In the ConfigMgr Console, Administration workspace, select Site Configuration then Sites and right click on the Primary site listed (P01). Choose Configure Site Components, then Software Distribution.
then choose Specify the account that accesses network locations, choose New and enter the credentials of the account you plan on using for Network Access.
Apply the changes and close the wizard.
Step 6. Enable PXE support on the Distribution Point
Note: These actions install Windows Deployment Services files to C:\RemoteInstall, if you want to use a custom path or different drive letter then configure WDS manually before enabling PXE. This step assumes you have already configured a DHCP scope and activated it on your Active Directory domain controller.
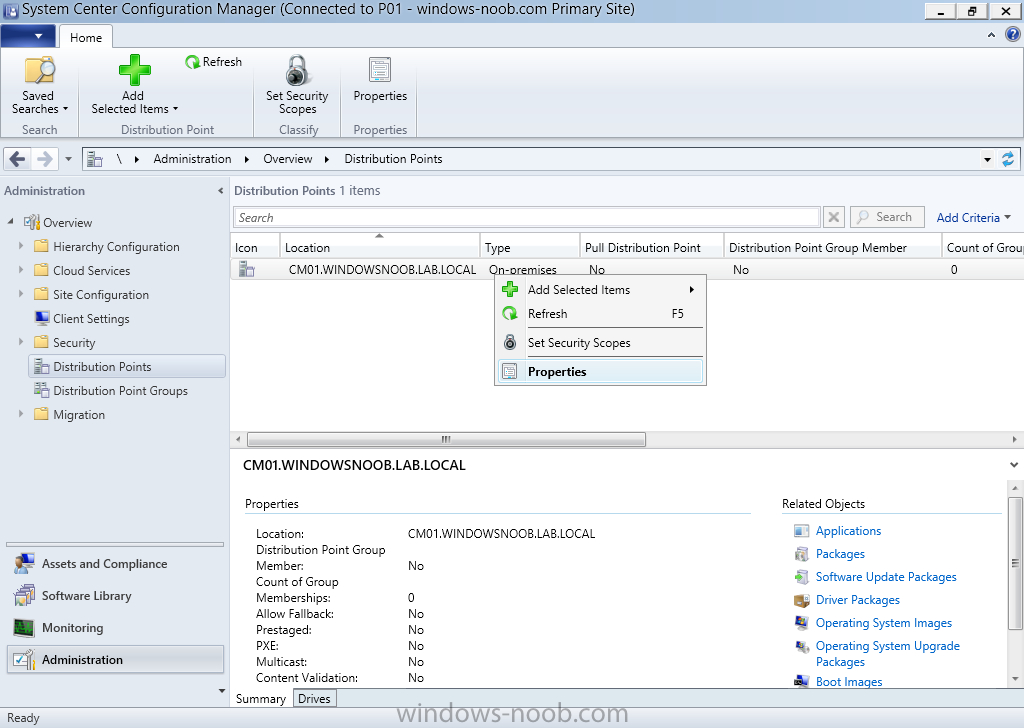
Enabling PXE support on the distribution point configures Windows Deployment Services automatically. To do this, open the Administration workspace and select a distribution point, right click and choose Properties.
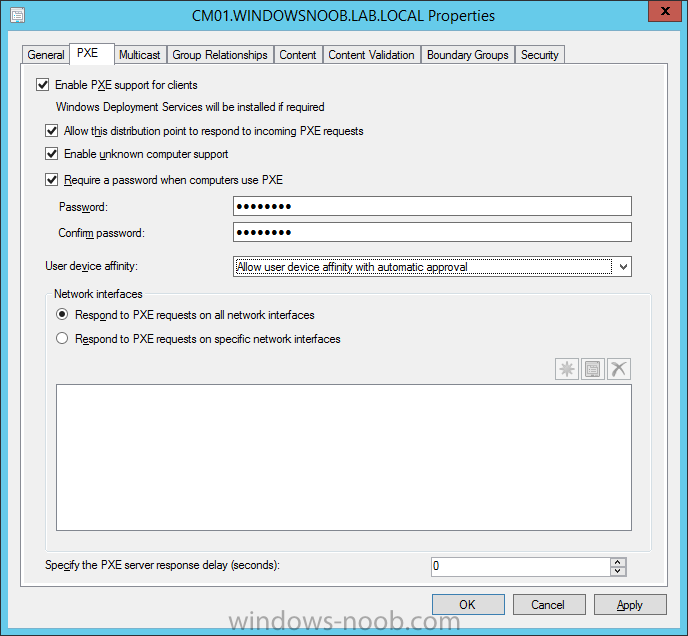
Select the PXE tab and use the following settings:
- Enable PXE support for clients
- Allow this distribution point to respond to incoming PXE requests
- Enable Unknown Computer support
- Require a Password when computers use PXE <P@ssw0rd>
- Allow user device affinity with Automatic Approval
Click Apply when done.
Step 7. Create MDT boot image, MDT Toolkit and MDT settings packages
In order to utilize MDT within ConfigMgr, you need to create a few MDT components namely
- MDT Boot image
- MDT Toolkit Files
- MDT Settings
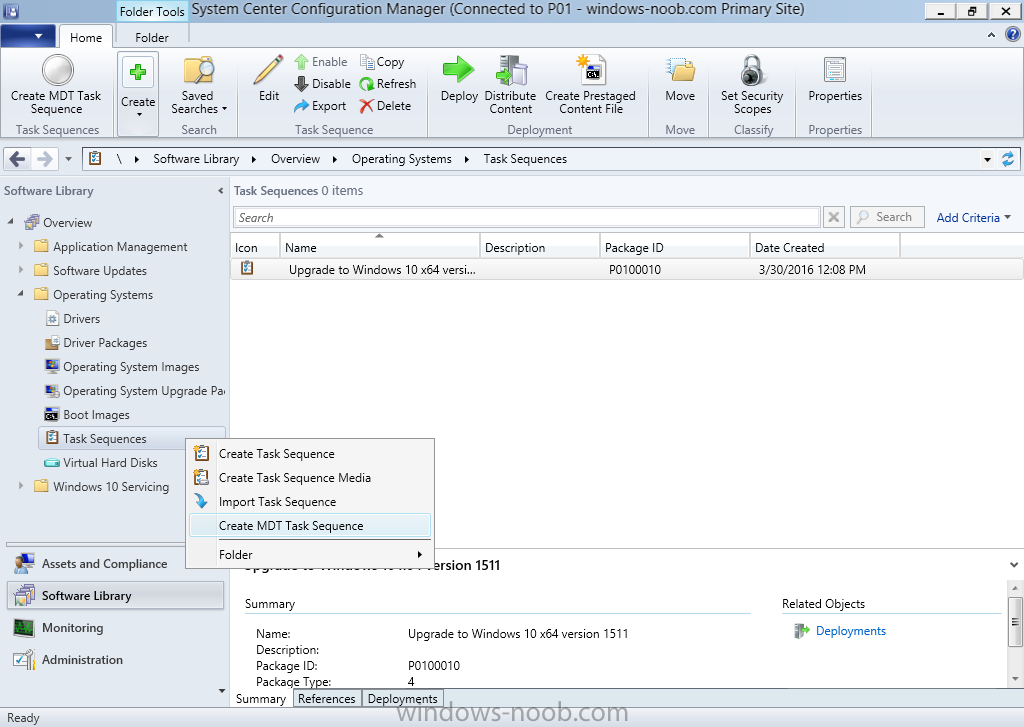
These can be created the first time you create an MDT task sequence. To do that follow this process. In the ConfigMgr console browse to Software Library, Operating Systems, right click on Task Sequences and choose Create MDT Task Sequence.
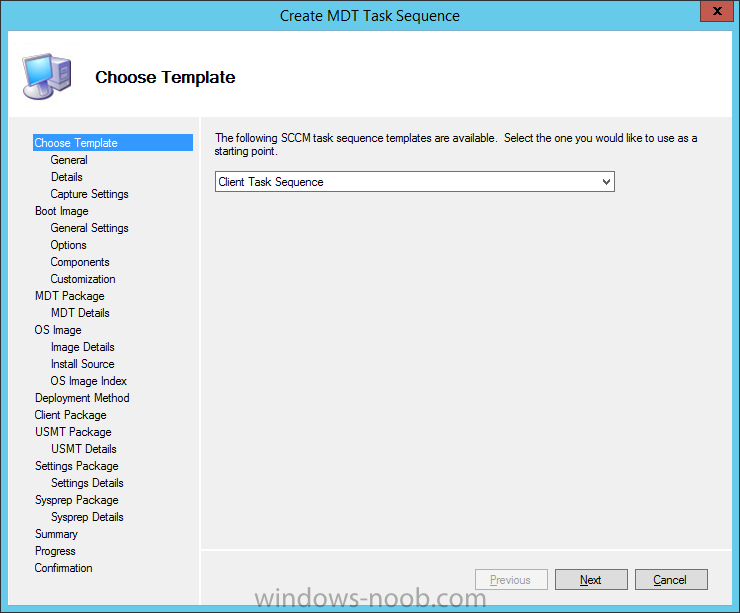
Choose a Template, there are several provided in the drop down menu listed below:
- Client Task Sequence
- Client Replace Task Sequence
- Microsoft Deployment Custom Task Sequence
- Server Task Sequence
- User Driven Installation Replace Task Sequence
choose the default option which is Client Task sequence
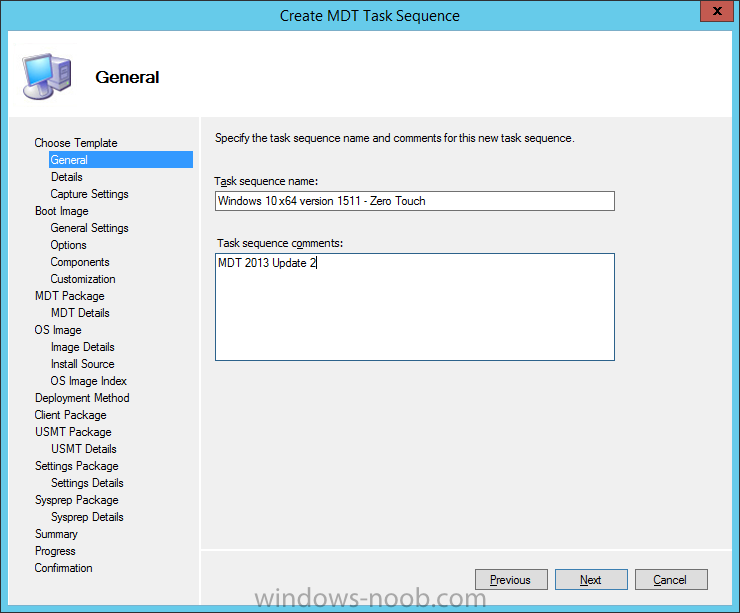
give the MDT task sequence a suitable name
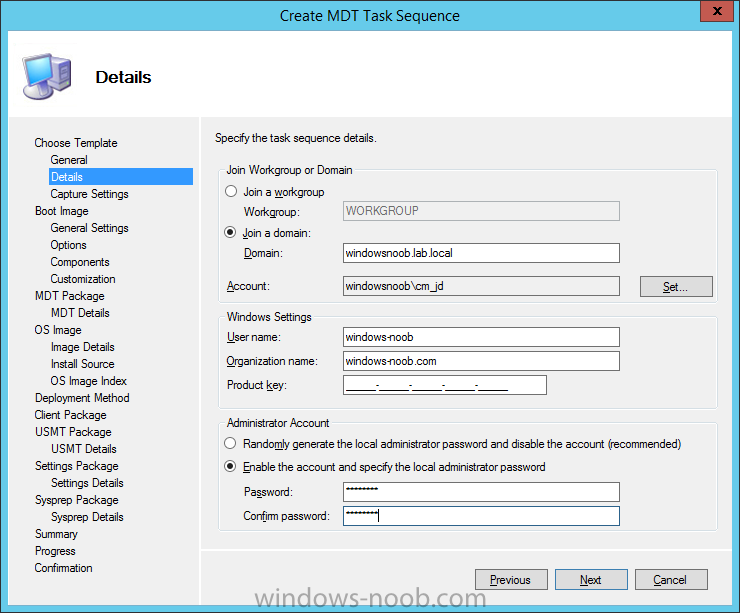
enter domain join details and choose an administrator password
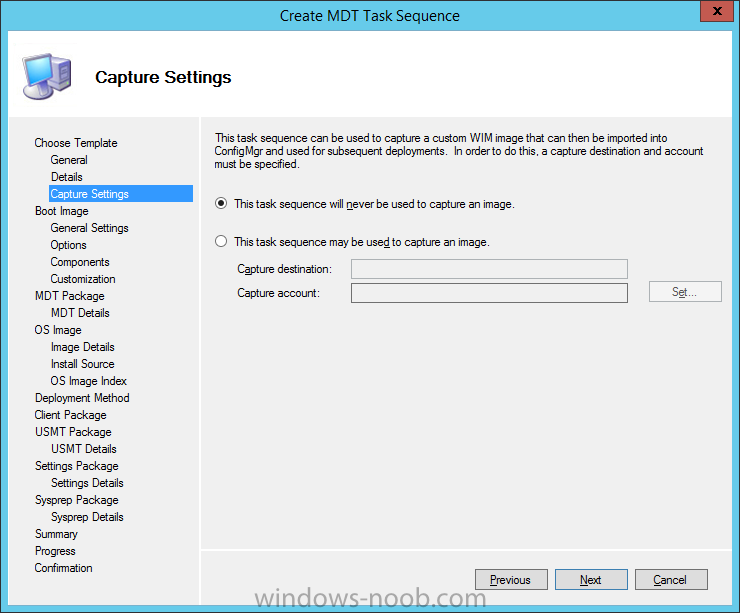
keep the default capture settings
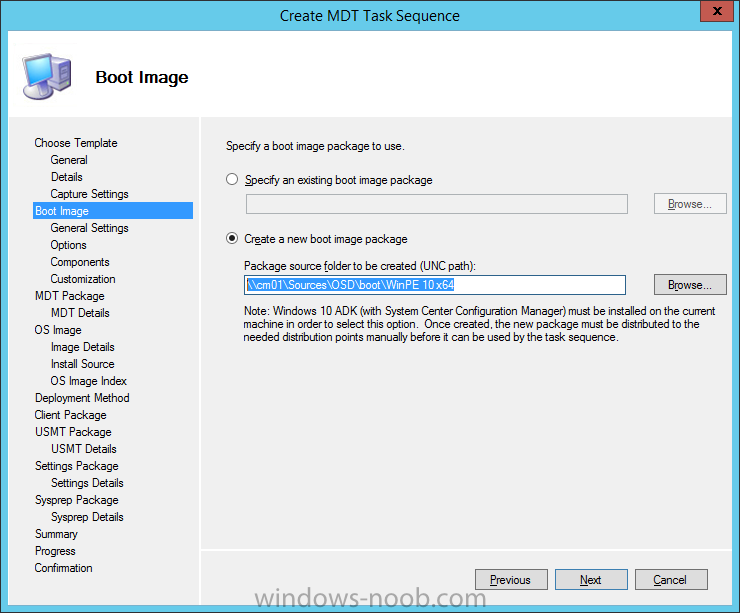
for Specify a boot image package to use, select the second option, create a new boot image package and browse to a previously created empty folder UNC path which contains a folder matching the version of WinPE and the Architecture of the boot image you are about to create, eg:
\\<ConfigMgrServer>\Sources\OSD\boot\WinPE 10 x64
Note: If you used the MDT.ZIP file mentioned in step 1, then this folder will already be present. Also to note, do not place a backslash at the end of the path as ConfigMgr will add that to the path and you won’t be able to distribute the boot wim later.
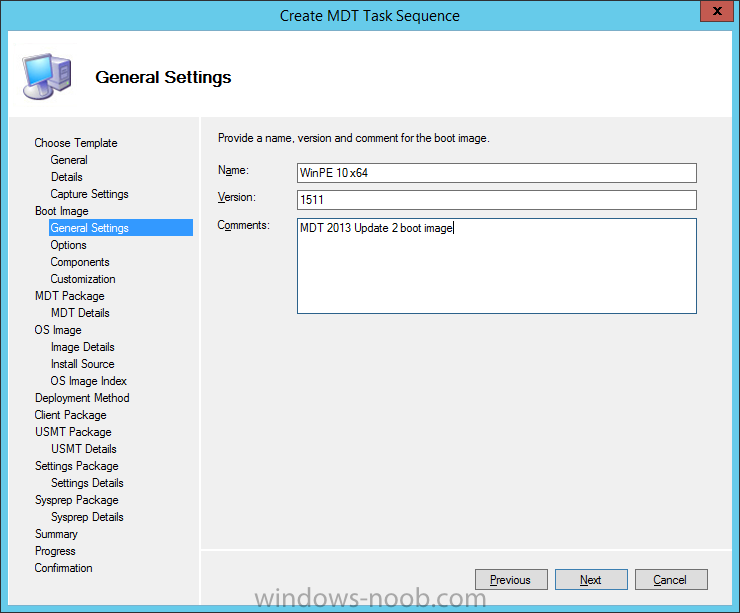
fill in some details about the boot image
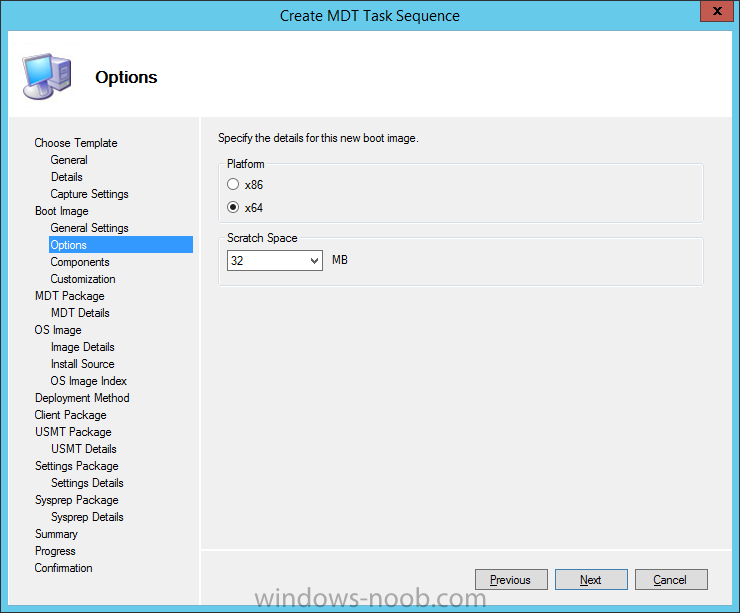
then select the x64 Architecture and scratch space
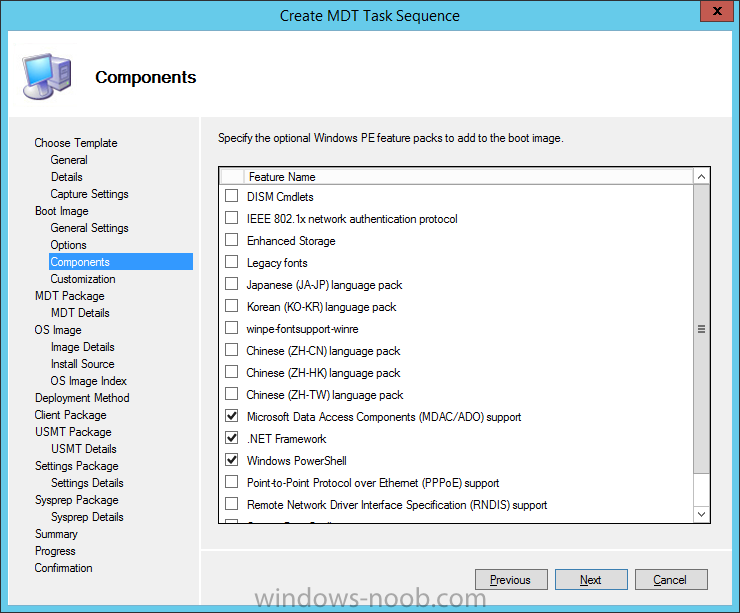
on the Components screen, browse through the list of components you want added to the boot image, for example if supporting Windows PowerShell add it here.
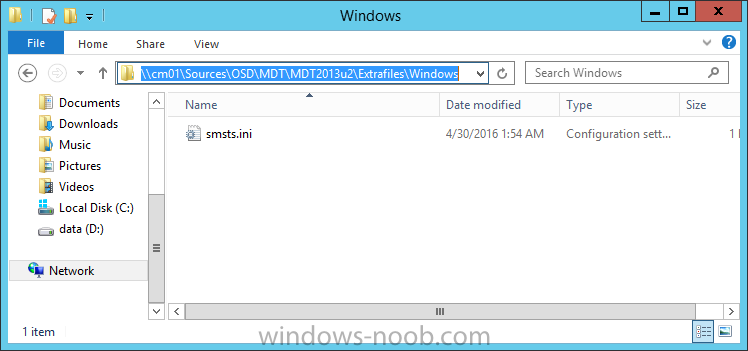
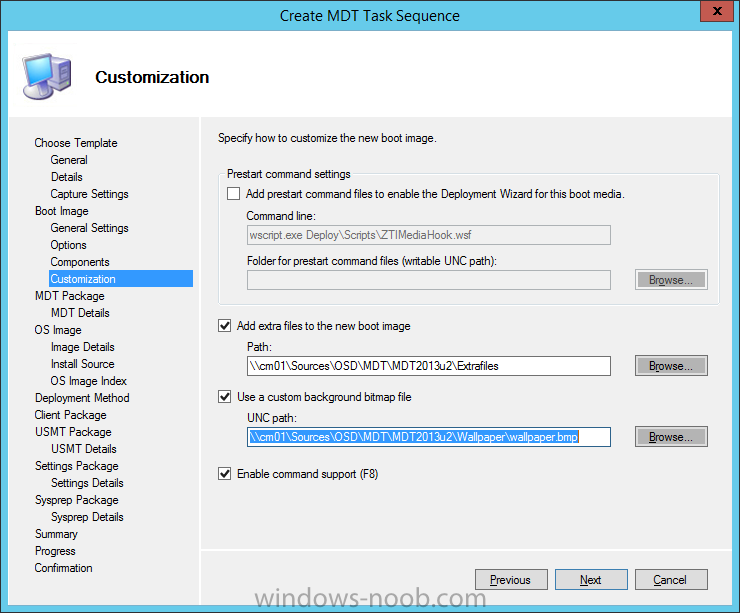
On the Customization screen you get to choose background wallpaper, prestart commands and extrafiles in addition to enabling command support (F8). To enhance the built in logging ability you’ll add smsts.ini via Extrafiles. I won’t go into more detail about that other than to refer you to this post where everything is explained.
Below you can see the smsts.ini file that is copied to an Extrafiles\Windows folder
and in the customization screen, you point to that previously created path
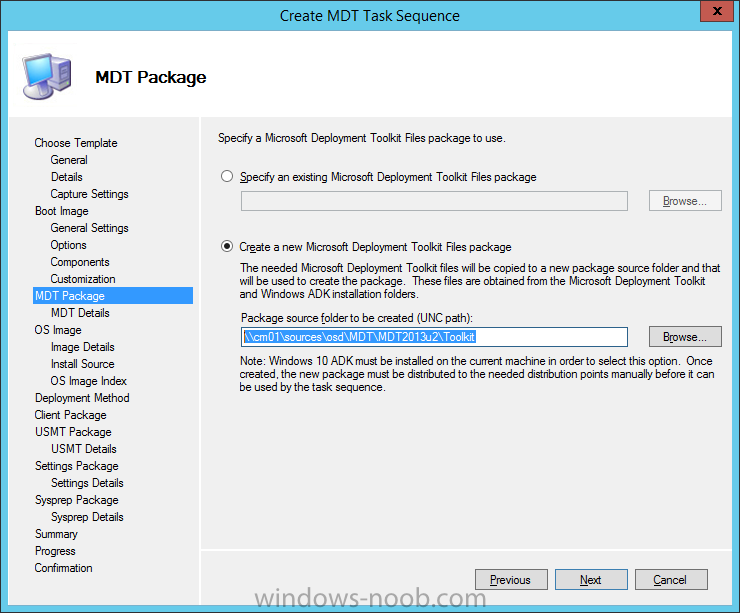
Next you get to create the MDT Toolkit Files package, so select the Create a new Microsoft Deployment Toolkit Files package option, and point it to a previously created path such as below:
\\<ConfigMgrServer>\sources\osd\MDT\MDT2013u2\Toolkit
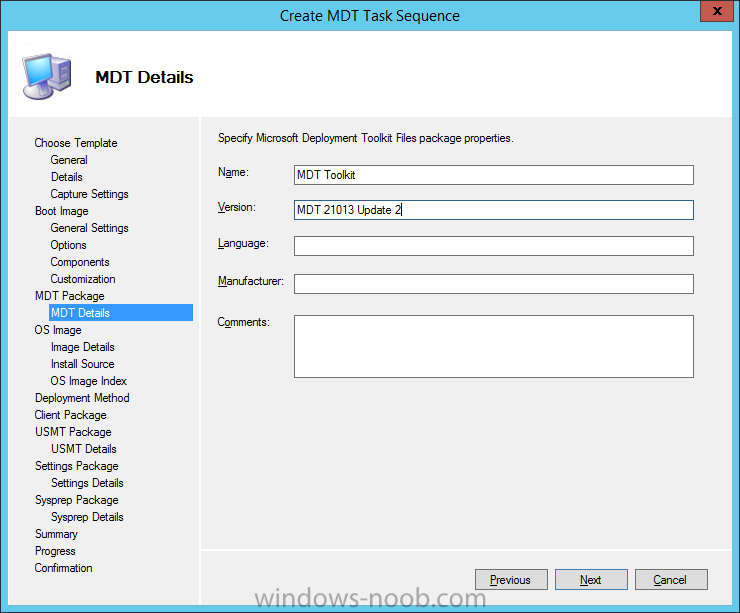
fill in details about the MDT Toolkit Files package..be descriptive as it’s common to have different versions of MDT Files over time
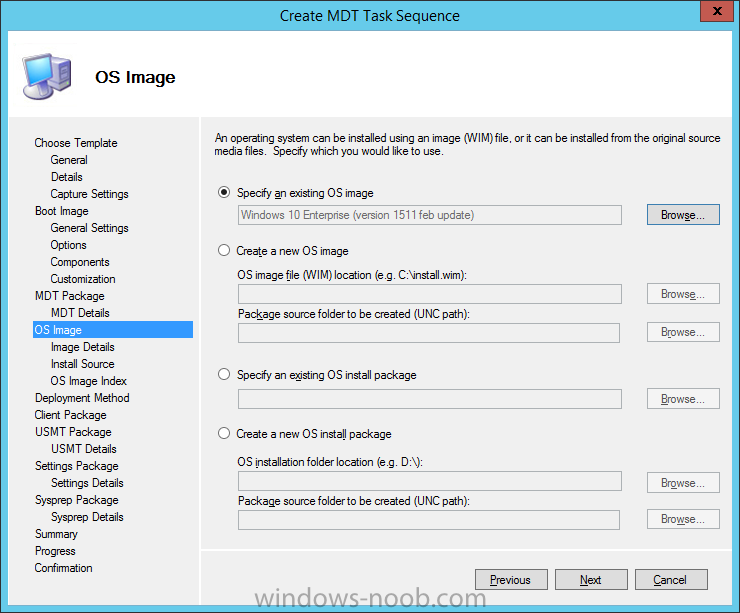
Select your previously added Operating System Image (first option)
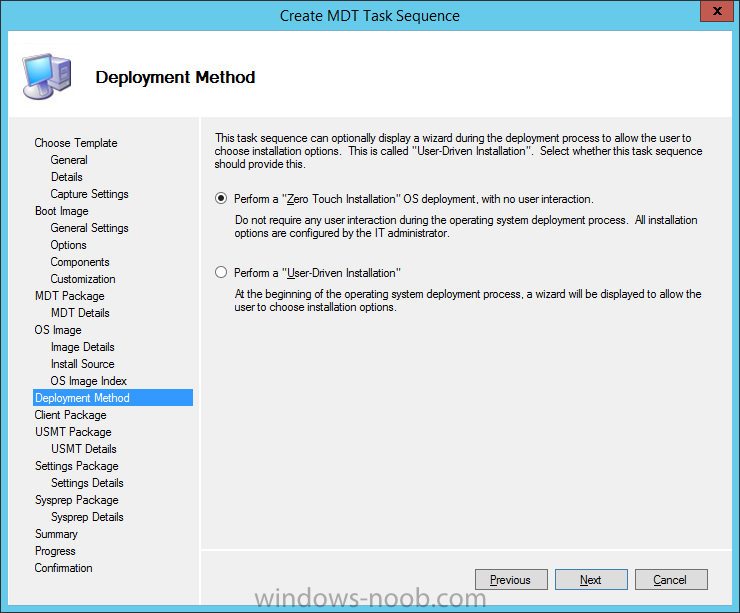
For Deployment Method you get to choose the type of task sequence interaction will be used:
- Perform a zero touch installation os deployment, with no user interaction
- Perform a user driven installation
if you want your users to have choices then select the UDI option, otherwise select the Zero Touch option to remove choices from the task sequence.
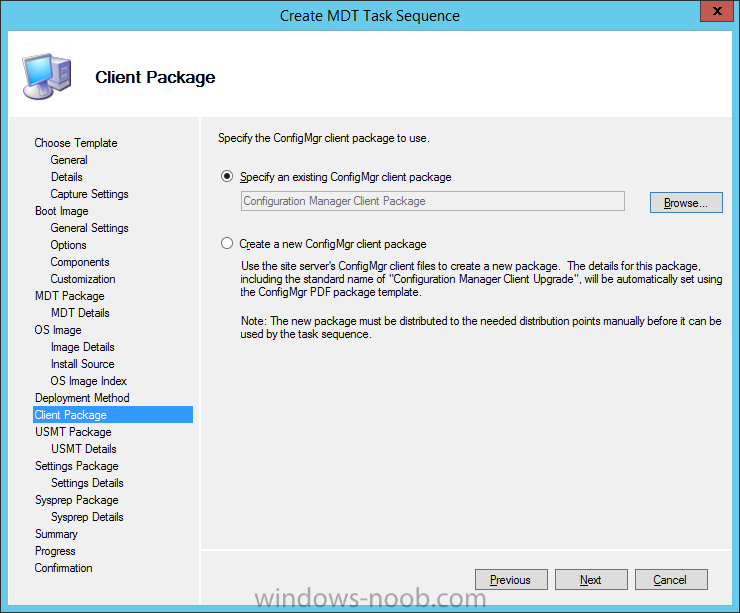
for Client Package, select Specify an existing ConfigMgr client package and browse to the one you wish to use.
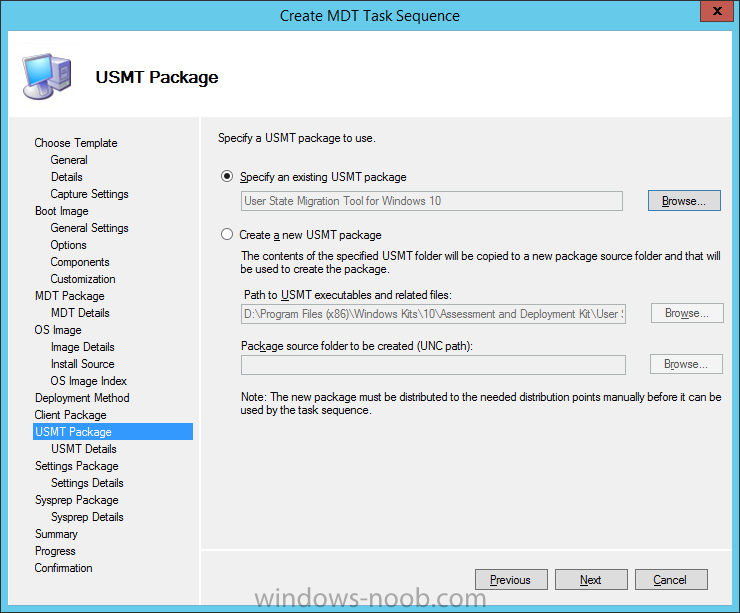
for USMT Package select the User State Migration Tool for Windows 10 package
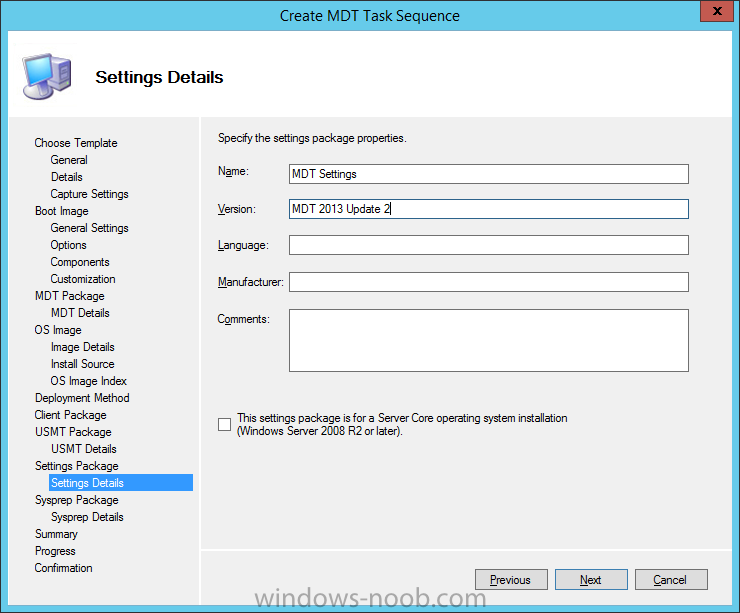
For Settings Package, you need to create a new MDT 2013 Update 2 settings package, therefore select the second option. You only have to do this once for each version of MDT you have installed.
Select Create a new settings package and fill in the path to be created as shown below something like:
\\<ConfigMgrServer>\sources\osd\MDT\MDT2013u2\Settings\
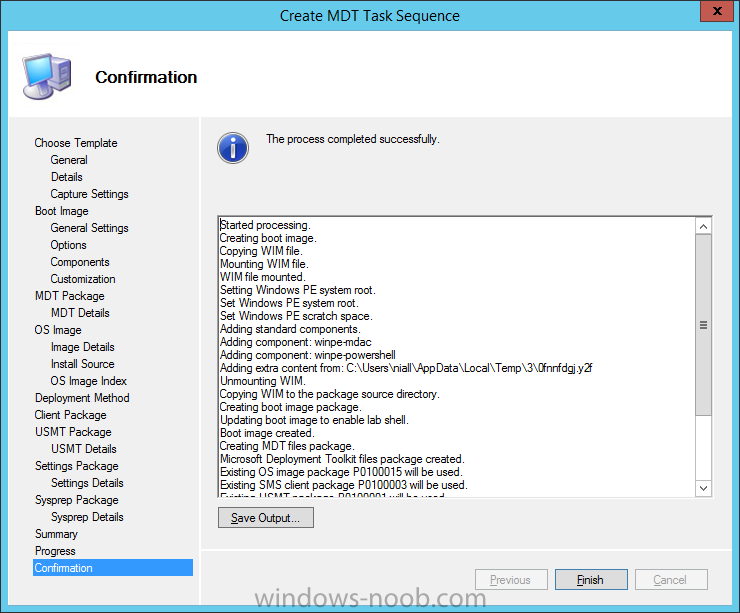
for Sysprep Package, set No sysprep package is required and continue through to the end of the wizard and after a while you’ll get a process completed successfully message.
Note: If you want to create the WinPE 10 x86 mdt boot image, repeat the above, except do not create new toolkit and settings packages, and change the architecture of the boot wim for that step.
Step 8. Distribute task sequence content
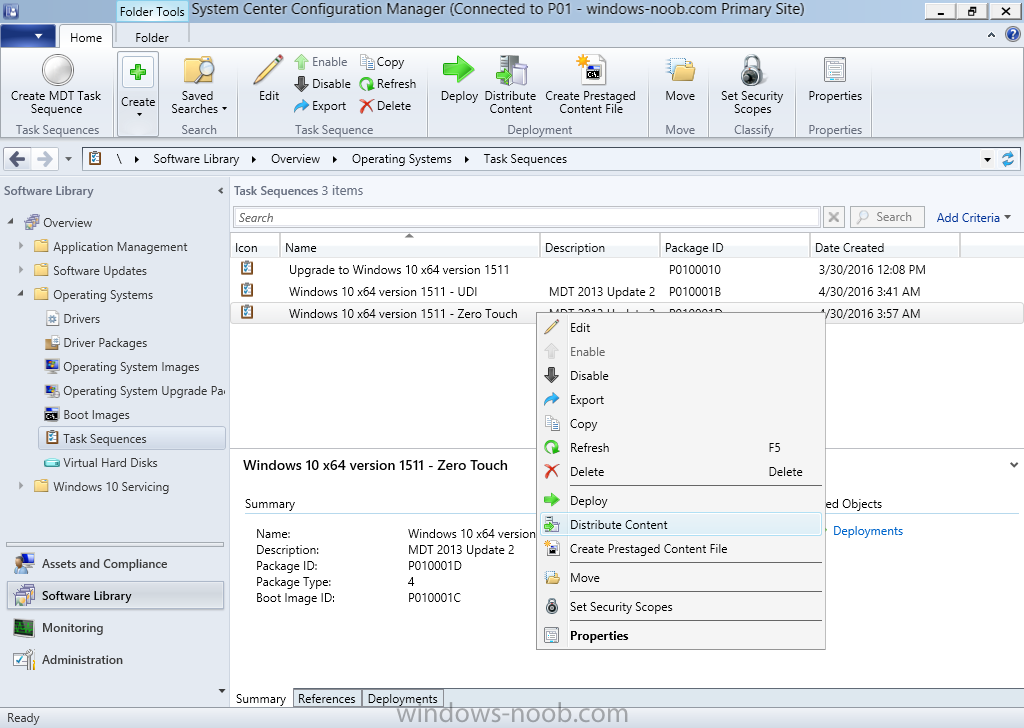
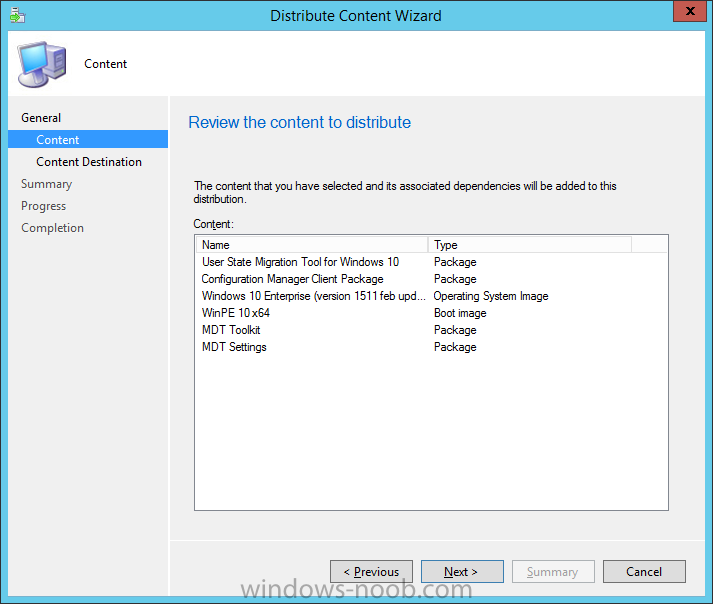
At this point you are nearly ready to start testing, but first you need to distribute the task sequence content to your distribution points, the easiest way to do that is to right click on the Windows 10 x64 version 1511 – Zero Touch MDT task sequence and choose Distribute Content.
the Distribute content wizard appears, listing all the packages in the task sequence
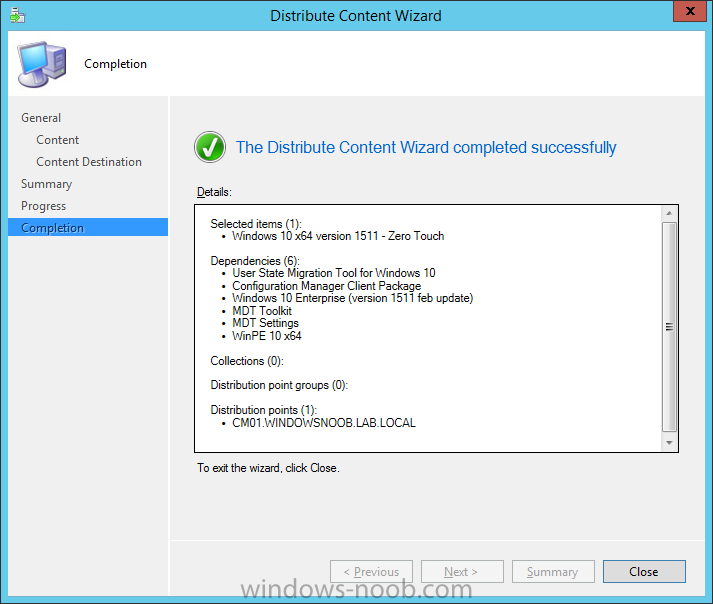
select one or more distribution points by clicking Add and continue through the wizard until completion
Step 9. Enable PXE support for the MDT boot image
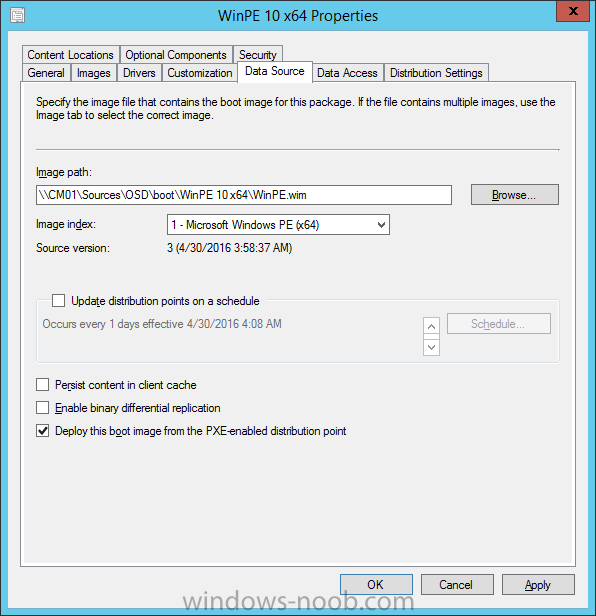
Browse to Software Library, Operating Systems, Boot images and select the WinPE 10 x64 boot image. Right click and choose Properties, and select the Data Source tab. Place a checkmark in Deploy this boot image from a PXE enabled distribution point.
Repeat the above for the WinPE 10 x86 boot image.
Step 10 . Deploy the task sequence
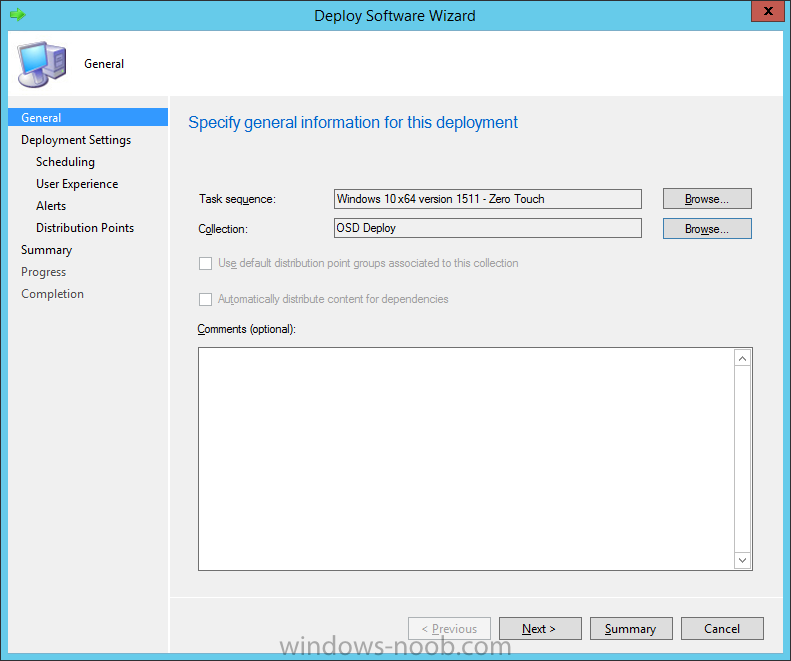
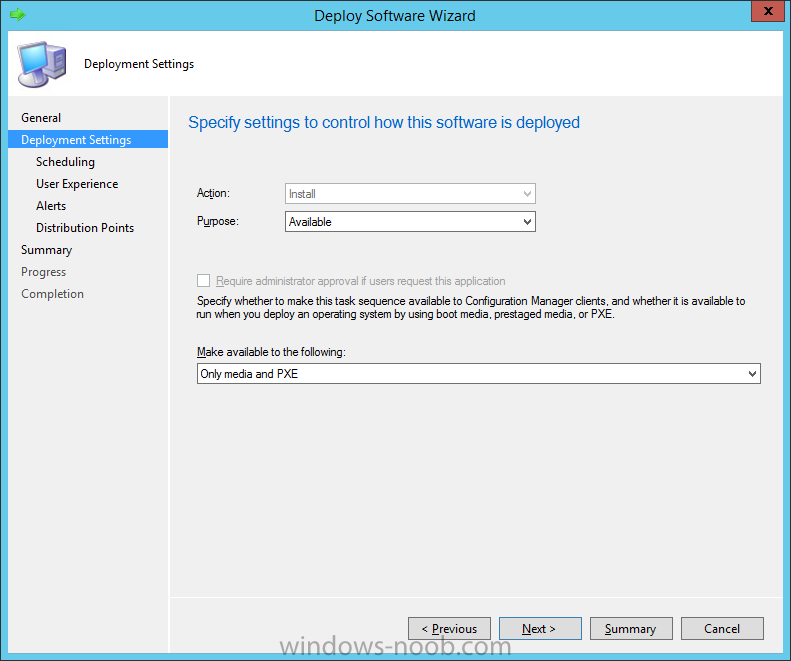
Browse to Software Library, Operating Systems, Task Sequences and select the Windows 10 x64 version 1511 – Zero Touch task sequence. Right click and choose Deploy and use the following settings:
For collection choose the OSD_Deploy collection (created in this guide)
for Deployment Settings make sure it is set to Available and deployed to Only media and PXE
and continue through the rest of the wizard until completion.
Note: The last task sequence deployed (last in, first out or LIFO) will have an effect on which boot image is offered to PXE clients. If you require the WinPE 10 x64 boot image to ‘answer’ your clients, make sure it’s attached to the last task sequence deployed.
Step 11. PXE boot a computer
Now everything is in place for testing a deployment of Windows 10 using an MDT 2013 Update 2 integrated task sequence in Configuration Manager (current branch). Simply PXE boot a computer that is a member of the OSD Deploy collection.
While PXE booting, you can verify that the WIM file it’s pulling down is indeed your newly created MDT 2013 update 2 boot image by looking at the boot image package id.
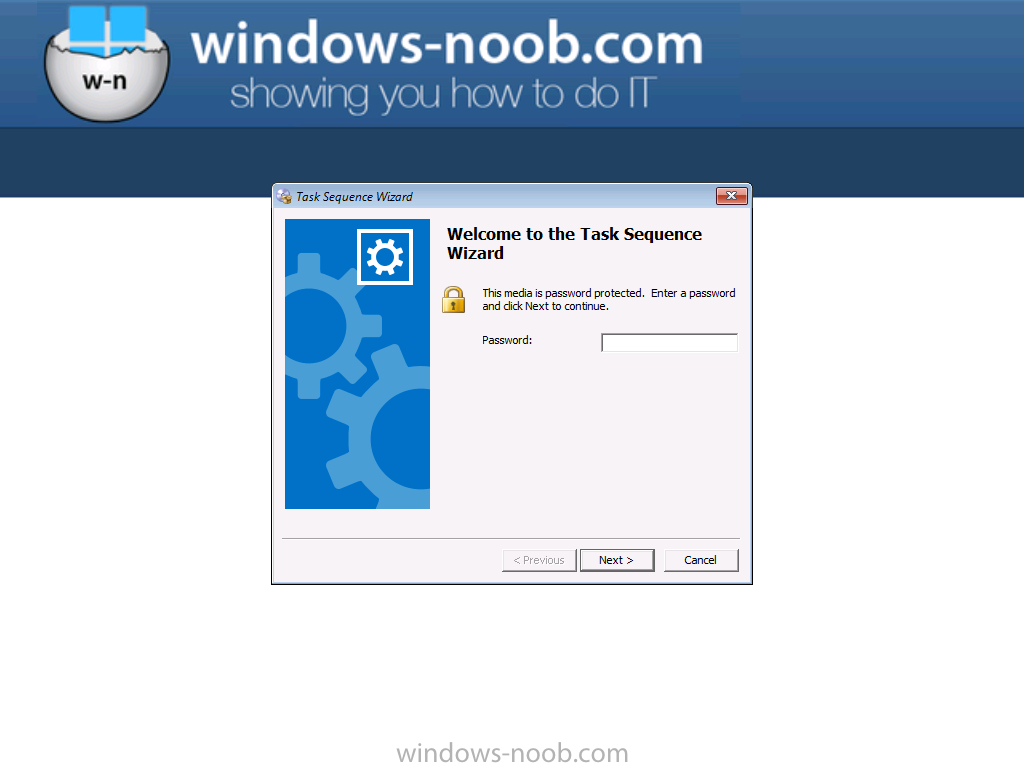
after is has completed PXE boot the custom wallpaper is in place and the PXE password prompt is waiting
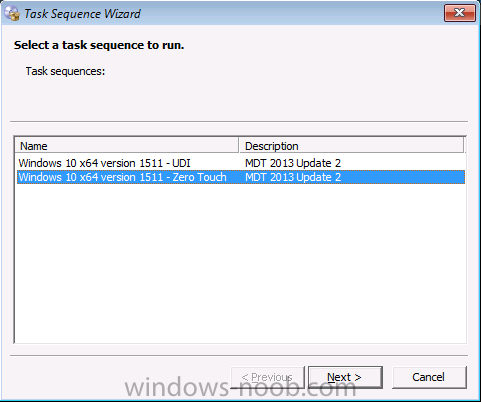
enter the PXE password and choose the appropriate task sequence
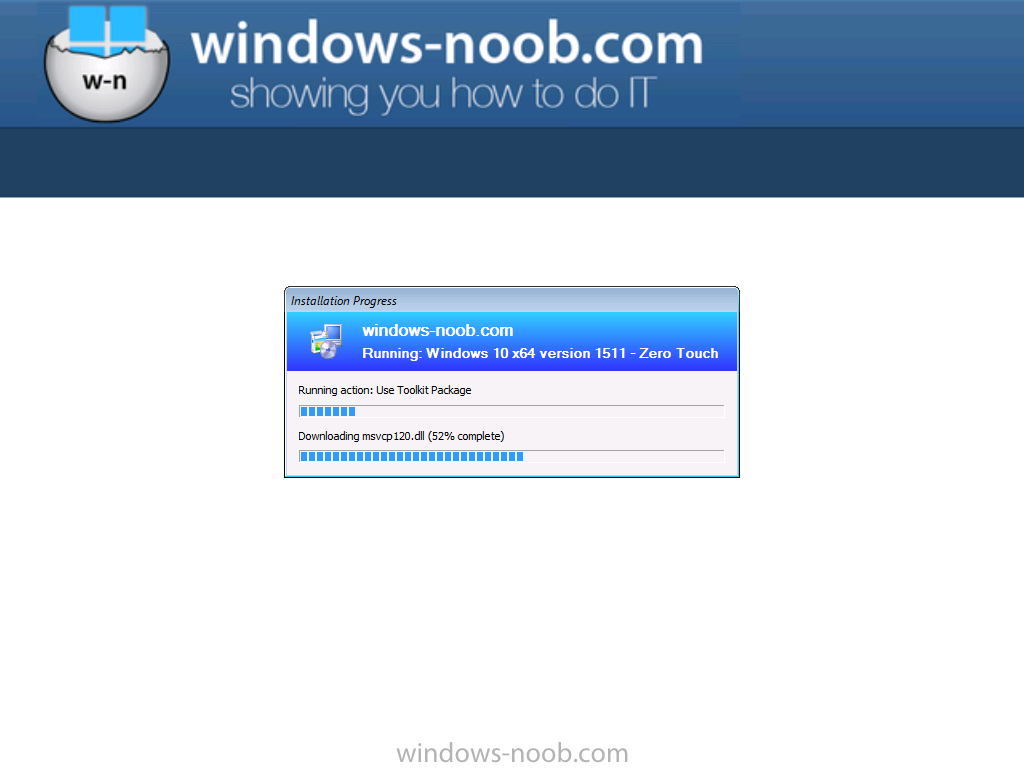
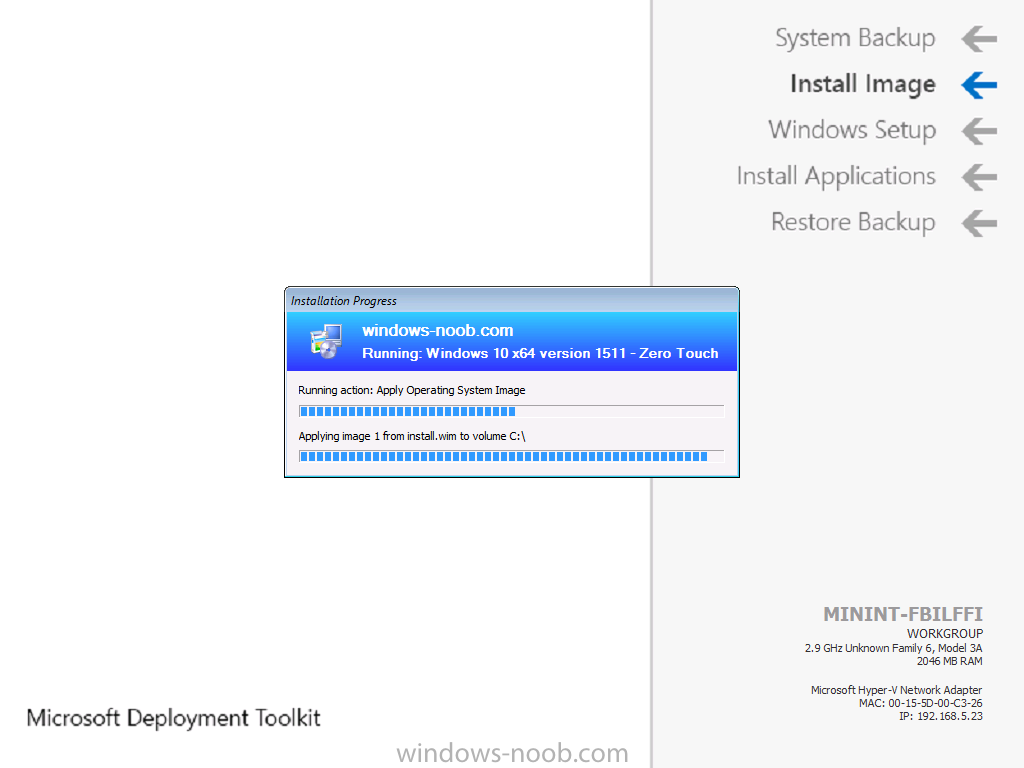
and off it goes…
and you can see the familiar MDT background with information about the stages of deployment
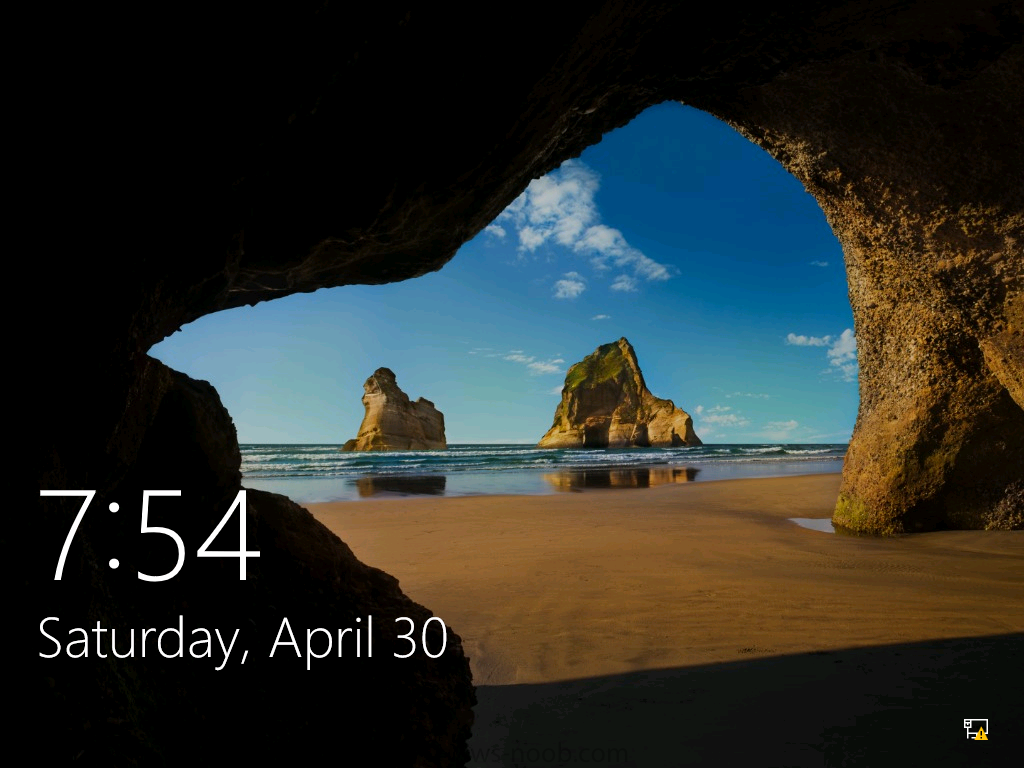
and after a while, it’s all done !
Summary
Using MDT integrated task sequences is relatively easy once you understand what needs to be put in place beforehand. In a later post you’ll see how to use some of the added functionality that MDT integrated task sequences provide within the ConfigMgr console.
Related Reading
- Planning for PXE-Initiated Operating System Deployments in Configuration Manager – https://technet.micr…y/hh397405.aspx
- How to Deploy Operating Systems by Using PXE in Configuration Manager – https://technet.micr…y/gg712266.aspx
- How can I use the Upgrade Task Sequence in System Center Configuration Manager (current branch) ?
- How can I use servicing plans in System Center Configuration Manager (Current Branch) to upgrade Windows 10 devices ?
Downloads
You can download a Microsoft Word copy of this guide here dated 2016/04/30  Deploying Windows 10 with MDT 2013 Update 2 in System Center Configuration Manager (current branch).zip 2.75MB 12 downloads
Download a copy of the MDT files and folders used in the Create MDT task sequence wizard here  MDT.zip 79.25KB 7 downloads




Hi, Thanks so much for good tutorial but i need your help i can’t boot form PXE, i configured DHCP Server with two option 66 with sccm ip and 67 with SMSBoot\x64\wdsnbp.com
but new computers get ip from dhcp and no pxe boot happen !
could you plz help me
can you explain exactly what error you see after you get the ip ?
Hi NCbrady,
the problem was client cannot boot from boot image, it just check pxe boot and proceed to boot from harddisk or cd according to boot menu, i check PXEBoot.log
i found the following data :
– No Advertisements found
– No Boot Action. Rejected
– Not Serviced
i fix the problem when deploy the (TS) i choose custom osd collection created by me and point to all unknown computers. i faced the problem , but if i browse and choose all unknown computers created by ConfigMgr by default, client boot normally without any problem, but till now i can’t found any explains how this happen while i point to all unknown computers when i create custom collection.
another request, could you plz guide me to use MDT Task Sequence to upgrade an exist windows 7 pro to windows 10 ! i mean i want to boot to pxe boot in a machine windows 7 have domain users profiles then backup profiles using usmt > install windows 10 > restore user profiles ( this is the required scenario from me)
please note that i tried to use the same TS created in this tutorial but when i proceed to windows 7 client and use pxe boot i got this error msg
(there is no task sequence available for this computer )
but if i use this tutorial in a new machine hard disk is not partitioned the installation successful install windows 10 .
thanks again and i’m waiting your reply