Introduction
I’ve been working on a blog post (coming soon) about how to install Windows 10 Language Packs offline in an MDT integrated task sequence in System Center Configuration Manager (current branch). The problem was, they were not installing for me in one of my two labs (CM12R2SP1CU3 versus CM Current Branch 1602) and I couldn’t for the life of me figure out why as there were no logs to help troubleshoot (more about that later).
Problem
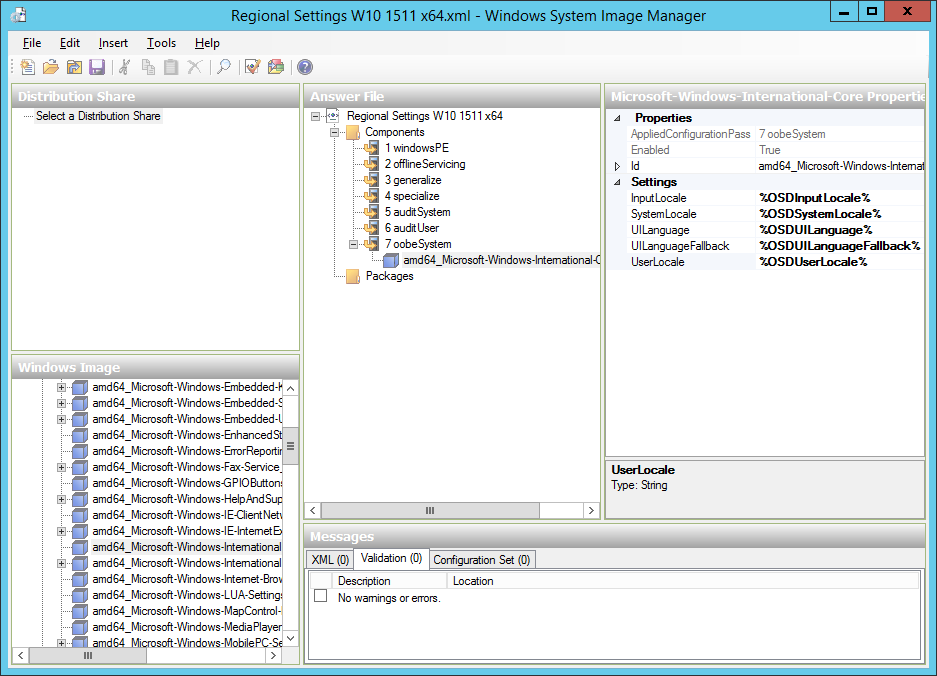
In order to install language packs offline you need to do a few things, one of which is define some variables in your custom unattend.xml file using Windows SIM (part of the Windows ADK). I created this XML file with Windows SIM from ADK 10 version 1511.
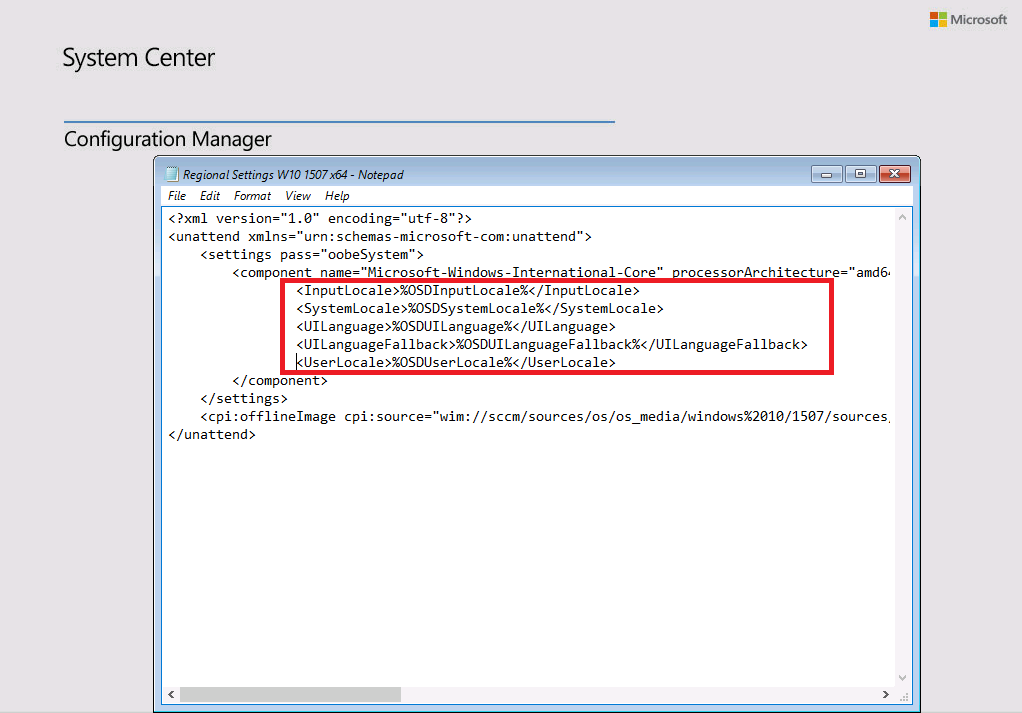
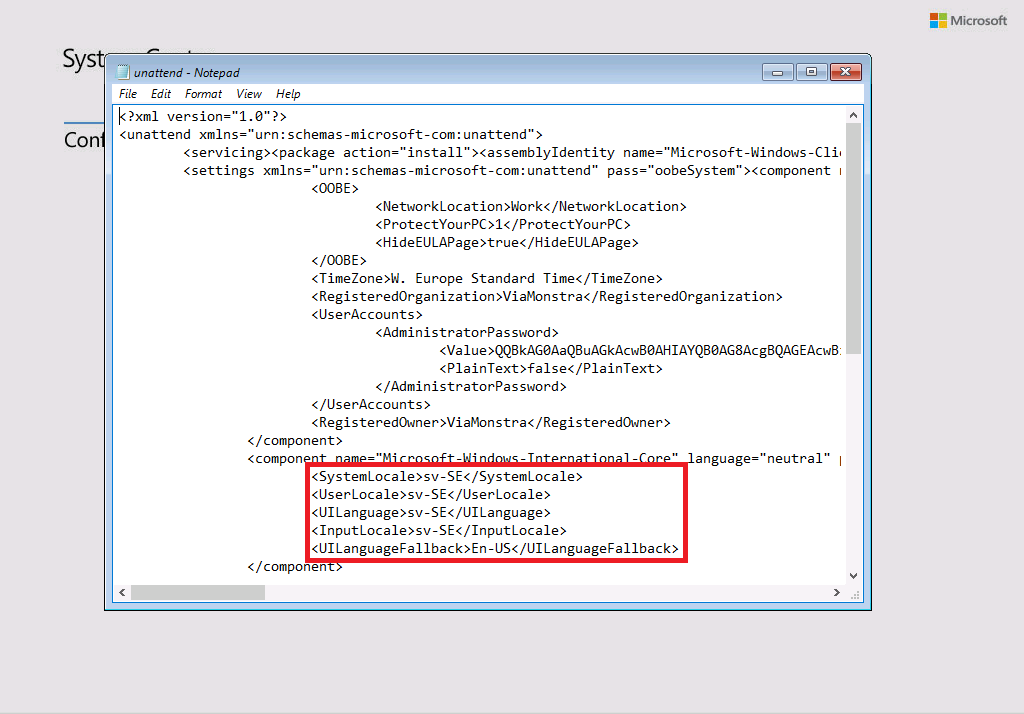
The generated file (see screenshot below) can later replace the variables with actual values such as sv-SE or en-US.
The unattend.xml is parsed and used by a number of steps in the task sequence including:
- Apply Operating System Image
- Apply Windows settings
- Apply Network settings
- Setup Windows and ConfigMgr
The problem becomes evident after the Setup Windows and ConfigMgr step, as the variables you originally added to your unattend.xml file are not changed even though the language pack servicing change is added to the unattend.xml file.
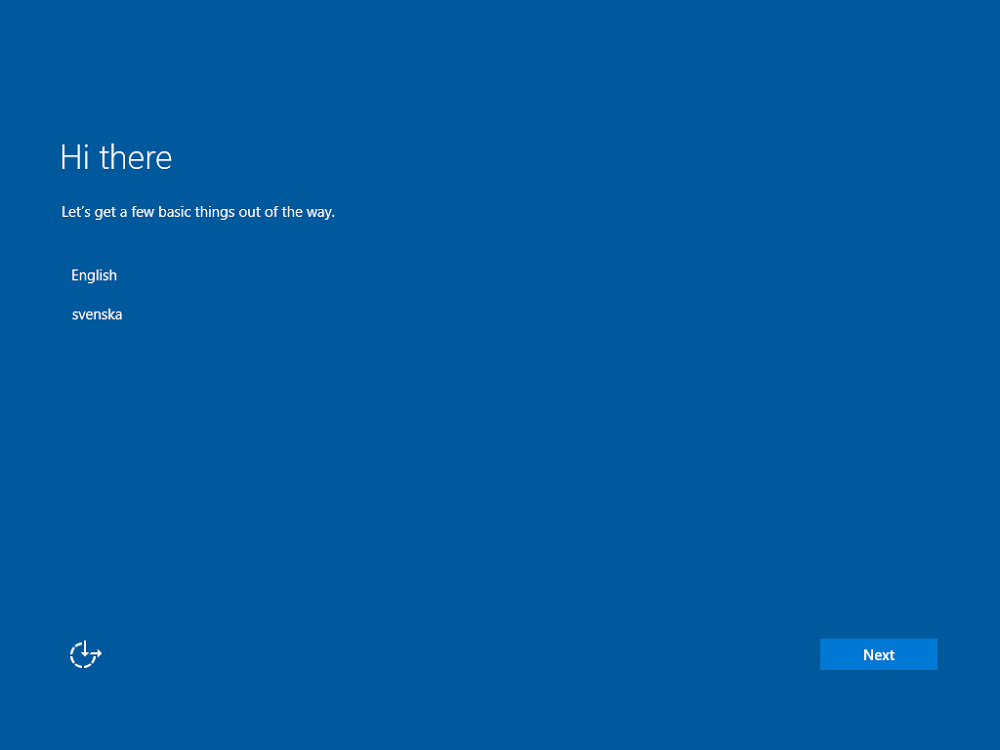
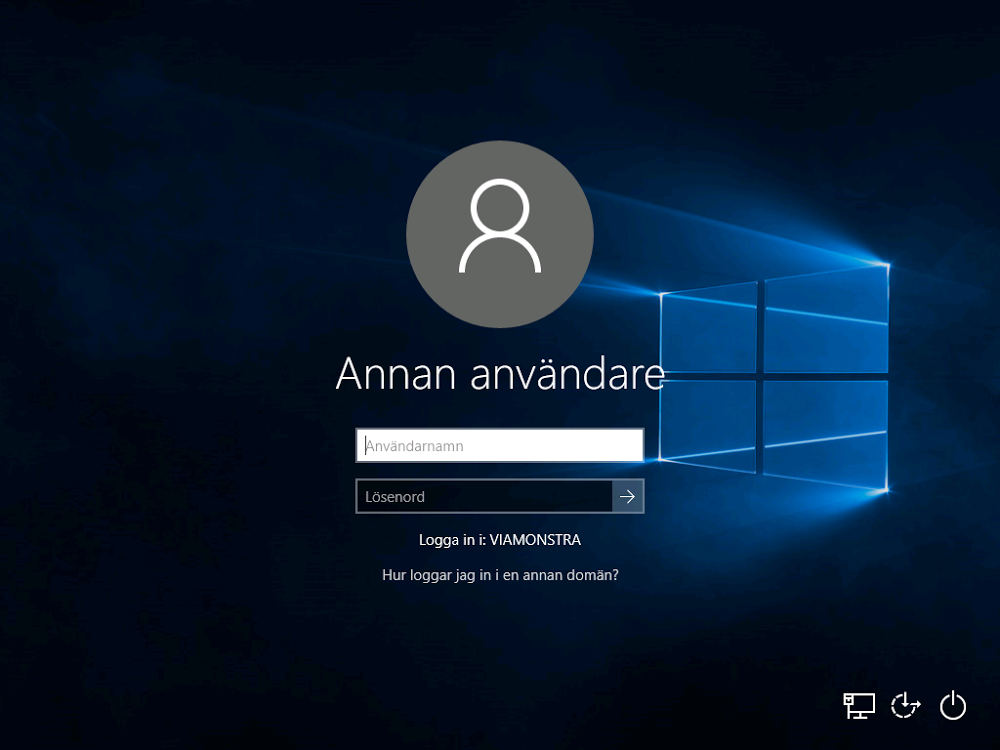
As a result of the variables not getting changed, after the initial reboot you’ll get prompted to select a language by Windows setup such as in the screenshot below:
Obviously you don’t want Windows setup prompting you, and after you click next Windows setup may complete but the following will occur:
- No Configuration Manager client agent is installed
- The Task Sequence exits
- Remaining task sequence steps are ignored
- No SMSTS logs (or related) to troubleshoot the issue
In other words, miserable failure.
Solution
Rather than bore you with details of the countless hours I spent testing this I finally determined that the steps in my task sequence were all good, my language packages were good,and the unattend.xml file that I created in Windows SIM was created correctly.
Yet of the two XML files I had, one was working and the other was not, they looked identical (except for the offline WIM image they were referencing).
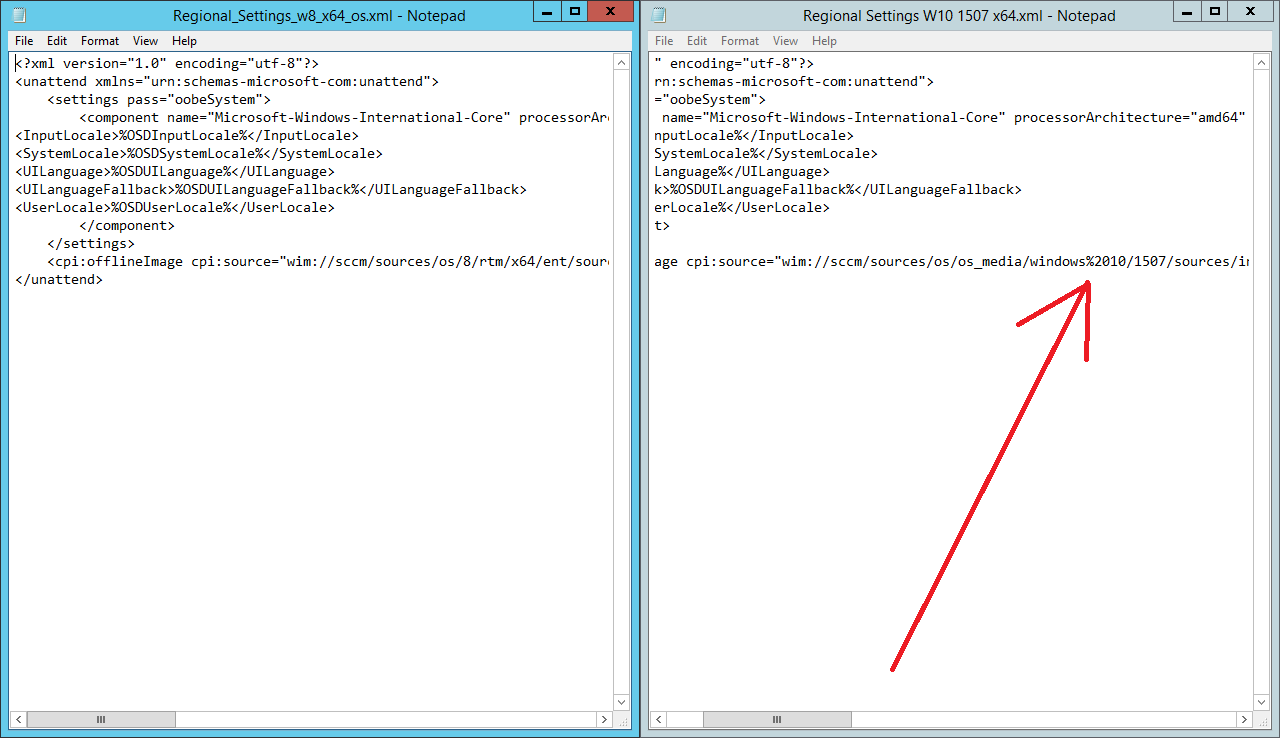
Below you can see the two unattend.xml files, the working one is on the left, and a failing one on the right.
The difference ? well the folder path that I saved the Windows 10 media on the server included one or more spaces, and Windows SIM inserted a %20 to replace that space as shown in the screenshot above.
Stranger still, it didn’t bother inserting any %20 for the spaces in the Windows 10 Enterprise name.
The fix
To fix the problem do as follows:
- Open your custom unattend.xml file in notepad (or your favorite text editor)
- Locate and remove any %20 in the following line: <cpi:offlineImage cpi:source
- Save the file.
- Update the package containing that file to your distribution points
Tip: In addition, from this point forwards it’s probably wise to use Windows SIM with media mounted in a folder that doesn’t contain any spaces.
After applying the fix the variables will get populated correctly directly after the Setup Windows and ConfigMgr step (before that step reboots into Windows setup) as shown below:
Note: You will also see the same problem if your %OSDUILanguage% variable is not set correctly
Windows language packs should now install as expected.
I hope this helps someone with the same issue as it was bugging me for a few days over the weekend. Thanks also go to Aaron and Michael for assisting with the troubleshooting.
cheers
niall.



Pingback: SCCM: install Windows 10 language packs offline with an MDT Integrated Task Sequence in SCCM CB | IT Consultant Everyday Notes
Pingback: SCCM – Apparition d’une invite lors du déploiement des modules linguistiques – L2T
Good article, but can you explain how to view unattend.xml whist in WinPE via notepad? Where is unattend.xml located X:\blah\blah? Thanks.
You can press F8 in WinPE and browse to the locations below and use notepad to examine the changes to the unattend.xml file.
Note: The unattend.xml file and/or C:\Windows\Panther\Unattend folder may not appear in your image until directly after the Apply Operating System Image step and the contents of that file depends on whether or not an unattend.xml file was specified in that step.
Before the Setup Windows and ConfigMgr step is complete you can monitor C:\Windows\Panther\Unattend\unattend.xml to see what is happening in relation to your modifications taking place or not
Note: The above locations are during the WinPE phase. After the Setup Windows and ConfigMgr step is complete it will reboot your computer (unless you have a command prompt open in WinPE), and after that reboot, the unattend.xml file will have been removed (by the Setup Windows and ConfigMgr step).