In Part 1 of this guide, you learned about the features available in the CM12 UEFI BitLocker FrontEnd HTA, in this part you will learning about installing it in your environment. However before you start make sure to fulfill the requirements listed below first.
Step 1. Fulfill these Requirements first
There are some requirements however, therefore before continuing this guide I will assume that you have:
- Integrated MDT 2013 with Configuration Manager 2012 R2
- Installed and configured MBAM 2.0 or later
- Installed and configured Maik Kosters 7.3 web services
If you have not done the above yet, then do so, below are some links that should help you accomplish those tasks.
Integrate MDT 2013 with Configuration Manager 2012 R2 – Guide
Install and configure MBAM 2.0 or later – Guide 1, Guide 2.
Install and configure Maik Kosters web services – Guide (don’t forget to install ASP.NET 3.5 and associated ISAPI extensions)
ok once the above is done we’ll extract some files, create some packages and import the task sequence before satisfying the dependencies within it.
Step 2. Extract the downloaded files
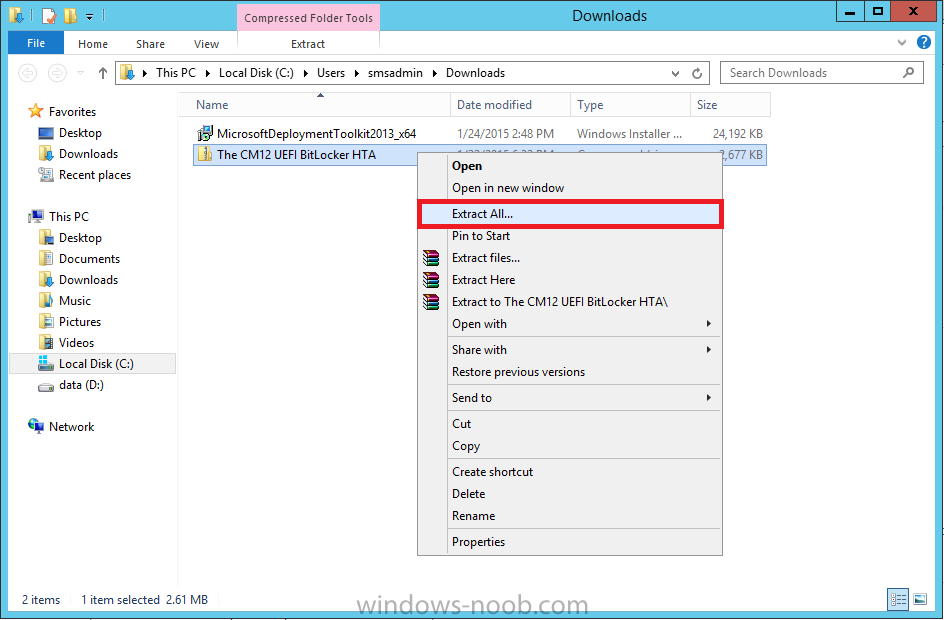
In part 1 you downloaded the CM12 UEFI BitLocker HTA and now you need to extract it. Right click on the downloaded zip file and choose Extract All.
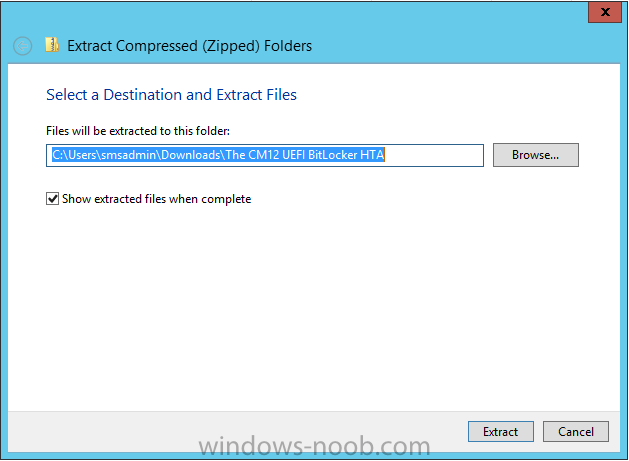
Select a destination for the extracted files
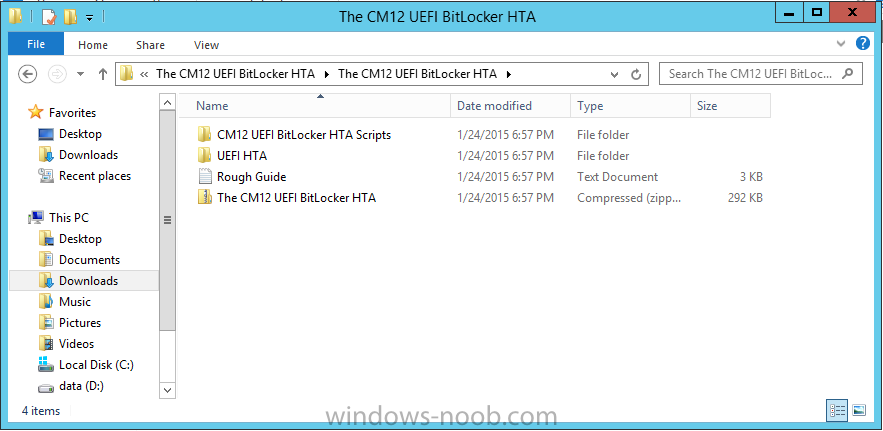
the extracted files will extract to a folder called The CM12 UEFI BitLocker FrontEnd HTA, click on that folder to view the contents, it should look like the below
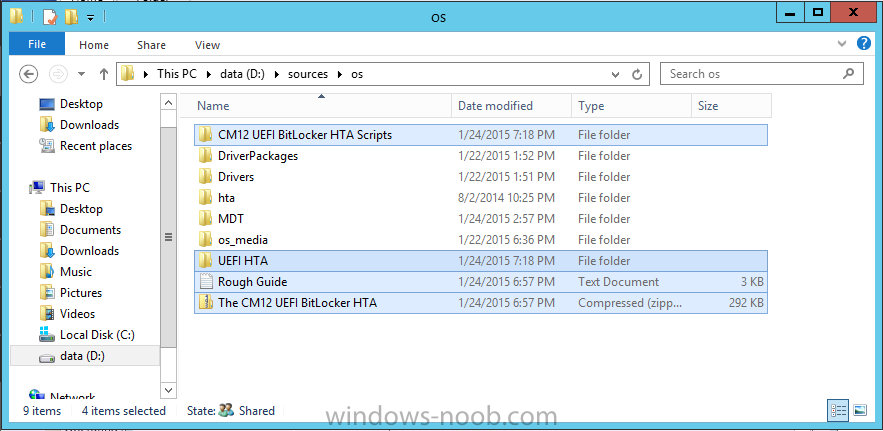
Copy everything in that folder to somewhere useful such as \\server\sources\os\
Note: Do NOT extract the zip file contained within the extracted files above.
Step 3. Create the CM12 UEFI BitLocker HTA Scripts package
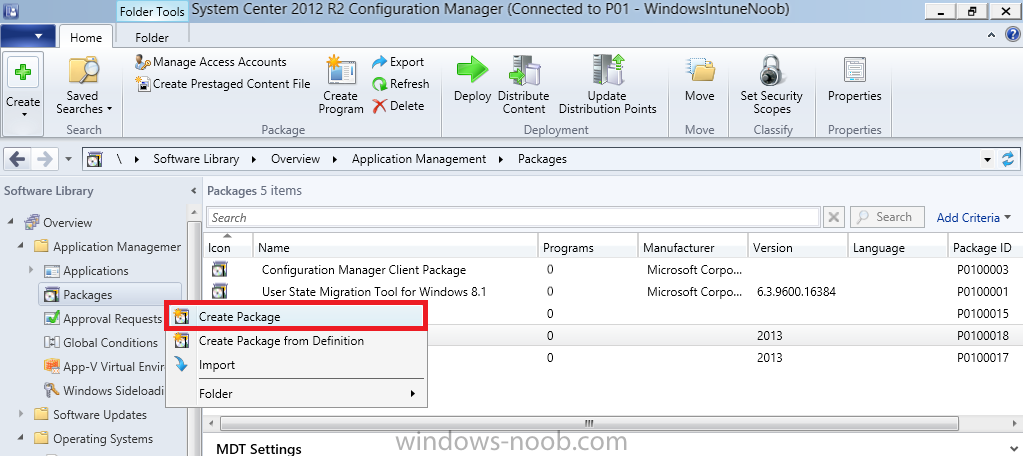
Open the Configuration Manager 2012 R2 console. Select the Software Library and then select Application Management then select Packages, choose Create Package as shown below
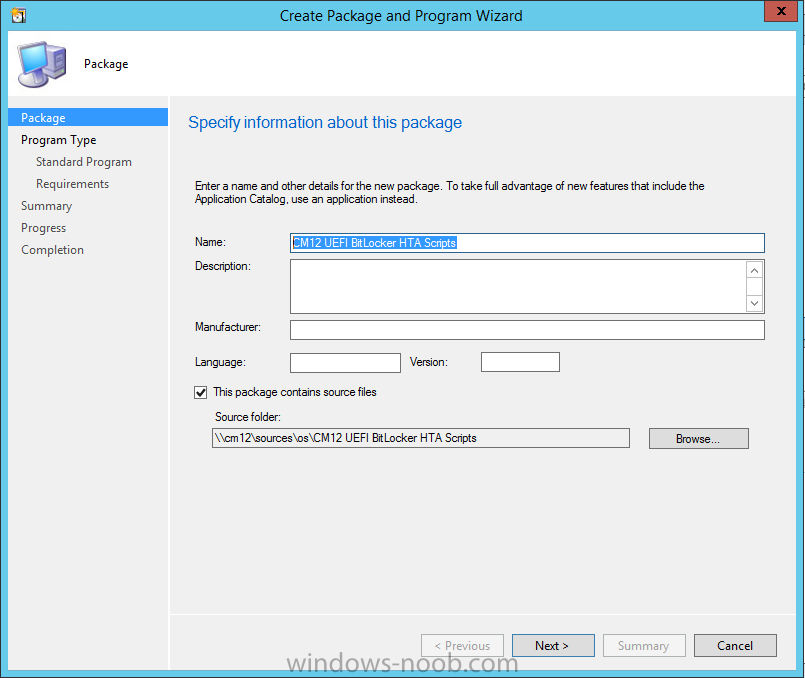
give the new package a name such as CM12 UEFI BitLocker HTA Scripts and point it to the UNC location of the CM12 UEFI BitLocker HTA Scripts folder as shown below
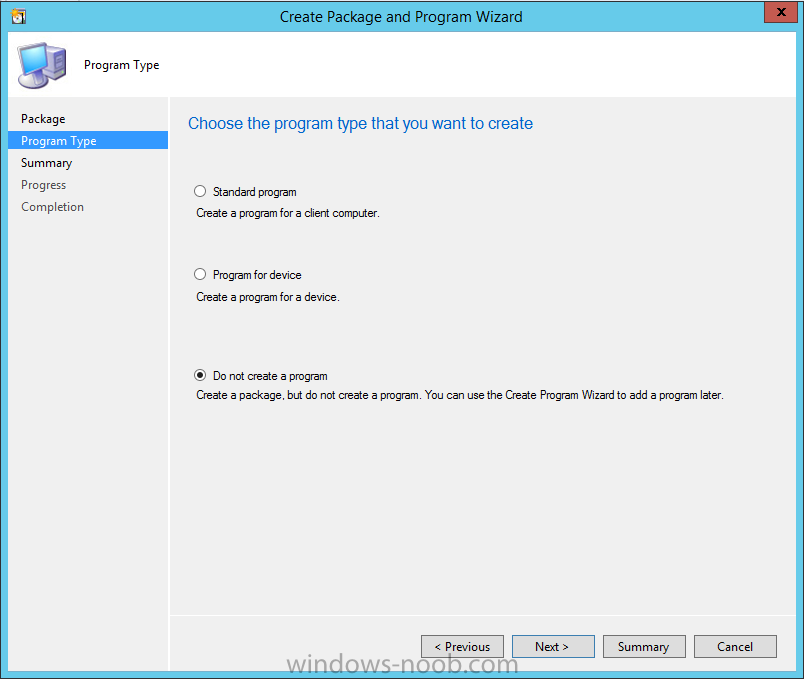
Choose Do not create a program
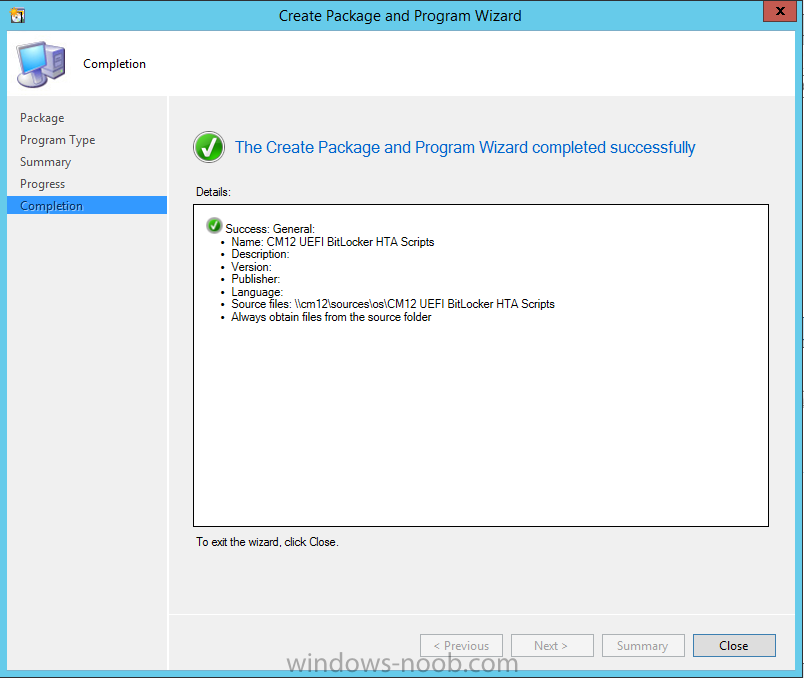
continue through that wizard until completion
Step 4. Create the UEFI HTA package
Select the Software Library and then select Application Management then select Packages, choose Create Package as shown below
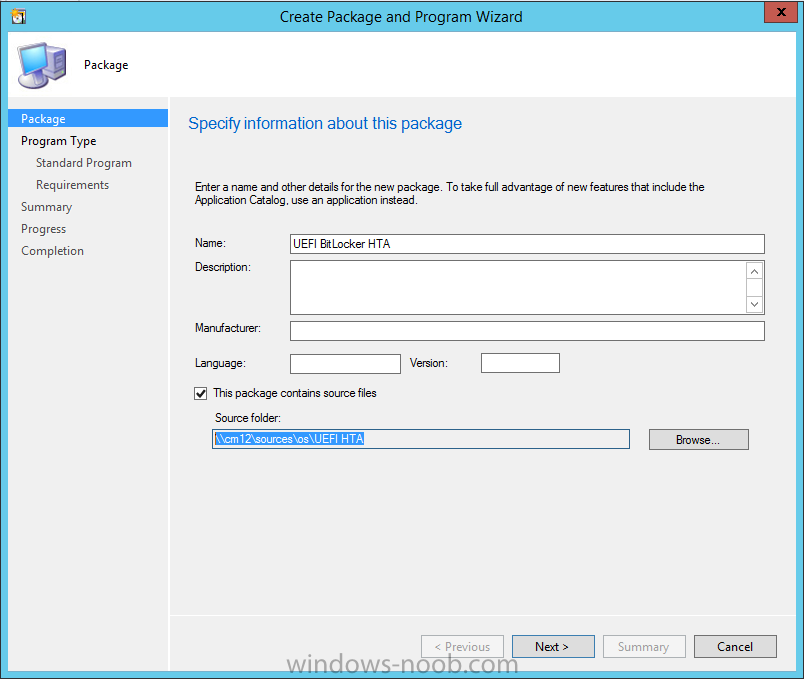
Give the package a name such as UEFI BitLocker HTA and point it to the folder containing the UEFI HTA files as shown below
Choose Do not create a program
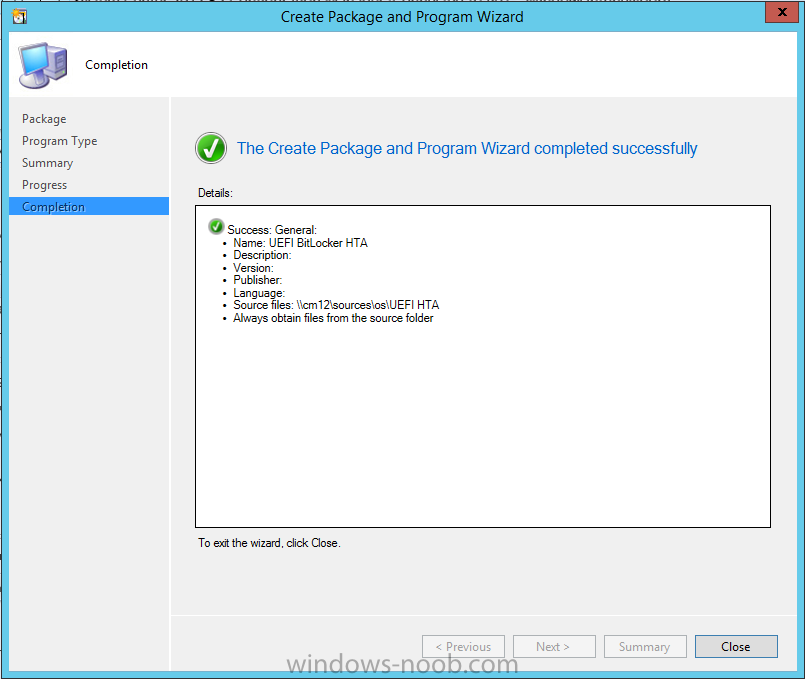
continue through that wizard until completion
Step 5. Distribute the new packages
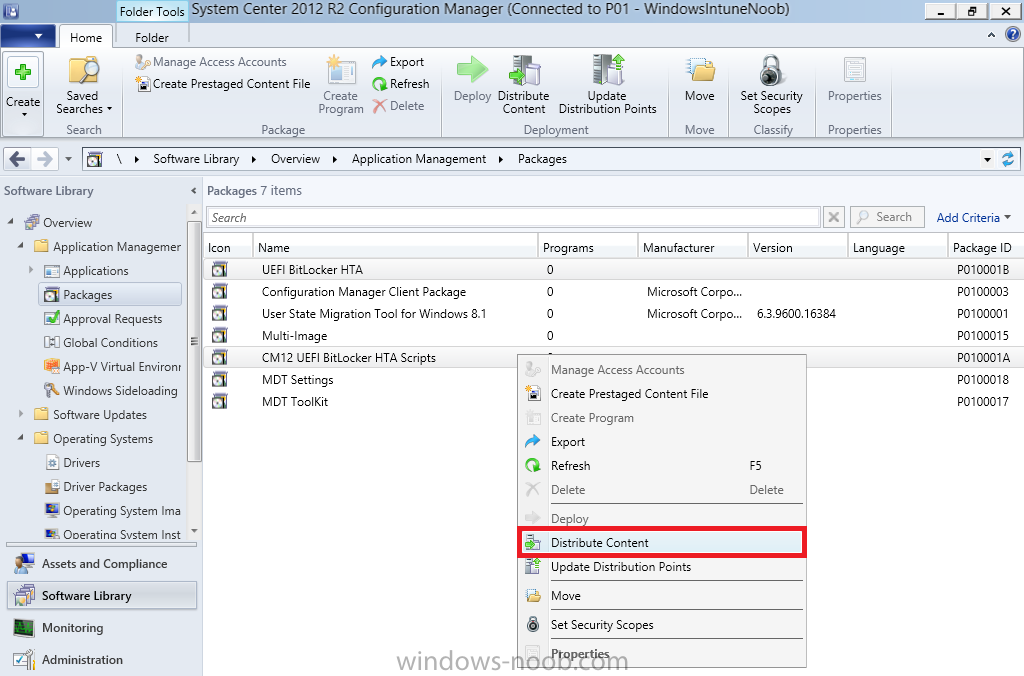
Select the two newly created packages by holding down CTRL when clicking on the packages, right click and choose Distribute Content as shown below
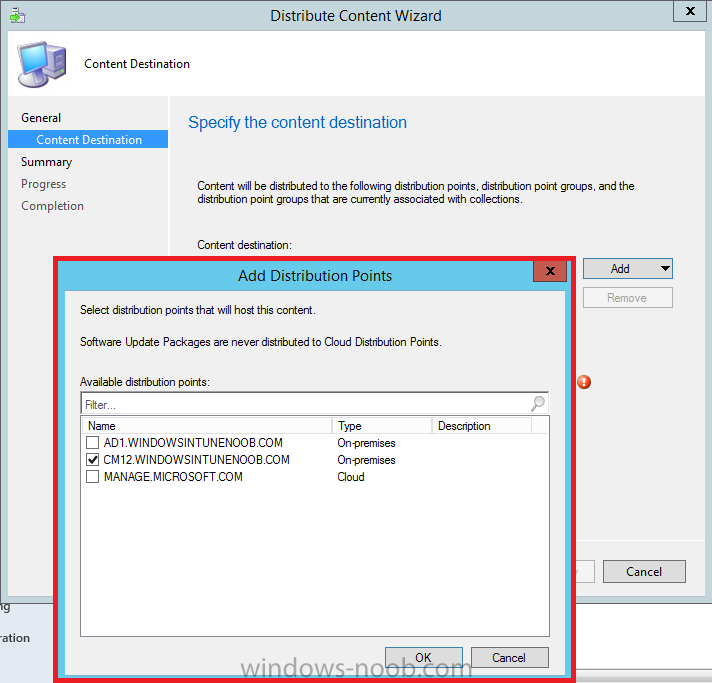
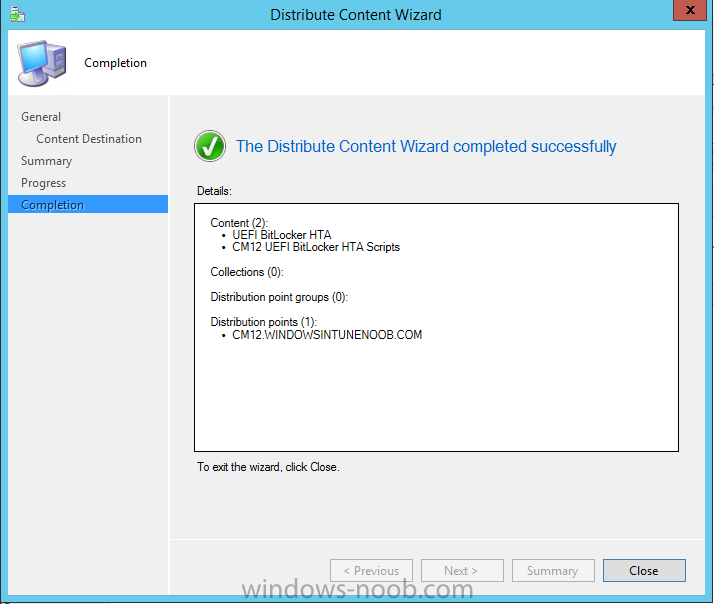
Click next, then select the content destination by clicking on the Add drop down, then select Distribution Points, once done, select one or more distribution points that you want the content on
continue through that wizard until completion.
Step 6. Import the Task Sequence
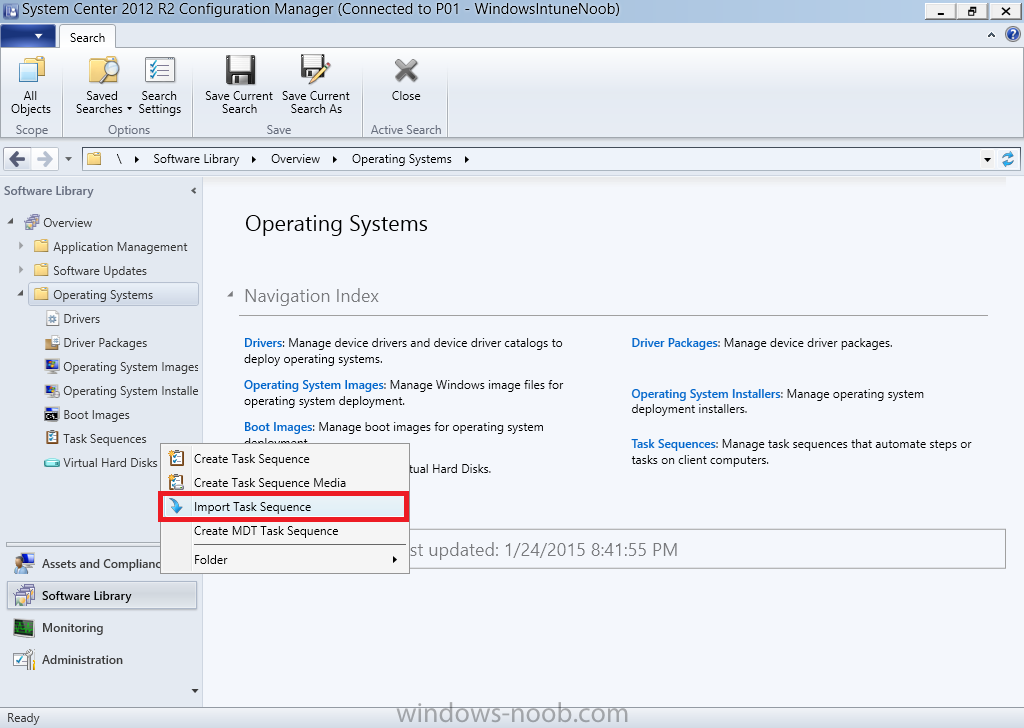
In the Configuration Manager console, select Operating Systems, expand Task Sequences, right click and choose Import Task Sequence as shown below
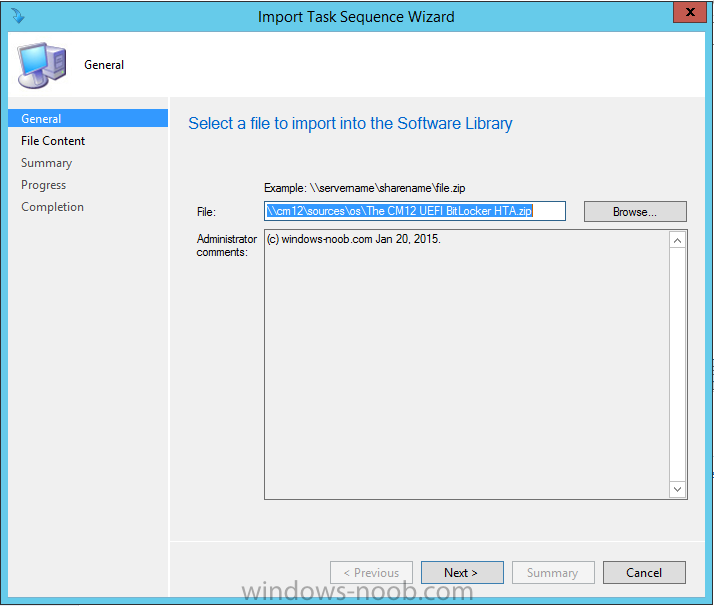
point to the UNC network path where you copied the contents of the extracted ZIP file from step 2 above as shown below
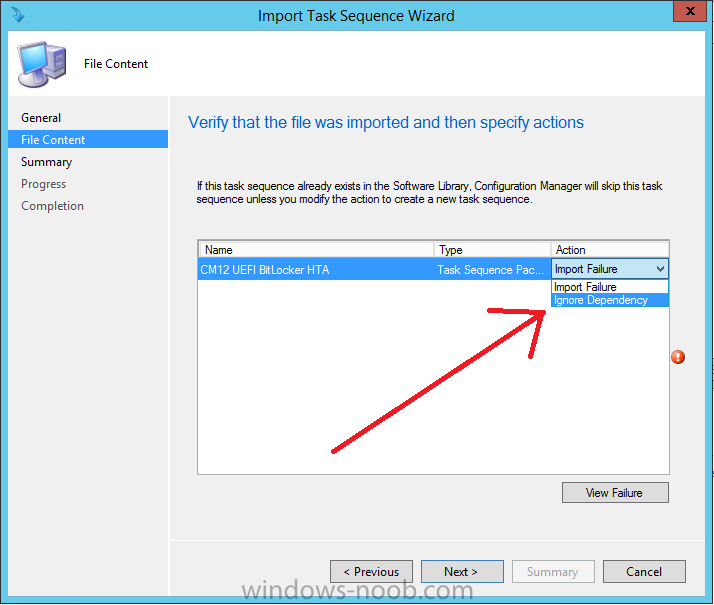
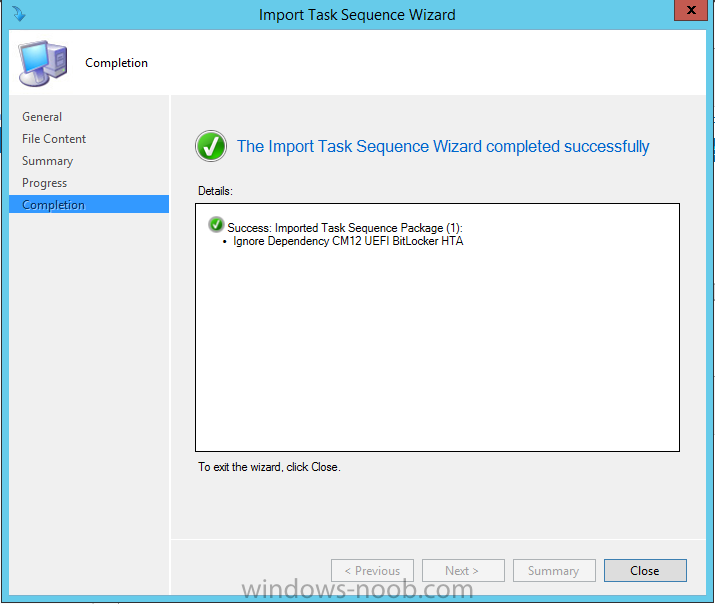
in the task sequence file content screen, the drop down menu allows you to change from Import Failure to Ignore Dependency, select that option and click next, this is to allow you to import the task sequence without having the same boot wim image as I used when exporting it, you can click on View Failure to review exactly what dependencies are missing on your site for the task sequence.
the import should complete successfully.
Step 7. Download the language packs
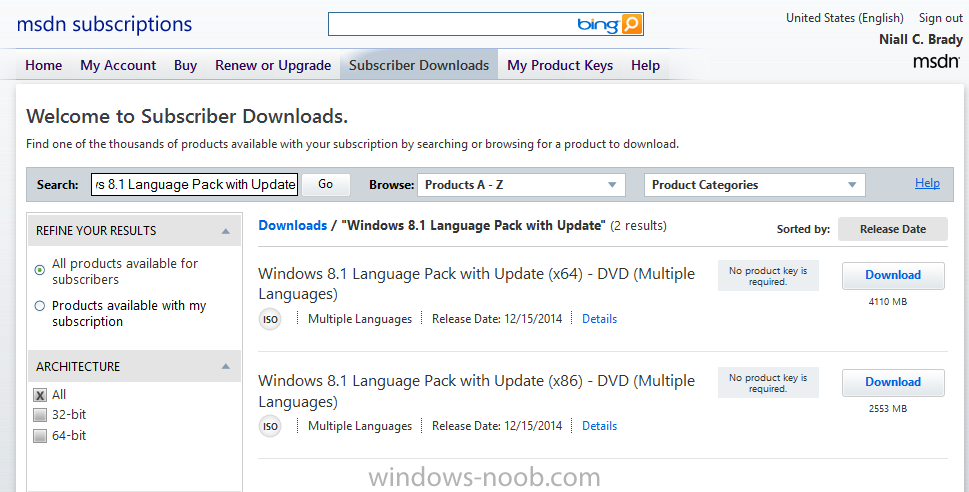
Using your Volume Licence or MSDN subscription access, download the Language packs for Windows 8.1 x64 with Update. Search for the following term
Windows 8.1 Language Pack with Update
The DVD ISO file should be similar to those shown below on MSDN. Select the x64 iso if your UEFI hardware is 64 bit (most is) otherwise select x86. The language pack download contains the following languages
Languages: English, Japanese, Korean, Arabic, Bulgarian, Czech, Danish, German, Greek, Spanish, Estonian, Finnish, French, Hebrew, Croatian, Hungarian, Italian, Lithuanian, Latvian, Dutch, Norwegian, Polish, Portuguese-Brazil, Romanian, Russian, Slovak, Slovenian, Serbian, Swedish, Thai, Turkish, Ukrainian, Chinese – Hong Kong SAR, Chinese – Simplified, Portuguese-Portugal
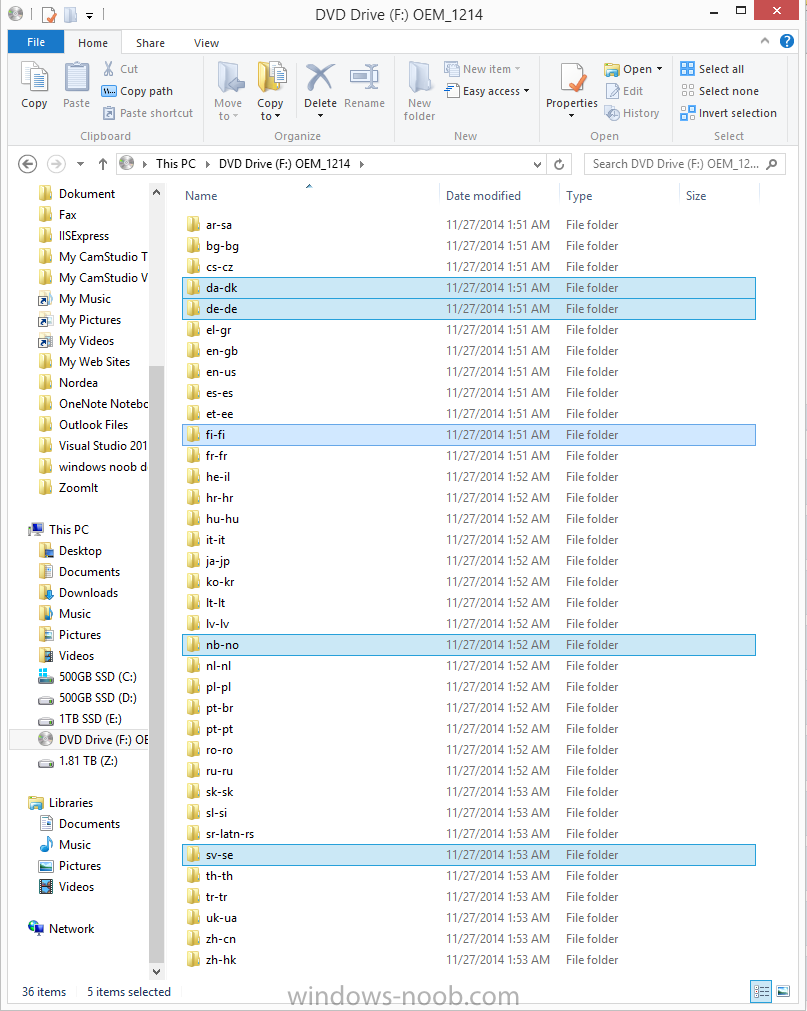
Once downloaded, mount the iso file by right clicking it and choose Mount, then copy the language packs you intend to support to somewhere useful as shown below
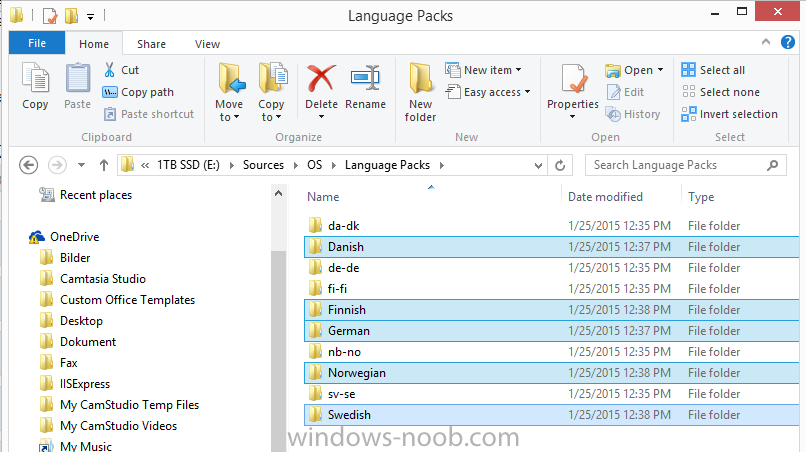
mark the language packs by selecting the ones you need,
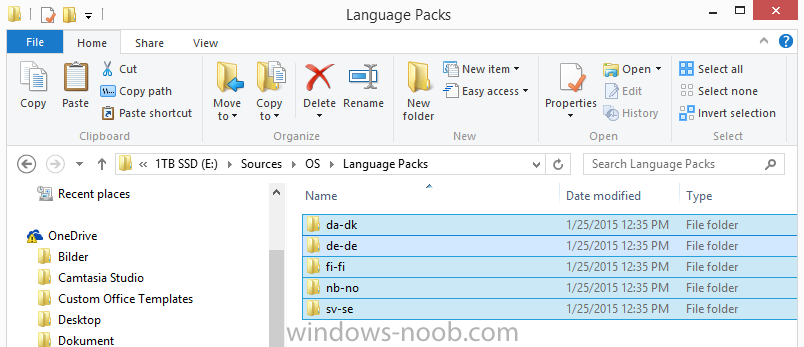
and copy them to a temporary folder called Language Packs as shown below
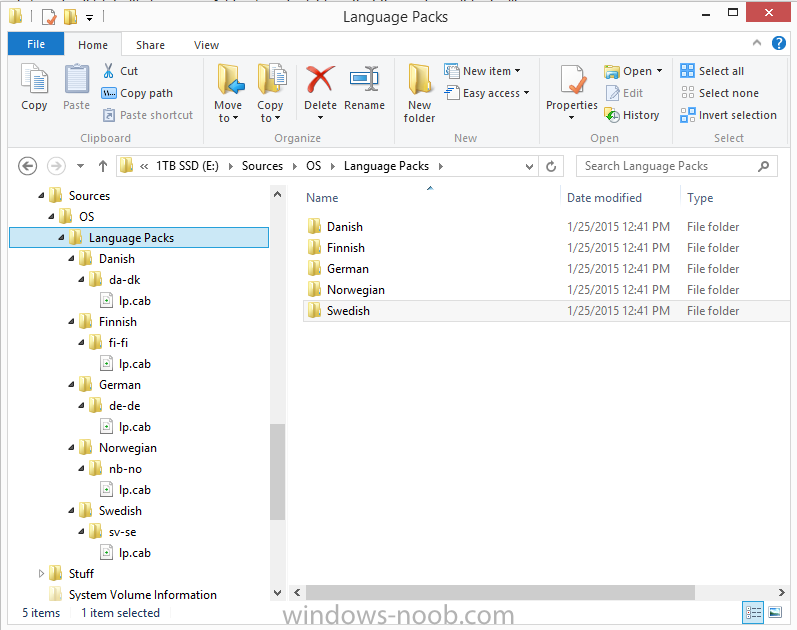
Create one folder matching the language of each language pack you have selected, so for example if you selected the da-dk language pack, then create a new folder called Danish. Below I’ve created 5 folders for my respective language packs.
next, copy the respective language pack (eg: da-dk) into it’s language folder (eg: danish) so that the end result looks like so
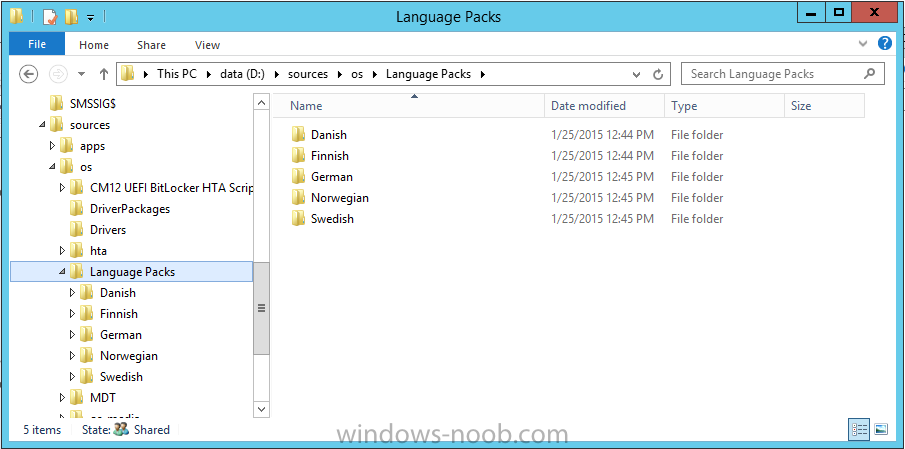
copy those files and folders from your temp folder to your Configuration Manager server as shown below
Step 8. Create Language packs packages
Select the Software Library and then select Application Management then select Packages, choose Create Package as shown below
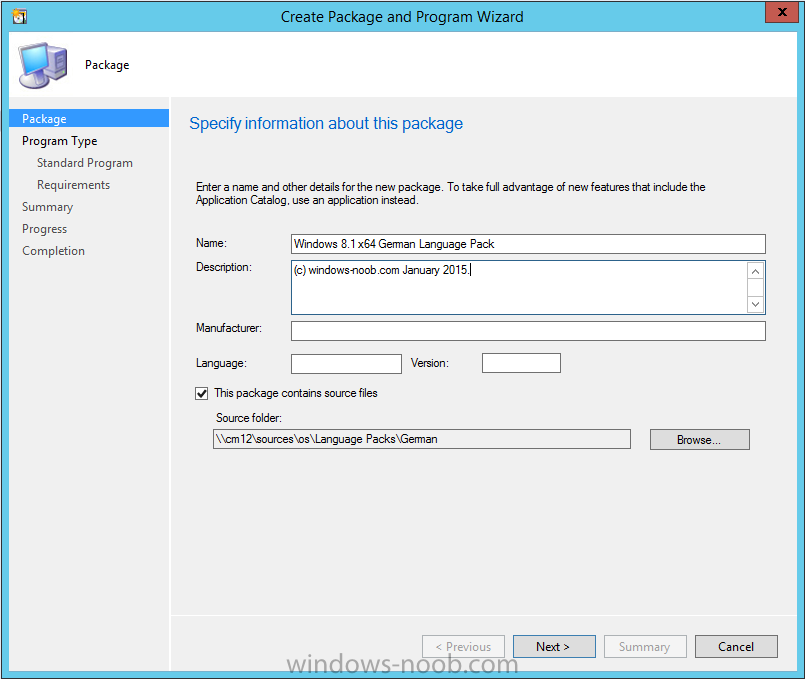
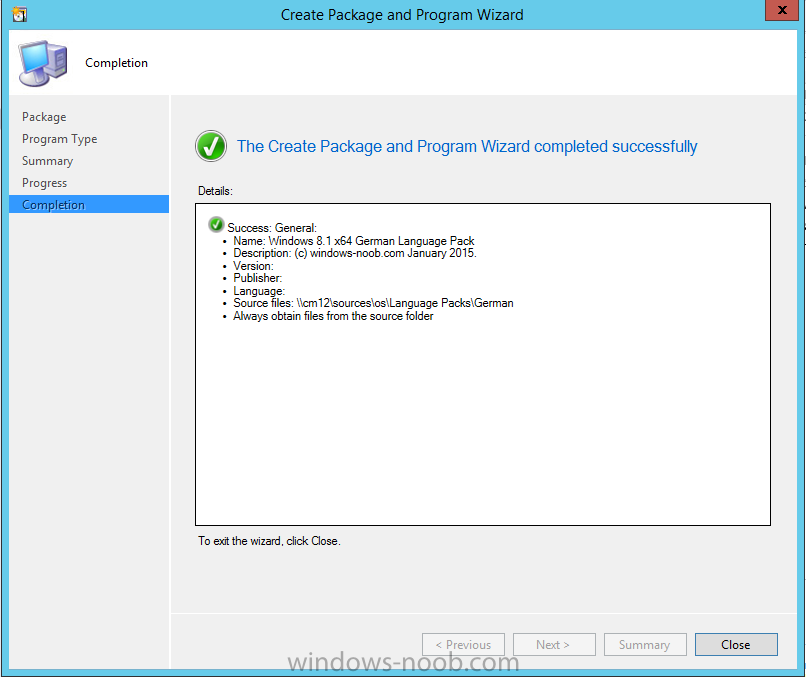
Give the package a suitable name like Windows 8.1 x64 German Language Pack and point to the top folder for that language pack, eg: German as shown in the screenshot below
Choose Do not create a program and continue through the wizard until completion.
Note: Repeat the above process for each language pack you want made available in the task sequence.
Step 9. Distribute Language packages
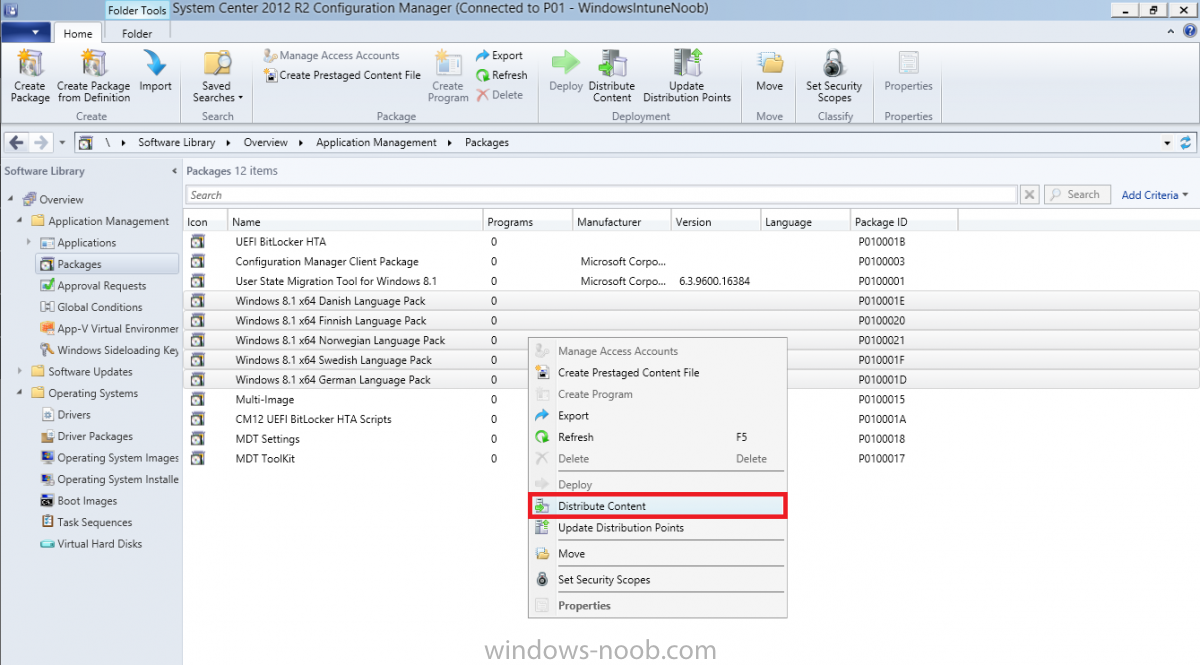
Right click on your newly created language packs and choose Distribute Content,
continue through the wizard as shown already in step 5 above.
Step 10. Create an Unattend.XML package
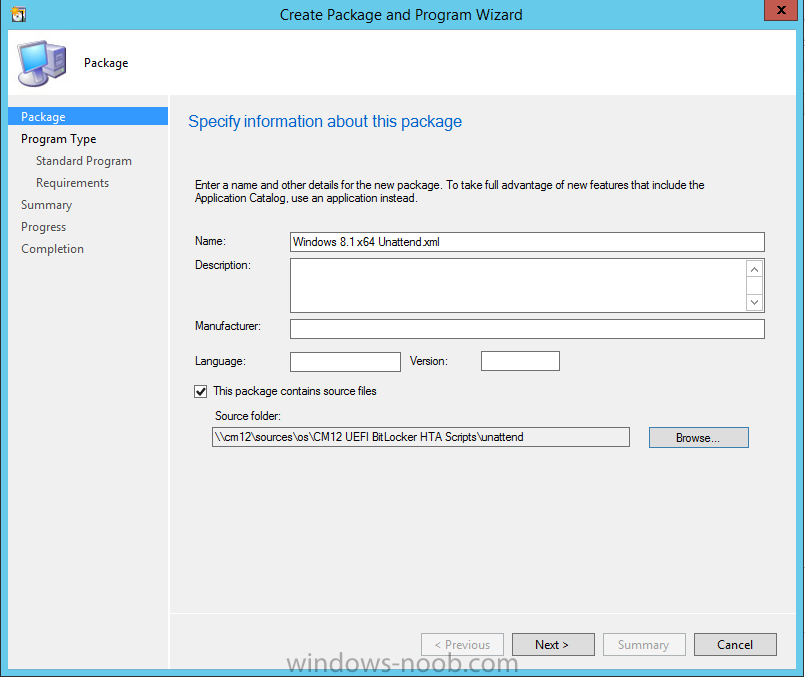
In the CM12 UEFI BitLocker HTA scripts\Unattend folder, you’ll find some xml files, create a package using that folder as shown below
Choose Do not create a program and continue through the wizard until completion, when done, right click the package and distribute content to your distribution points as shown in Step 5.
Step 11. Create MBAM client packages
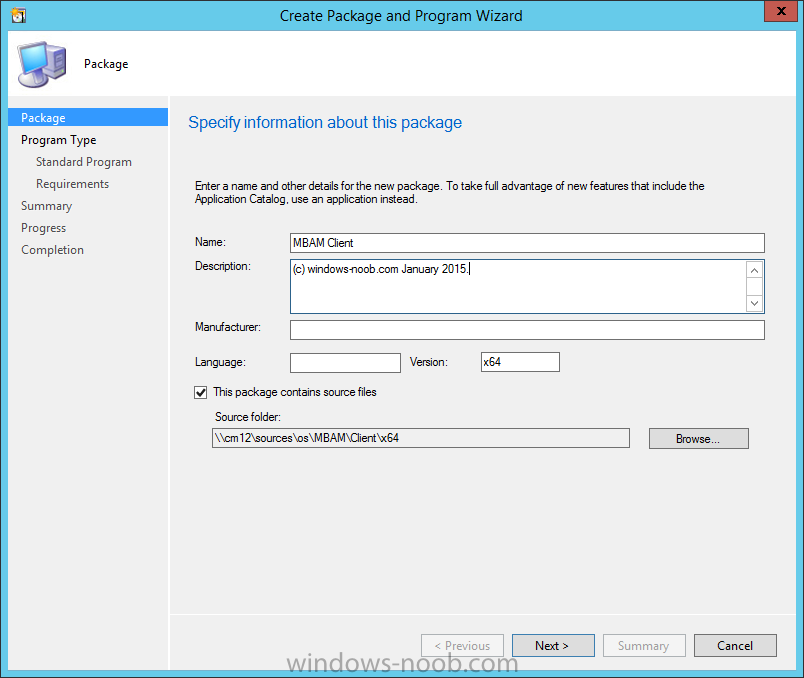
Locate the MBAM client installation files that are provided with the MBAM software, and create two MBAM packages, one for MBAM x64 and the other for MBAM x86 clients as shown below (for the x64 MBAM package)
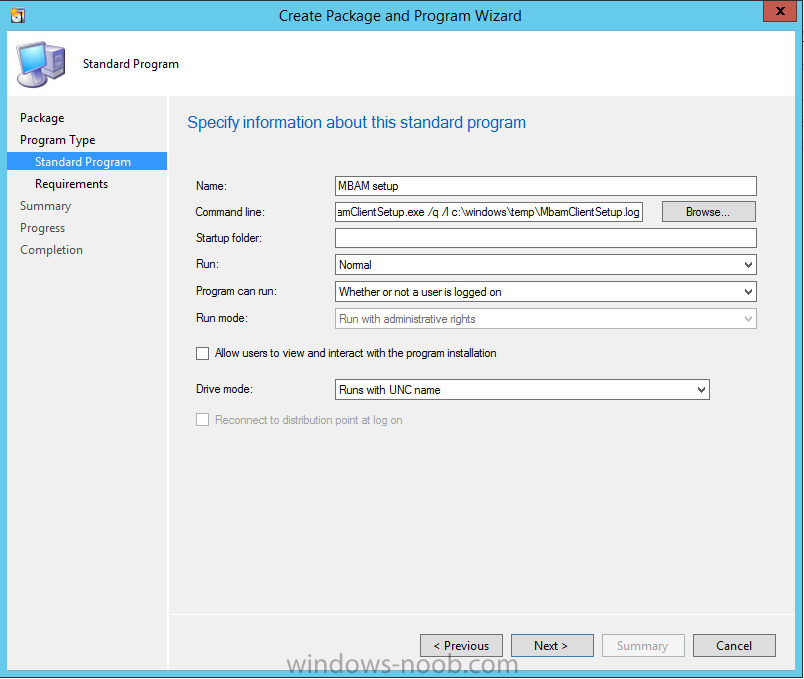
Create a Standard Program for each package with the following parameters
MbamClientSetup.exe /q /l c:\windows\temp\MbamClientSetup.log
as shown below
continue through the wizard and distribute the packages to your Distribution Points as shown in Step 5.
Step 12. Edit the task sequence to fix missing references
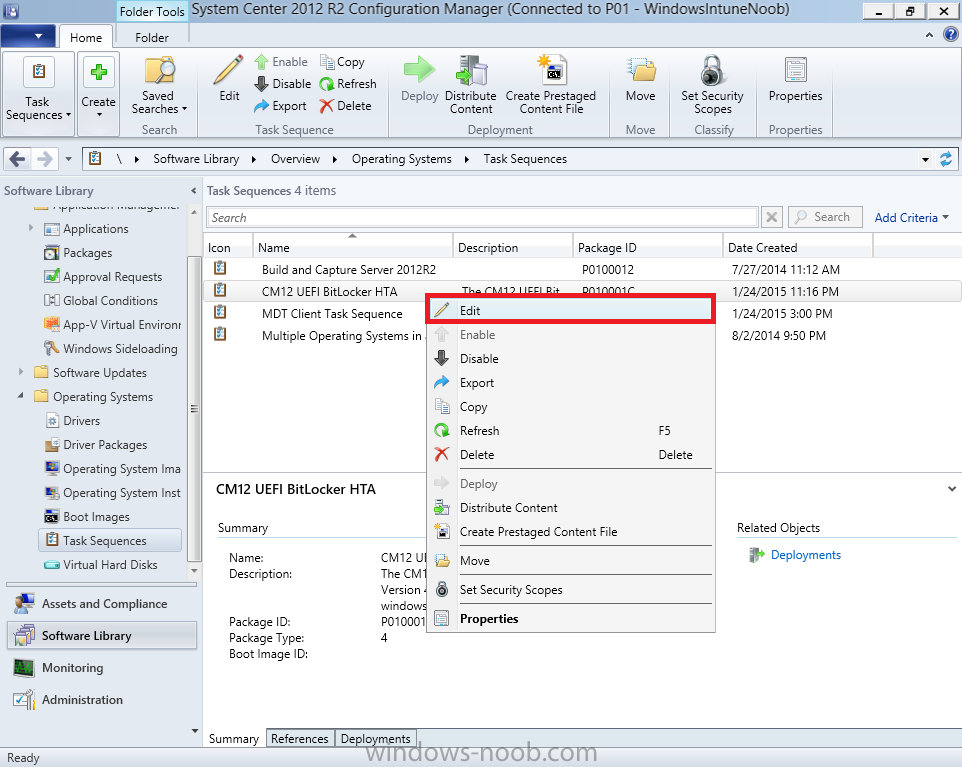
Right click on the newly imported task sequence and choose Edit as shown below
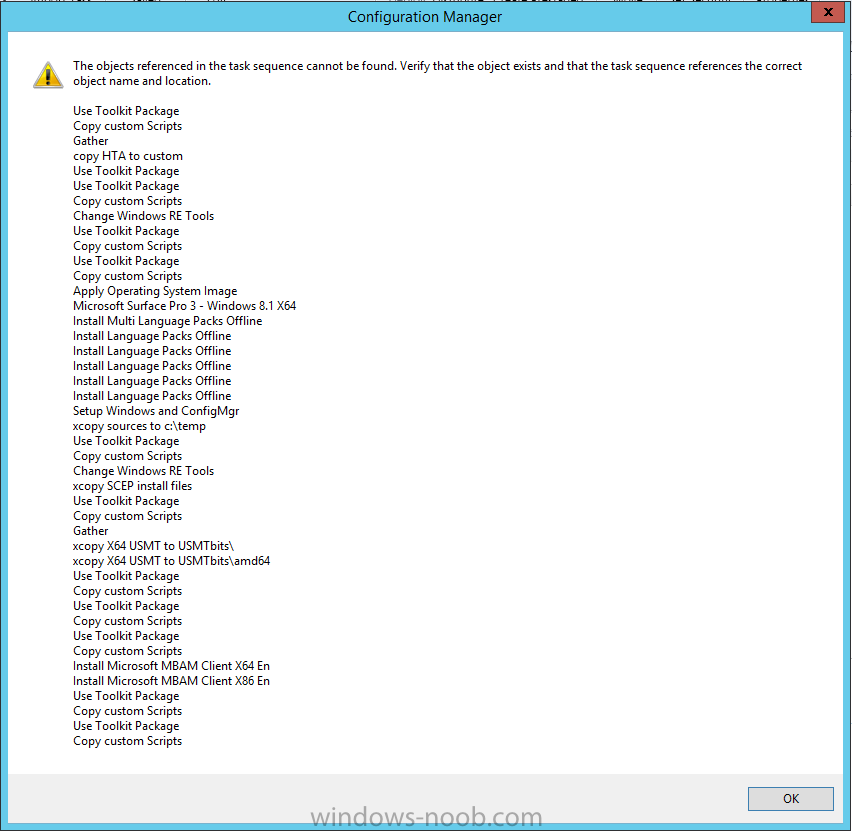
at this point you’ll get an extremely long list of missing reference objects, don’t panic, it’s easier to fix than it looks.
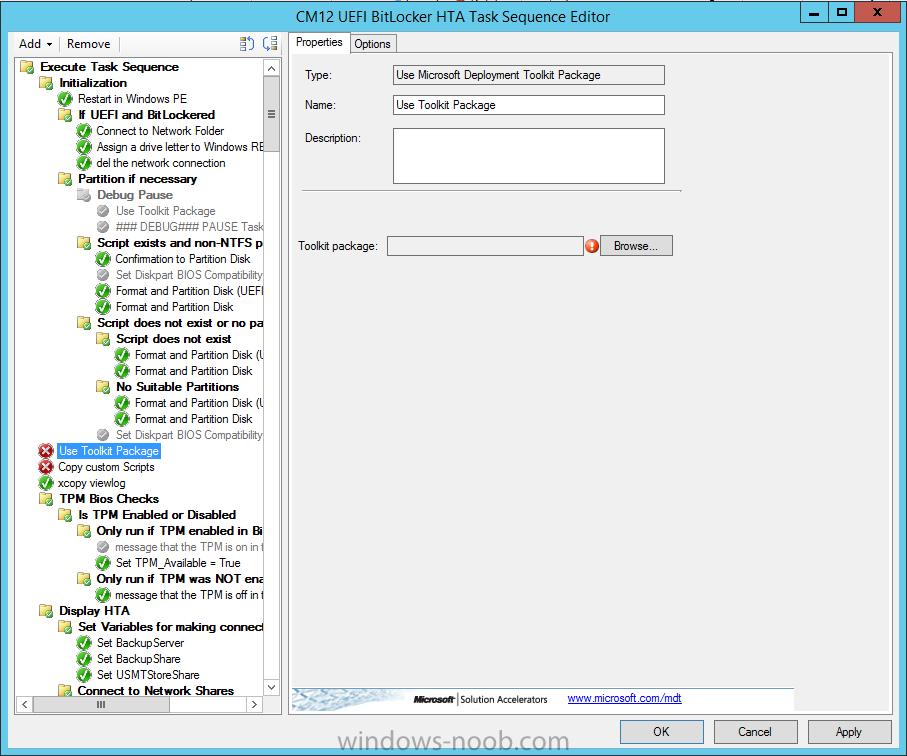
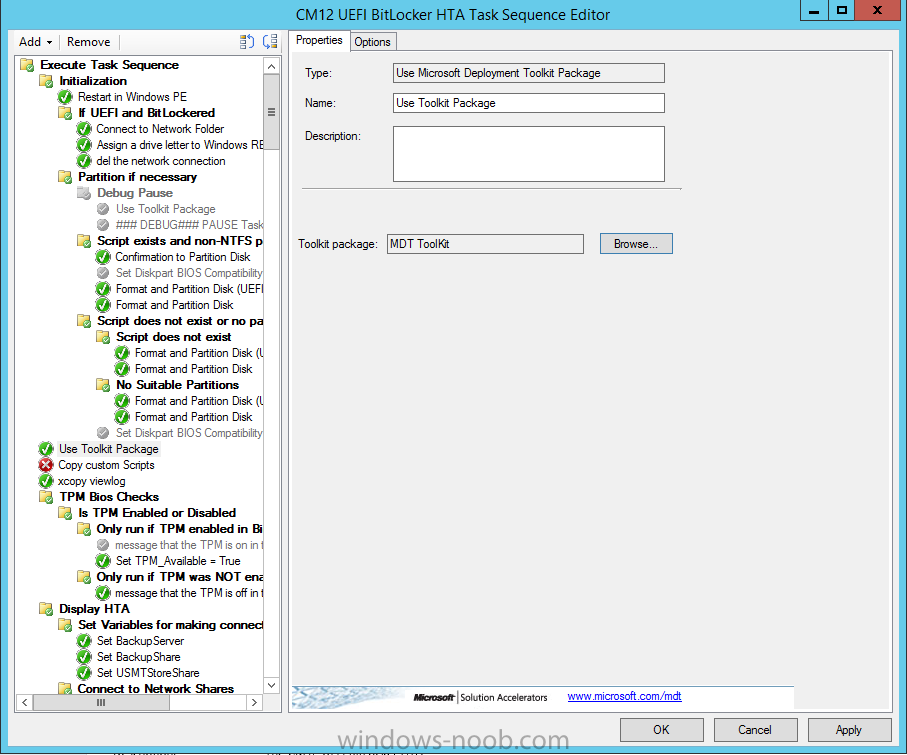
Scroll up to the top of the opened task sequence, any package that needs to be re-referenced will be marked with a red x such as the Use Toolkit Package step shown here.
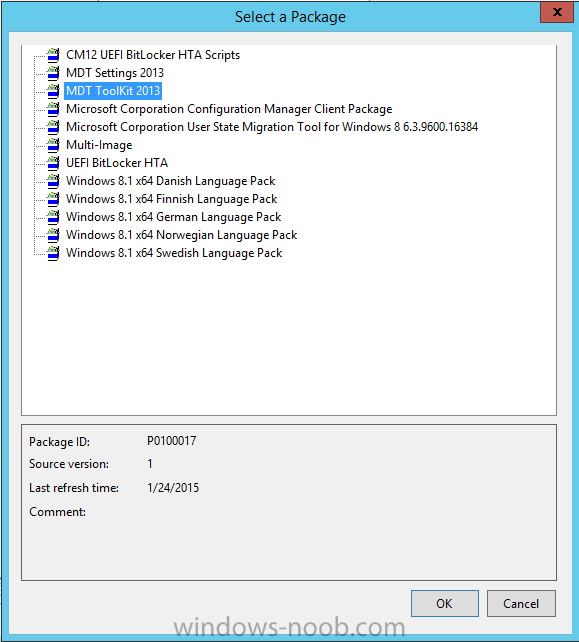
Click on Browse beside the missing package, and Select the correct MDT 2013 Toolkit package which you created when you integrated MDT with Configuration Manager by following this guide.
The completed step now looks like this
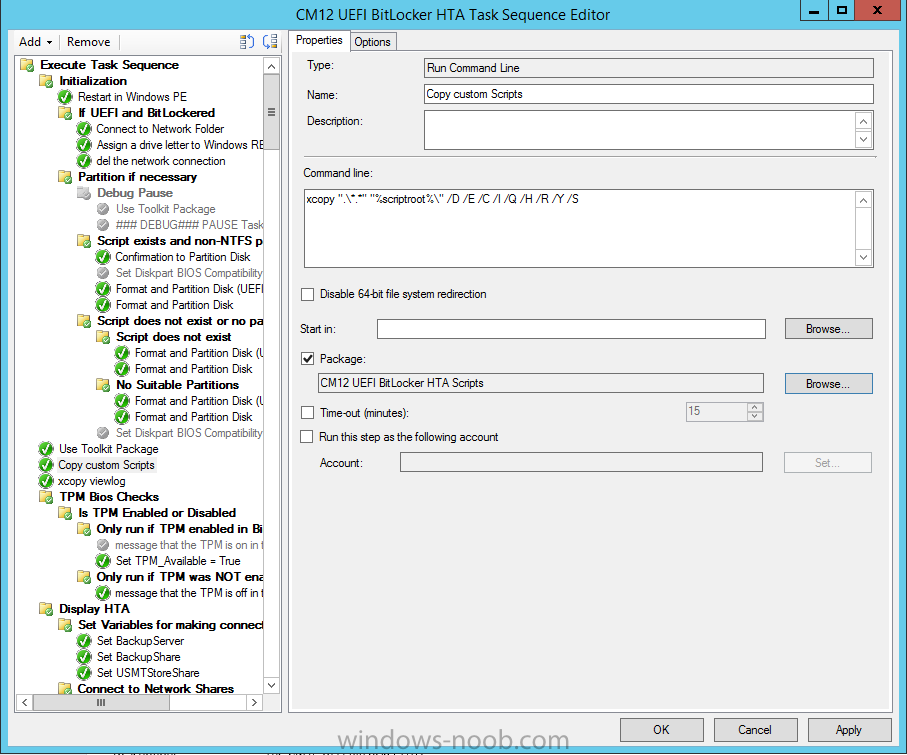
The Copy custom scripts step is basically using our CM12 UEFI BitLocker HTA scripts package as shown below, in addition the Change Windows RE Tools step uses the same scripts package.
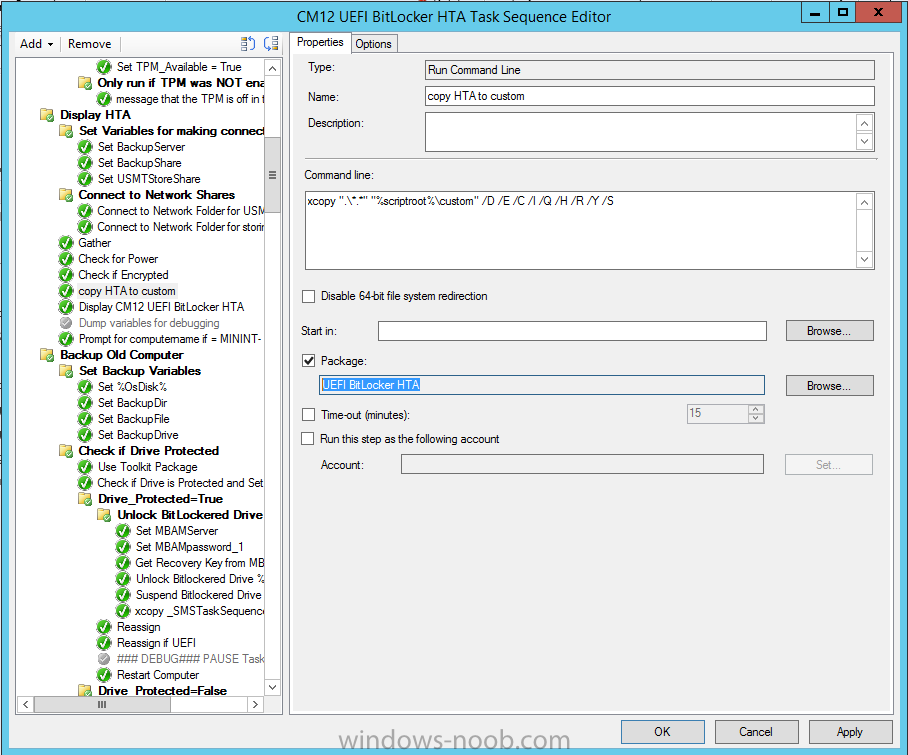
The copy HTA to custom step looks like so (use the UEFI BitLocker HTA package created earlier)
Repeat the above process for each and every step that needs it’s package fixed. It will take some minutes but once done you can finally save the changes in the task sequence. I’ll go through most of the ‘different’ package steps below for your information so that there is no confusion about what goes where.
Note: the Unattend.xml file referenced in the Apply Operating System image step is created in step 10 above.
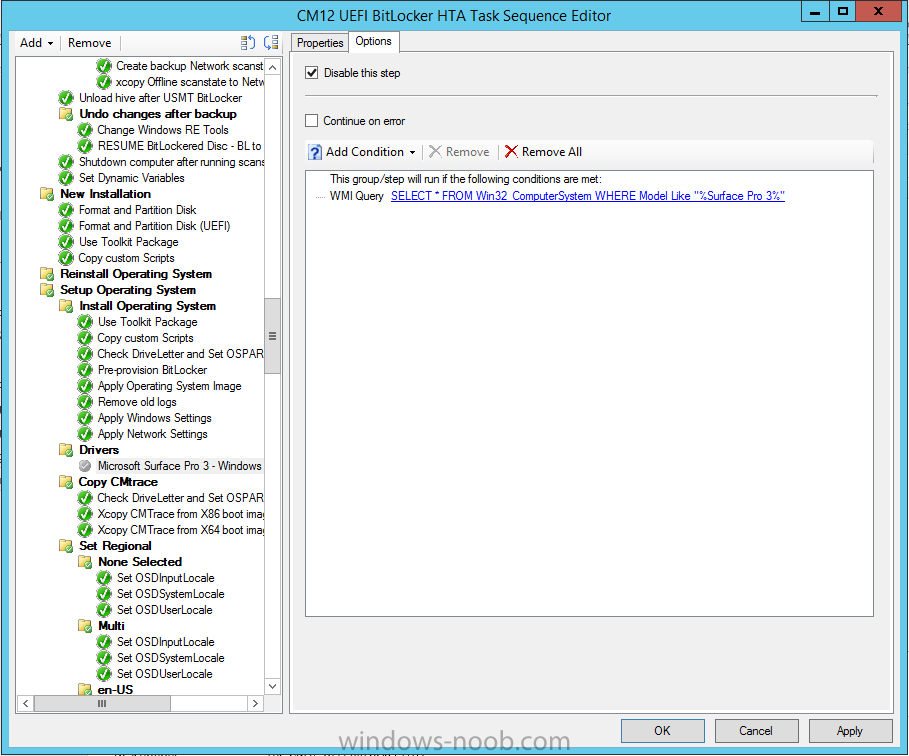
If you don’t have a Surface Pro 3 in your organization you can disable that step as shown below or create the package using the powershell script as shown in this guide.
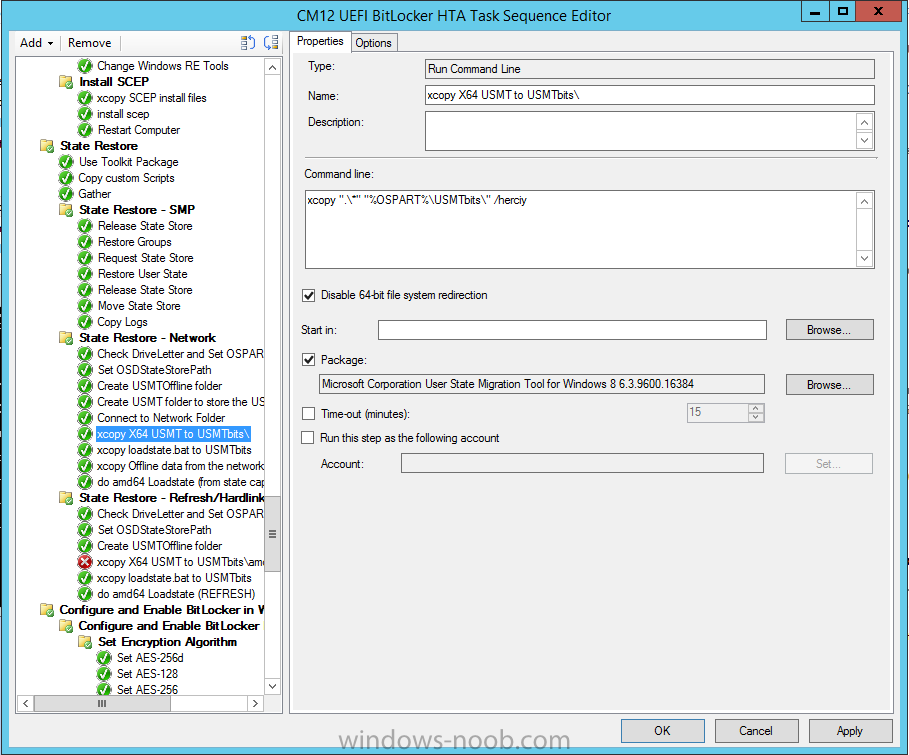
The USMT package references should point to your ADK created USMT package as shown below
Note Each folder in the USMT package (amd64 and x86) should be populated with custom XML files that you create, the batch files used to run them can be modified to suit your needs, or make no modifications at all and use the samples in the download here.
 USMT XML files.zip 3.76KB 2 downloads
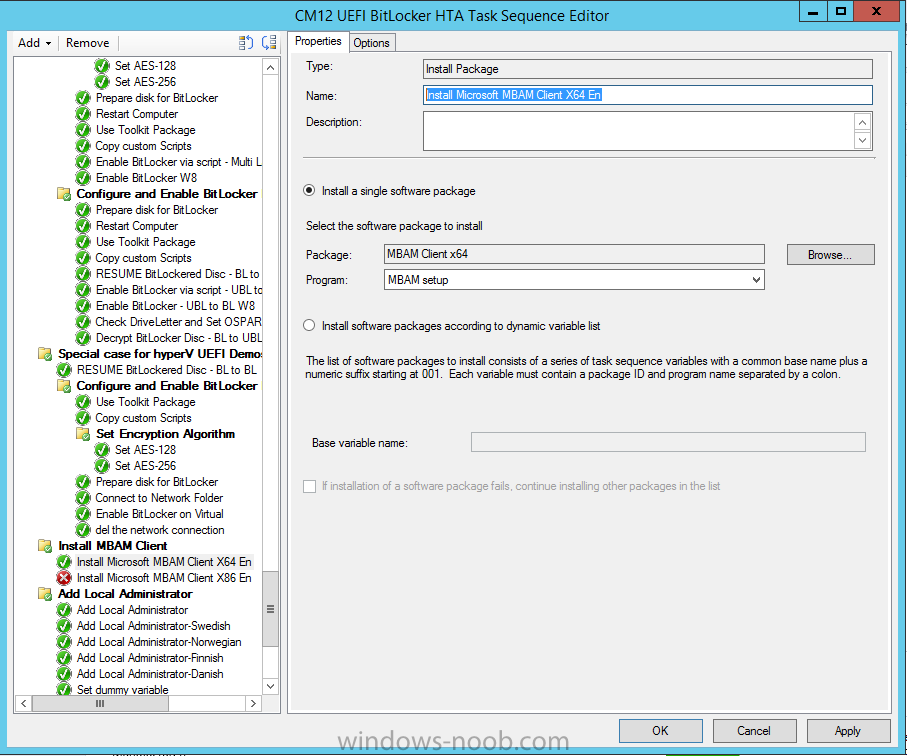
The Install Microsoft MBAM Client X64 En step will look like so
Step 13. Add PowerShell, MDAC and HTA support to your boot wim image
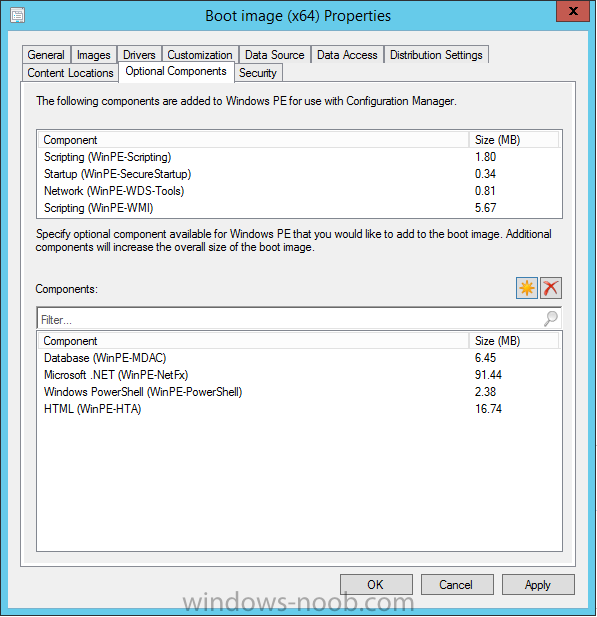
We’ll need MDAC support to contact the MBAM SQL server, we’ll need PowerShell support to run the ChangeRETools powershell script, and we’ll need HTA support to display the CM12 UEFI HTA. To add this support to our boot wim image we need to do as follows:
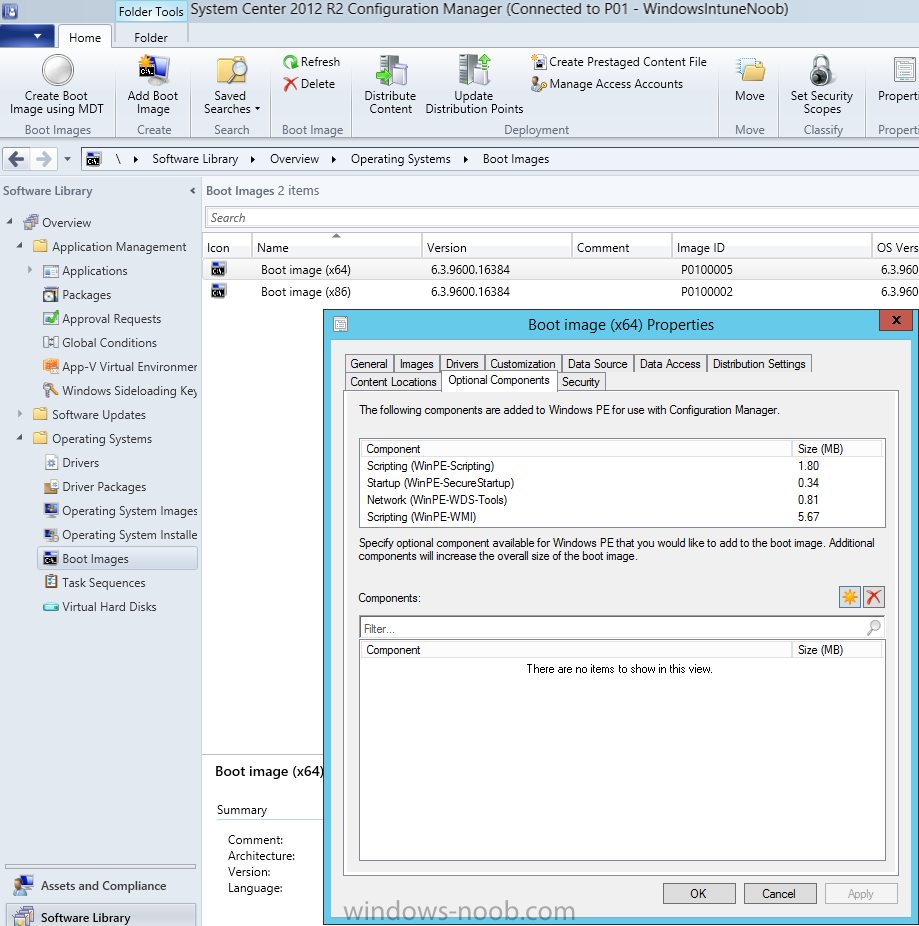
Select the x64 boot wim and right click, choose Properties and Optional Components.
Add the following by clicking on the yellow startburst icon, note that Microsoft .NET (WinPE-NetFx) will be added automatically when you select Windows PowerShell,
- Databse (WinPE-MDAC)
- HTML (WinPE-HTA)
- Windows Powershell (WinPE-PowerShell)
as shown below
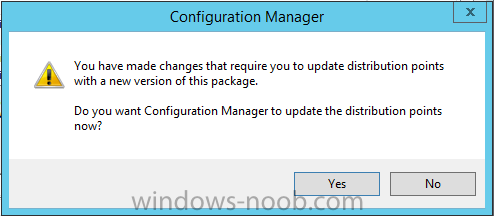
Click Apply when done and answer Yes to the prompt below
complete the wizard.
Step 14. Attach the edited boot wim to your task sequence
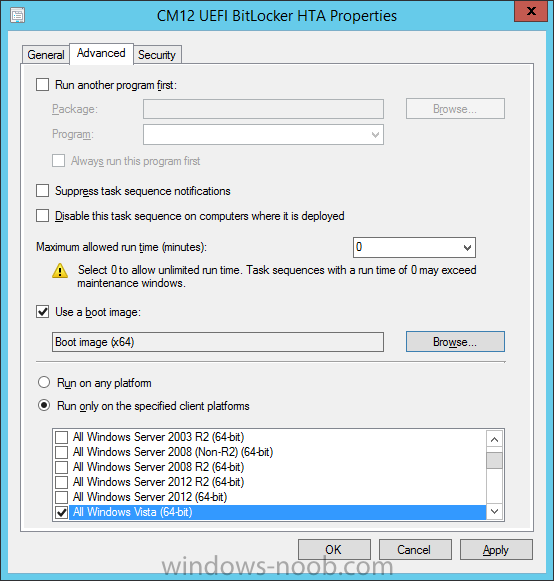
Right click on the task sequence and choose Properties, select Advanced, next select Use a boot image and point it to the newly updated X64 boot image as shown below.
Step 15. Edit the CustomSettings.ini file
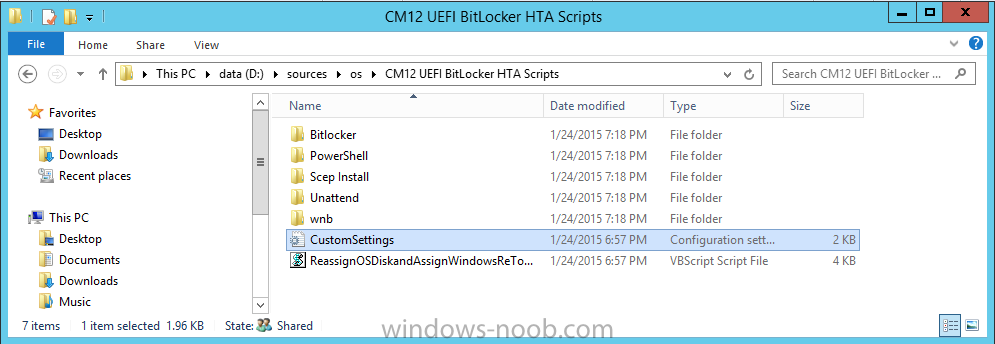
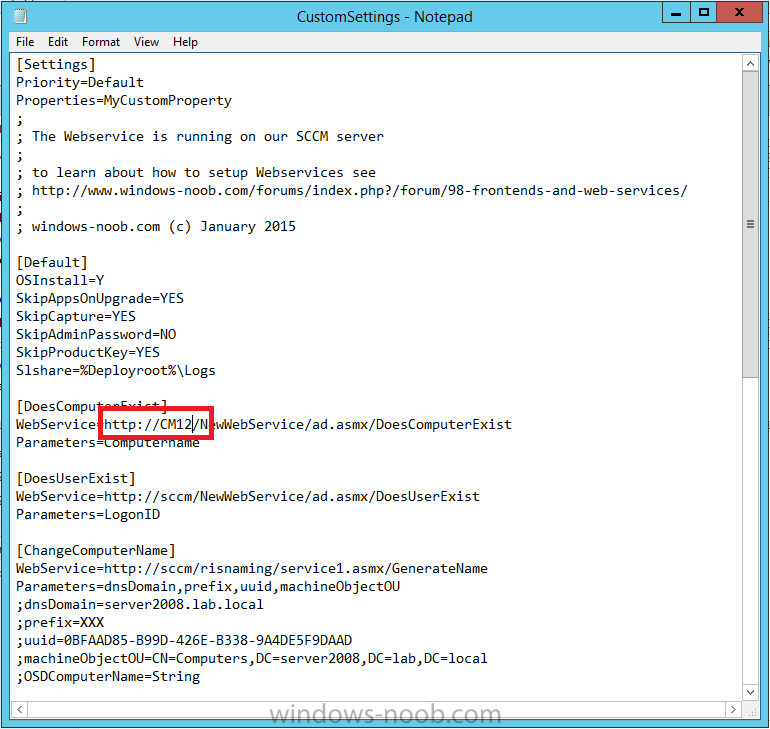
Locate the CustomSettings.ini file (included in the CM12 UEFI BitLocker FrontEnd HTA scripts folder
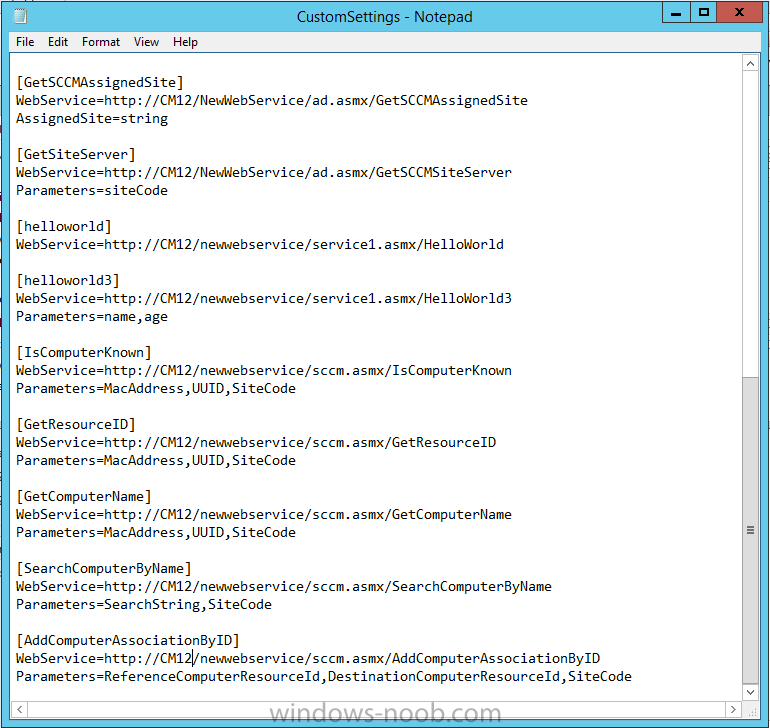
and edit it to point to your web service urls as shown below
repeat the above for each webservice URL encountered pointing to the correct server in your environment
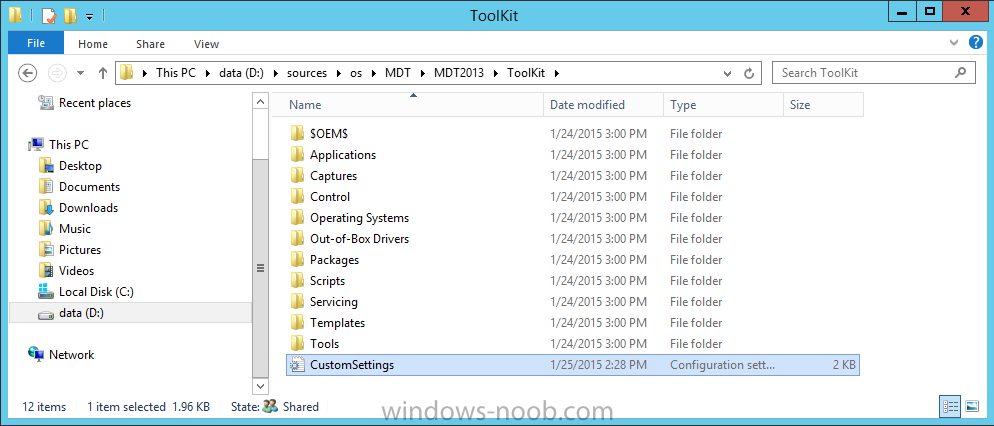
Save the file, and copy the new file to the ROOT of your MDT 2013 package like so
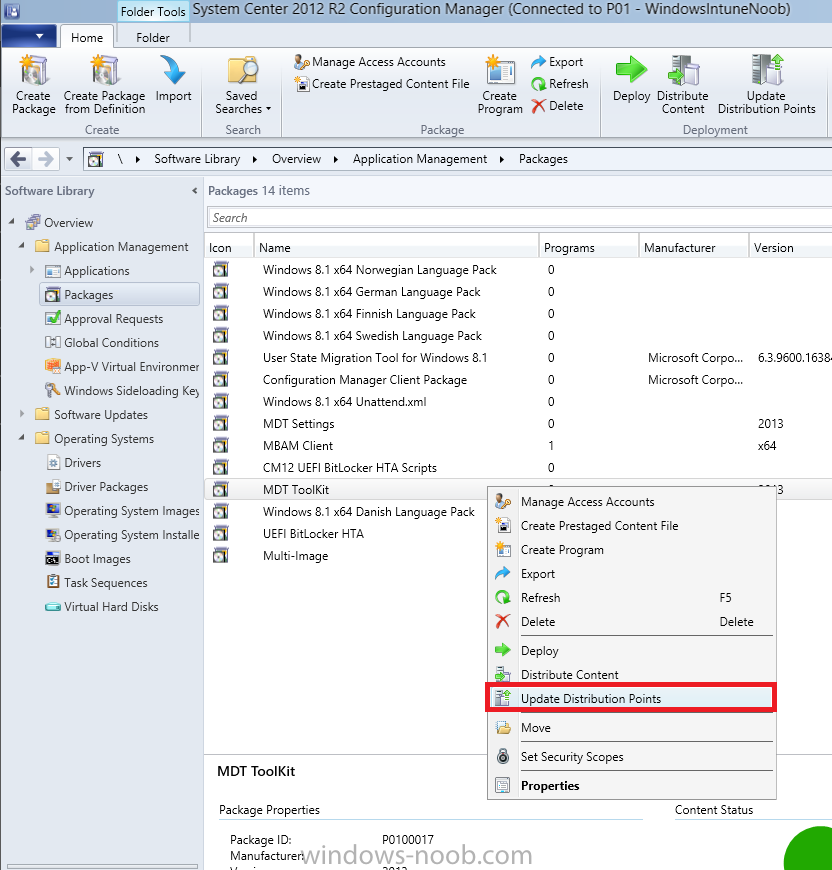
Finally, locate the MDT 2013 Toolkit package in the console, right click and choose Update Distribution Points as shown below
Step 16. Set variables and assign connect to network folder users
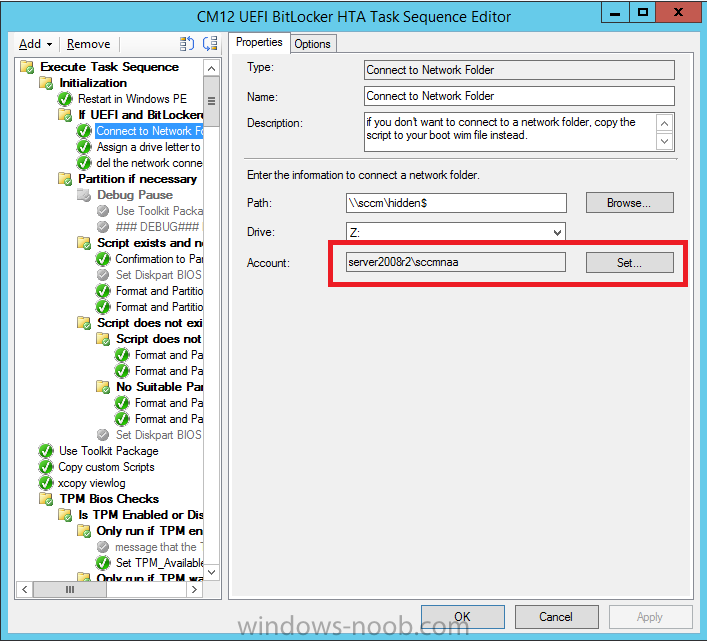
Edit the task sequence and locate the Connect to Network folder steps *there are a few*, change the network account to one that has permission to the share in question
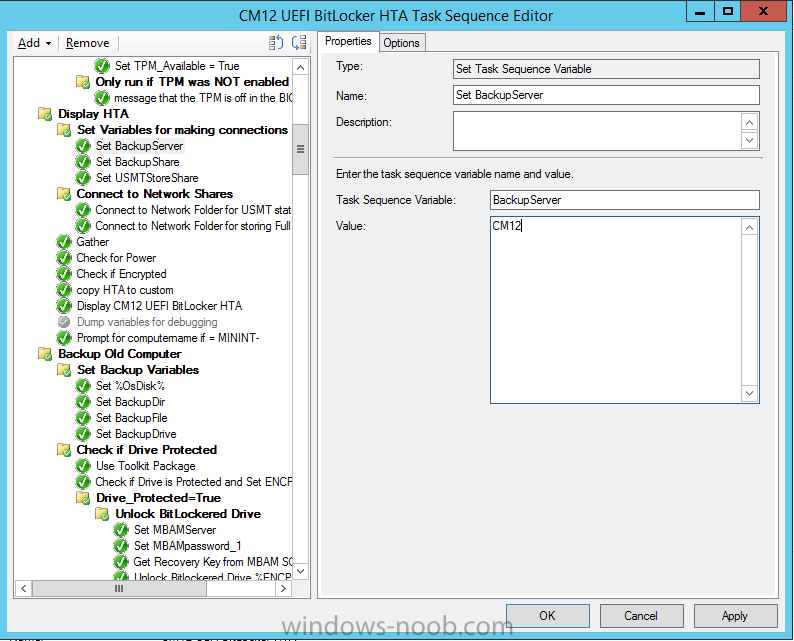
Next change the variable steps to point to server/shares/etc of your making as shown below
- Set BackupServer
- Set BackupShare
- Set USMTStoreShare
- Set MBAMServer
- Set MBAMpassword_1
for example like so….
Apply your changes and close the task sequence.
Step 17. Deploy the task sequence
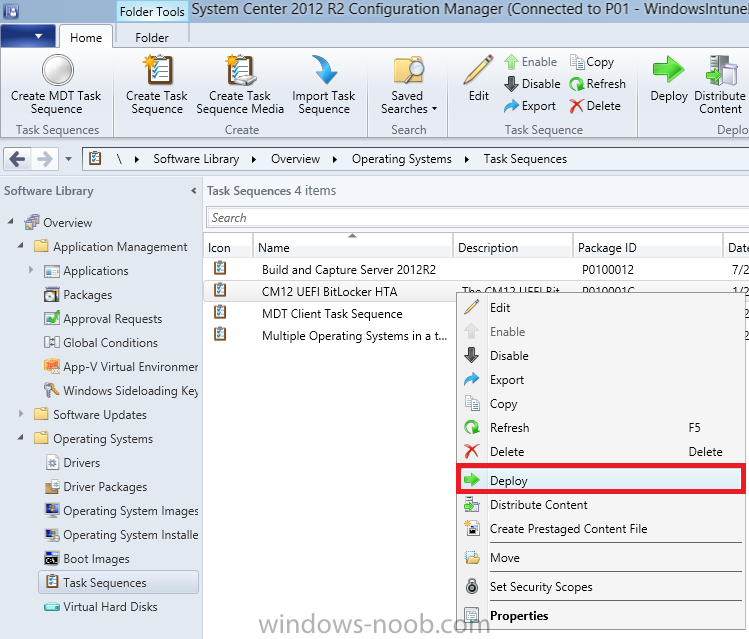
Right click on the CM12 UEFI BitLocker HTA task sequence and choose Deploy as shown below
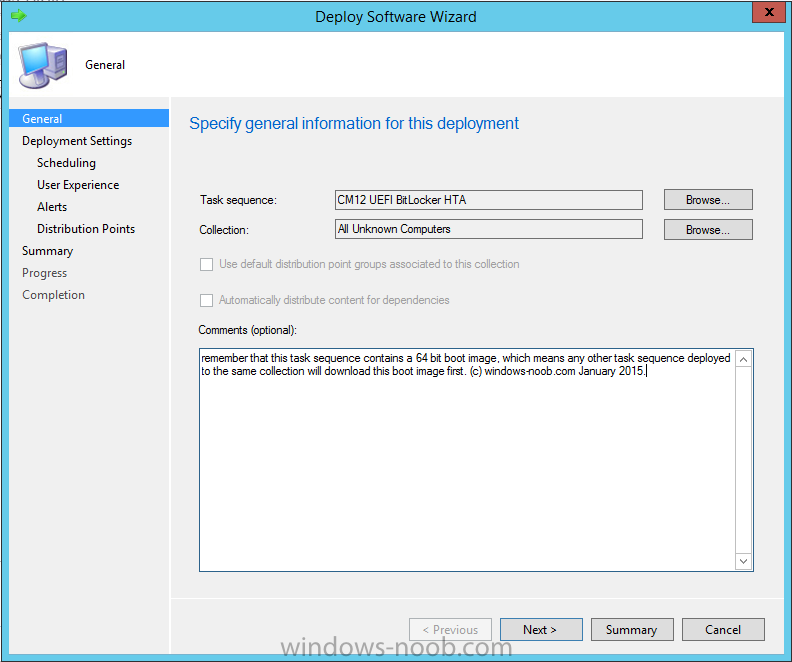
and select an appropriate collection for example All Unknown Computers
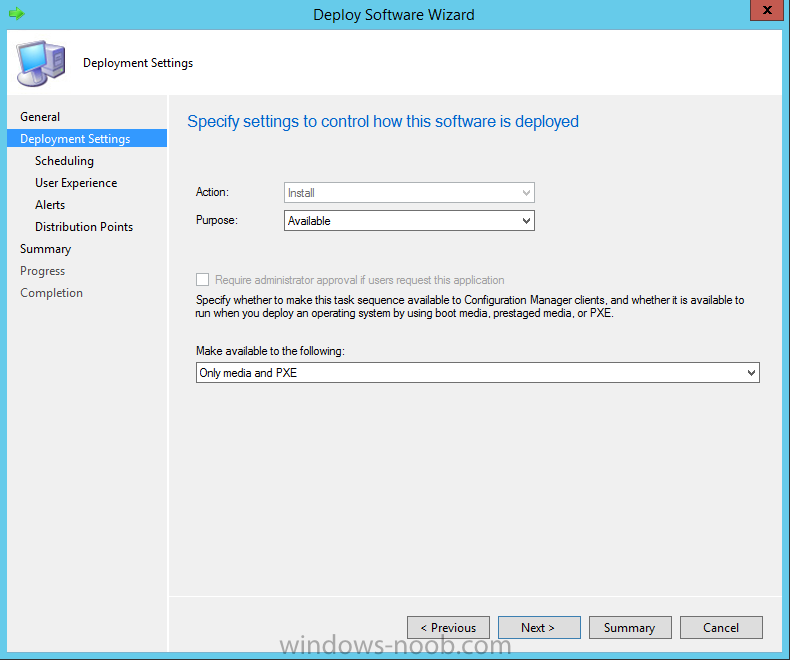
make it Available (optional) and available only to media and PXE as shown below
Tip: you might want to create a UEFI only collection and add known computers to it, then deploy this task sequence again to that collection also.
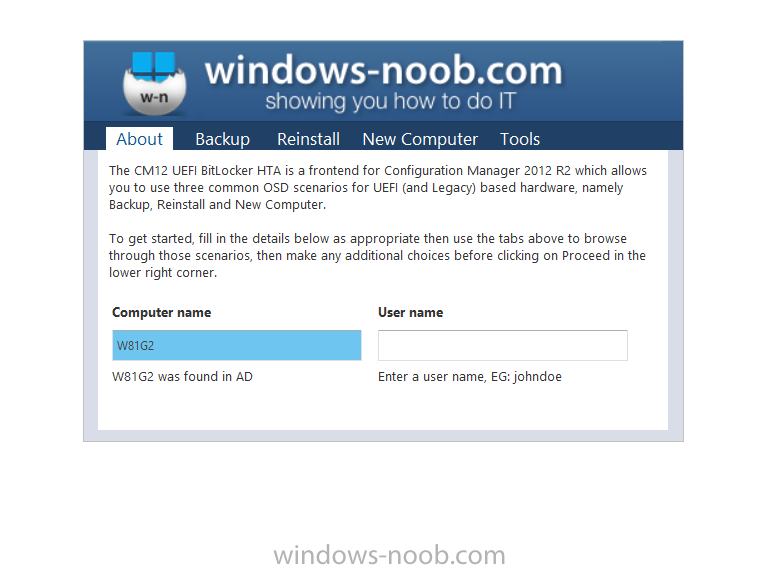
that’s it, all that’s left to do is to PXE boot a computer and you should see the CM12 UEFI BitLocker FrontEnd HTA in action.
that’s it !
Recommended reading
The CM12 UEFI BitLocker Frontend HTA – Part 1. The features. – http://www.windows-n…1-the-features/
How can I install a Web Service ? – http://www.windows-n…-a-web-service/
How to Deploy the MBAM Client to Desktop or Laptop Computers – https://technet.microsoft.com/en-us/library/dn145031.aspx
Downloads
You can download a Microsoft Word copy of this guide here.  The CM12 UEFI BitLocker HTA part 2.zip 3.55MB 2 downloads
Summary
In this part I’ve shown you how to set up your environment to work with the CM12 UEFI BitLocker HTA, In part 3, I’ll go through troubleshooting common problems with this task sequence, until then, adios !


