Introduction
In a previous post I explained how to deploy hidden task sequences in Configuration Manager by using the SMSTSPreferredAdvertID variable. You can use that method (or variations of it) to Deploy Task Sequences that are hidden and only available via PXE or Media. In this post I will show you how you can have multiple hidden task sequences available on-demand via a simple script and using a prestart command, the idea for this developed between myself and my esteemed work colleagues (thanks Magnus/Jimmy :-)) and that inspired me to put something together.
How does the on-demand bit work ?
The prestart command will only popup a prompt (on-demand) if the following file (X:\hidden.txt) is present on a client that is PXE booting. We place the file there by using a script (devel.vbs) and that script is invoked when a user presses F8 and types Devel prior to entering the PXE password. Once the file is present, the prestart script will check for another file (DeploymentIDs.txt on a UNC share) and if found, display the contents of that in a prompt to the end user. The end user will enter their choice and our variable is set. Done.
Step 1. Download the files
Download the following files
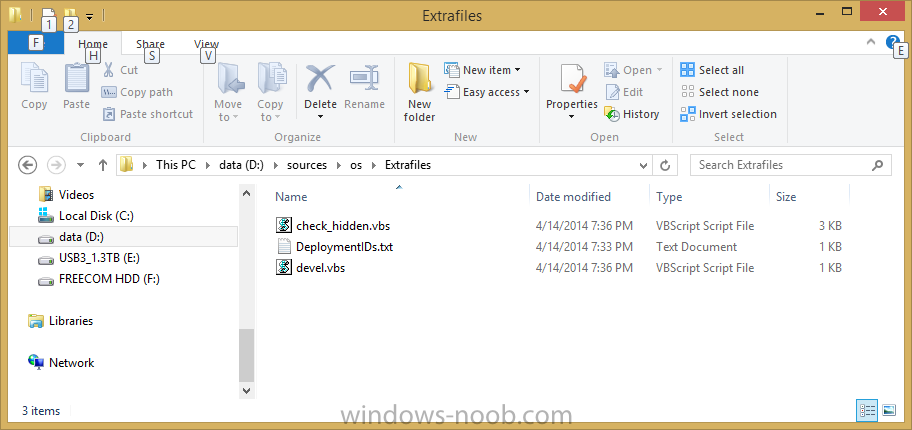
 Extrafiles.zip 2.25KB 4 downloads
and unzip to somewhere useful like D:\sources\os\extrafiles
Step 2. Create some temporary directories
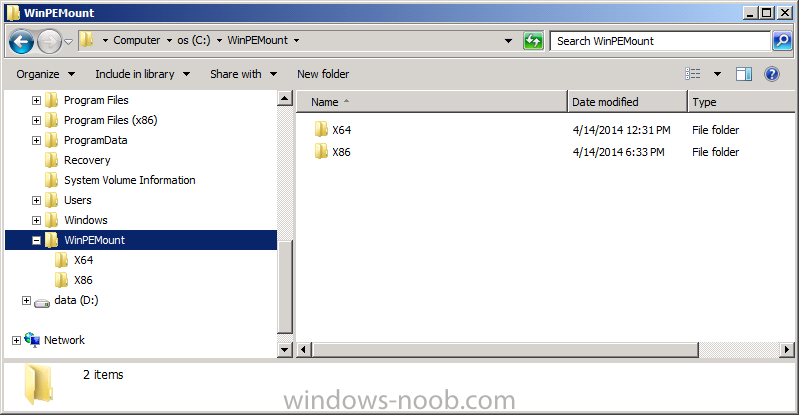
To enable the on-demand ability, we need to add a script to our boot image, and to do that we’ll inject a file called devel.vbs into our boot wim image. This file needs to be accessible even before the prestart command kicks off so we will mount our boot wim file to inject it. To mount the boot wim we need some temporary storage so create some folders on C:\ like so
C:\WinPEMount
|__X86
|__X64
as shown in the screenshot below
Step 3. Add a script to the boot image
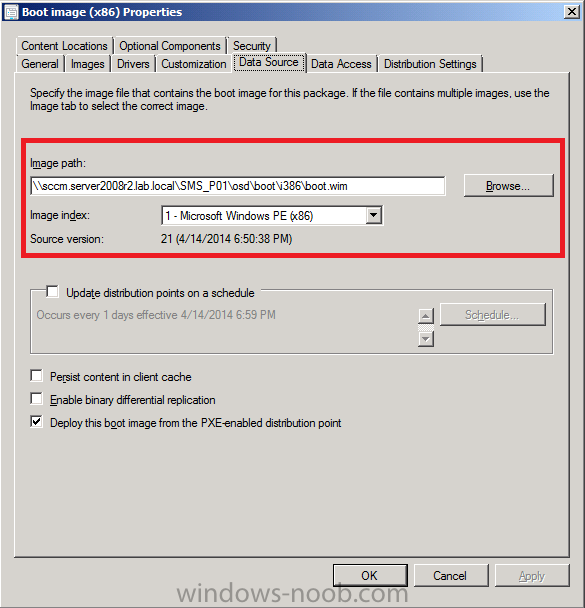
Locate the boot wim that you use most often in your task sequences in the console and identify it’s path. In the example below we will edit the i386 (X86) boot wim, but you can just as easily replace the path with X64.
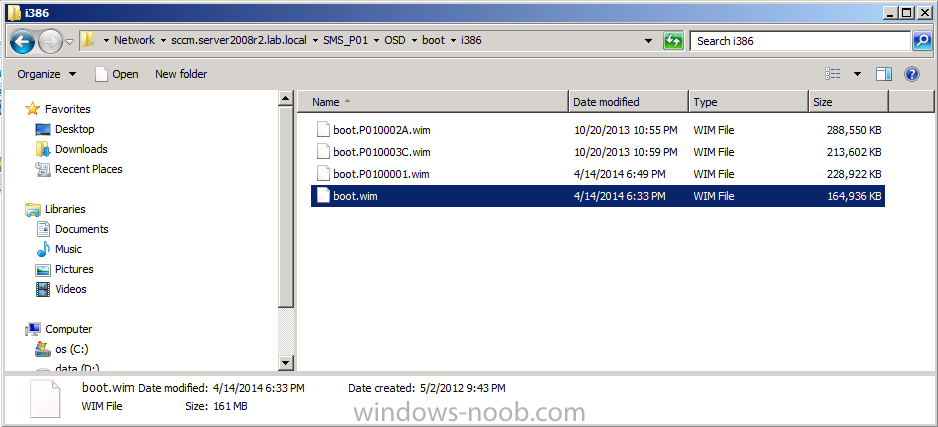
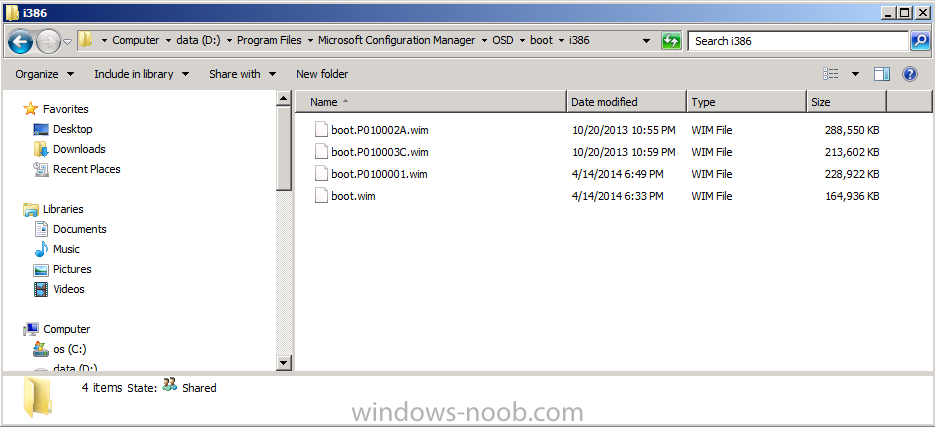
browse to the data source listed in the properties and you’ll probably see a few wim files, the file we are interested in is called boot.wim as every time your boot wim file is updated (for example adding drivers), this file is used as the source for all changes.
This file will be present locally on our Configuration Manager primary server in the following path D:\Program Files\Microsoft Configuration Manager\OSD\boot\i386\boot.wim assuming Configuration Manager is installed on D:\.
Tip: Before making any changes to your boot wim files, make a copy of them and store them safe.
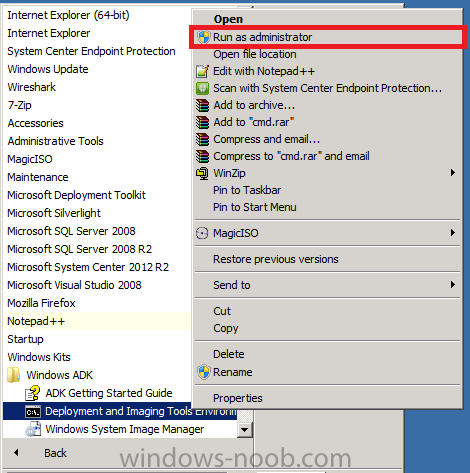
We will modify the boot wim file in the local path. To inject files we first need to mount the file with DISM. Use the version of DISM that comes with System Center 2012 R2 Configuration Manager, the correct version is included in ADK 8.1 and the correct version of DISM is 6.3.9600.16384. To start the correct version of DISM locate it in your start menu and right click on the Deployment Imaging Tools and Environment cmd prompt, choose Run as Administrator
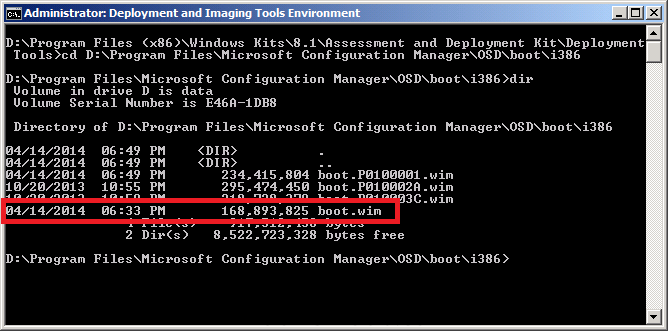
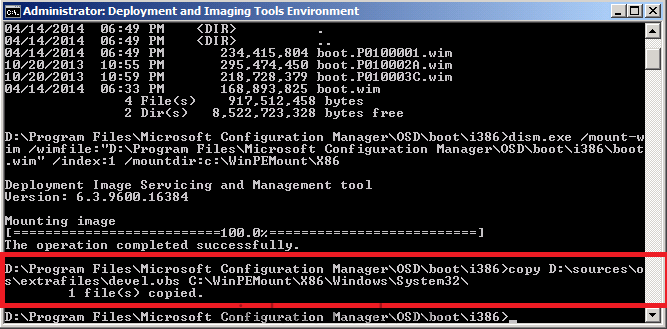
and change directory to the directory that has your boot wim file. You can check the contents of the directory to verify that the boot wim file is present.
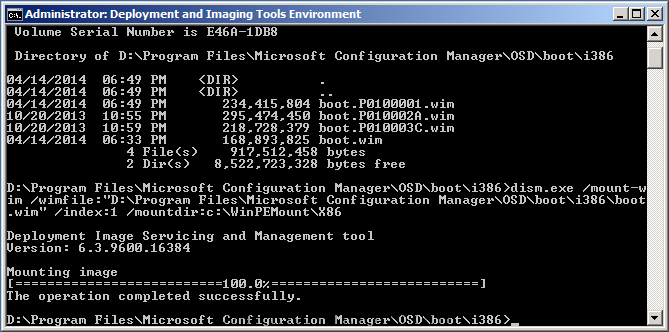
using Dism mount the image using the following command
dism.exe /mount-wim /wimfile:"D:\Program Files\Microsoft Configuration Manager\OSD\boot\i386\boot.wim"/index:1/mountdir:c:\WinPEMount\X86
press Enter when done
Using Explorer, or a command prompt, copy the file called devel.vbs from our downloaded files from Step 1 to C:\WinPEMount\X86\Windows\System32 for example like in the screenshot below
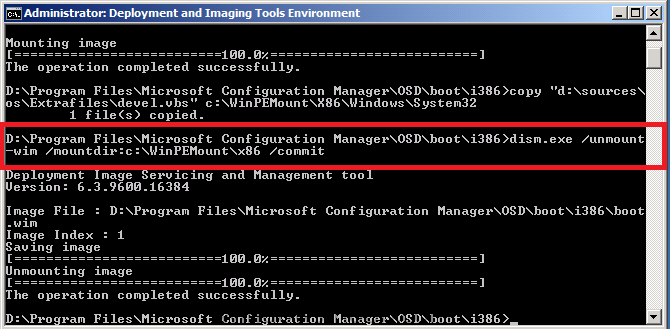
Now the file is in place, commit our changes (save the changes) to the boot wim file.
dism.exe /unmount-wim /mountdir:c:\WinPEMount\x86/commit
as shown in the screenshot below
Step 4. Add a prestart script to the boot image
Now that we’ve injected our needed script, we need to add our prestart command. To do that bring up the boot wim properties and browse to the Customization tab, fill in the details
Command Line:
cscript.exe check_hidden.vbs
Include files for the Prestart command:
\\sccm\sources\os\extrafiles
like in the screenshot below
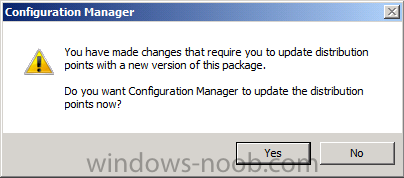
Click Apply, and OK and answer Yes to the Distribute Content question.
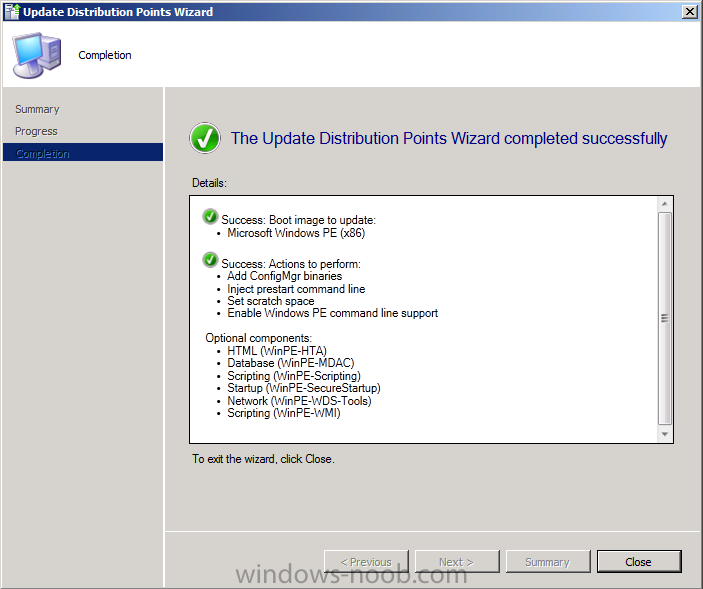
continue through the wizard until completion.
Step 5. Create a local user and a hidden share
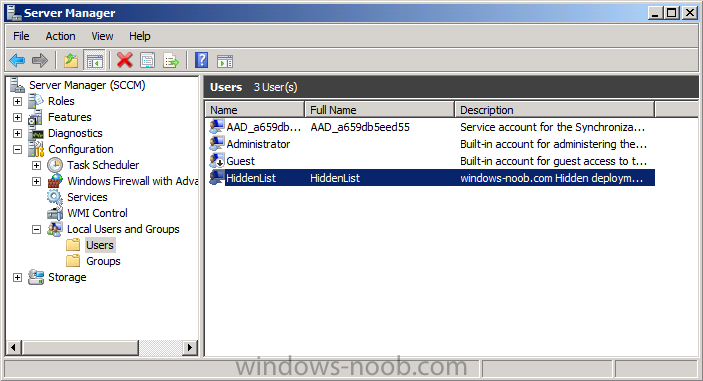
On a suitable server (I used the Configuration Manager primary server in my lab, in production you may want to separate it), create a local user called HiddenList with a password matching the one in the check_hidden.vbs file downloaded in Step 1 above.
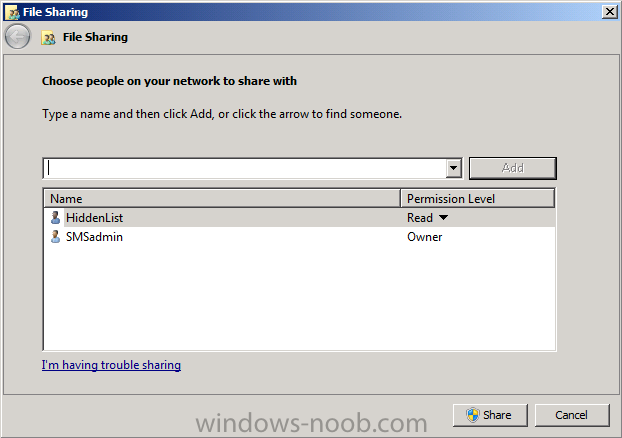
Next create a folder called Hidden$ and share it, grant the local user HiddenList read access to the share.
Note: Don’t forget to edit the Check_Hidden.vbs file downloaded in Step 1 and change the ip address and share name to match the one created above.
Step 6. Copy DeploymentIDs.txt to the hidden share
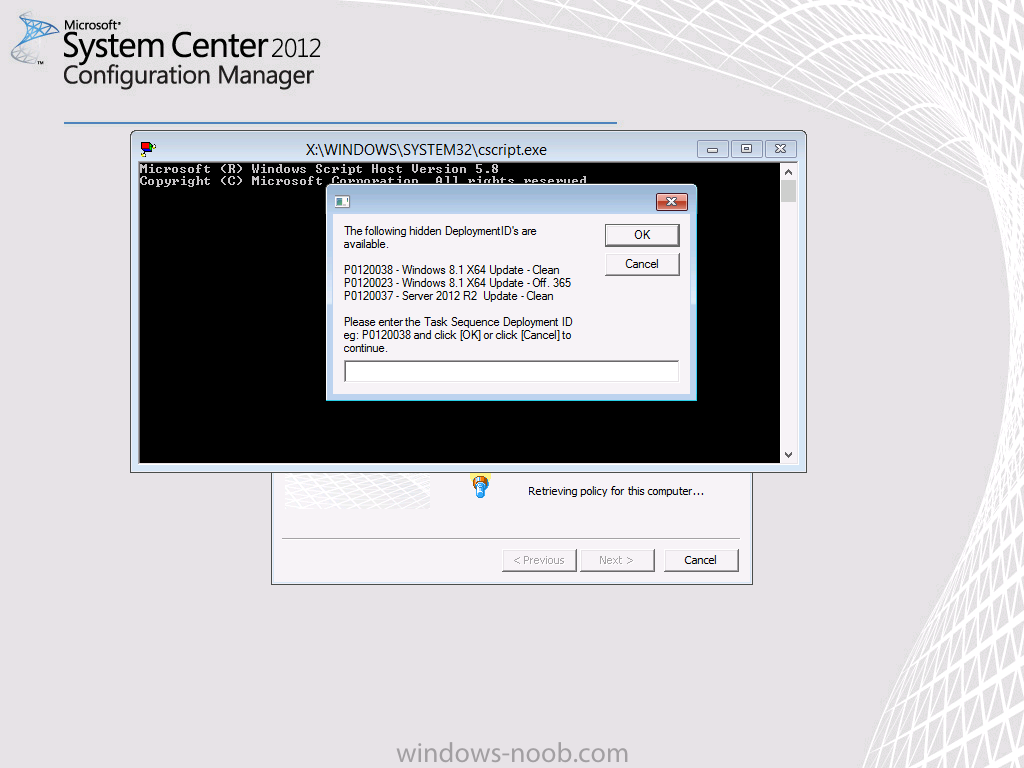
Copy the DeploymentIDs.txt file downloaded in Step 1 to the hidden$ share, edit the file in notepad making sure that it includes the DeploymentIDs and friendly name of the Hidden Task Sequences you have deployed in your environment. The Deployment ID value of a task sequence can be found by looking at Step 8 of this post. This text file will be the ‘template’ that is shown to the end user so make sure to enter the correct values.
Step 7. Verify and Test
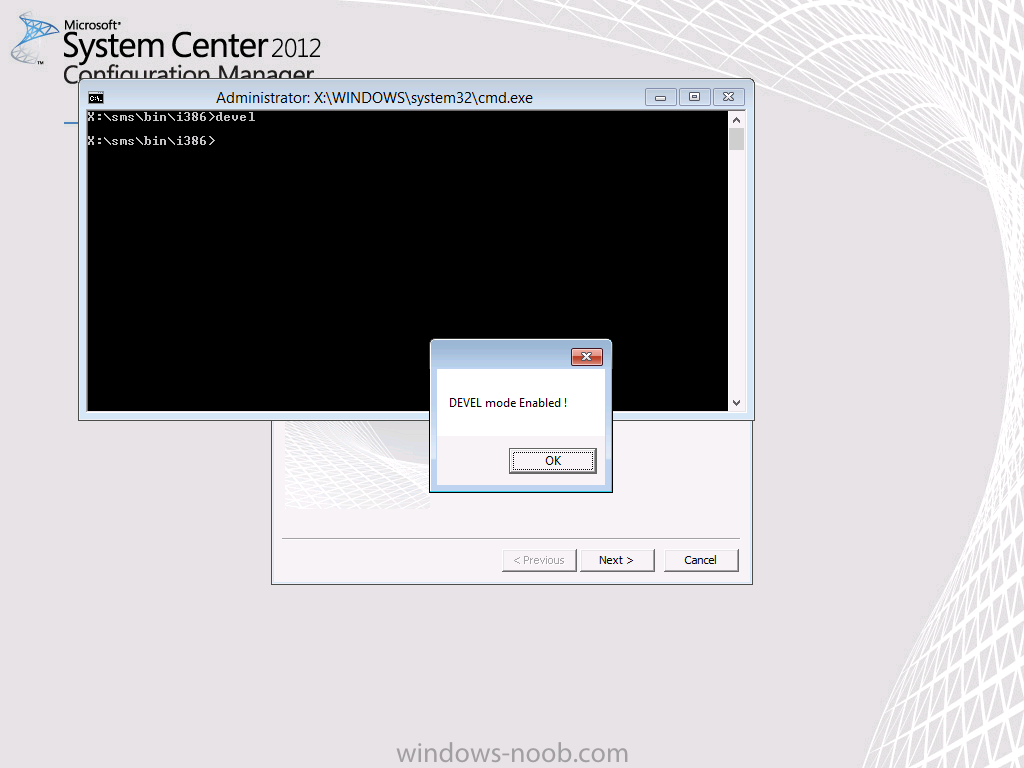
Now everything is in place to test out the theory above. So PXE boot a computer and when you get to the PXE password screen, before entering the password press F8 and type devel. If you followed the guide above you should see a popup telling you that Devel mode Enabled.
Click Ok and close the command prompt window. Enter the PXE password and press Enter. The prestart command in the boot wim should display the following prompt.
Note: if you didn’t enable Devel mode above then it won’t popup the prestart prompt at all. That is on-demand in action!
after typing in your deploymentID and pressing enter you should see the following
Success !
Summary
The SMSTSPreferredAdvertID is a great variable and allows us to deploy hidden task sequences, however selecting that Task Sequence deploymentID is usually hard coded via a script to one DeploymentID or relies on the user knowing the values. This method allows you to conveniently use SMSTSPreferredAdvertID on-demand (by pressing F8 and typing Devel), and having a list of available hidden task sequences and their respective Deployment ID’s on screen.
cheers
niall





This has been working great for us for quite some time. However, last fall after upgrading to MECM 2006 and ADK 2004, the prestart command stopped working for us. I’ve been working with MS support thinking there is a bug in the product somewhere, but they think that it is the script. I disagree but was curious if you or anyone else was having any issues trying to get the prestart command with the check_hidden.vbs file to work correctly for the newer versions of CM and ADK. thanks and enjoy your posts.
when you say it stopped working, do you see anything in the smsts.log to indicate that
No, I don’t. Here is the weird thing. If I use the console to create a new bootable ISO file and add the prestart stuff during the process of creating that bootable file, the prestart works just fine. However, using the method as you had outlined, it doesn’t work anymore. The method of going into the properties of the boot image within the console and adding the prestart command in the Customization tab no longer yields the expected results as it used to. I believe the prestart check_hidden.vbs command executes but no longer works even though the script hasn’t changed and works if I inject it into the boot ISO creation. My old boot image that was created using the prior version of ADK and SCCM that uses the exact same script works. If I take that same boot image and update it using the newer version of ADK, it stops working. That’s why I’ve been trying to get MS to see if this is a bug but they aren’t biting yet.