In Part 1 of this mini series we integrated Windows Intune with System Center 2012 R2 Configuration Manager. In Part 2 we added Support for iOS devices (Iphone, iPad). In Part 3 we learned the difference between App Package for iOS (*.ipa file) and applications from the Apple App Store. We learned how to deploy them to iOS devices and configured the deployment type so that the applications were made available to the user based on the iPhone or Ipad operating system version, in addition we also checked device Ownership information and deployed the application based on those requirements.
In Part 4 we learned how to use and configure compliance settings in order to enable or disable certain configurable features on iOS devices. We enforced a Password requirement and enforced a minimum password length as this is a common requirement for organizations. In Part 5 we enabled support for Windows 8.1 devices (both Windows RT 8.1 and Windows 8.1 Enterprise) so that they could be managed via System Center 2012 R2 Configuration Manager integrated with Windows Intune. In Part 6 we deployed Windows 8.1 apps (appx) to Windows 8.1 devices. Now we will look at how to make Windows 8.1 store apps available in the Company Portal and how to make them featured apps with their own categories.
Step 1. Enable Windows Remote Management on a device
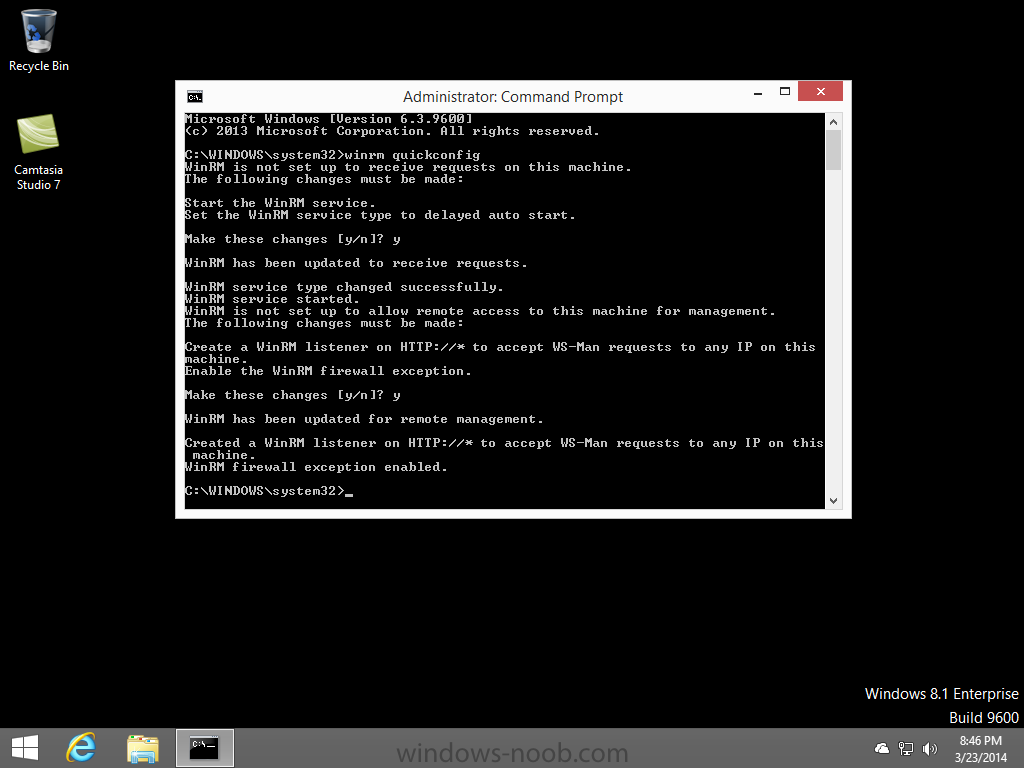
In order to add links to Windows 8.1 Store apps we need to be able to browse a Windows 8.1 device from the console using Windows Remote Management (WinRM) and that device should have the source Windows store app installed that you want to make a link available for in the Company Portal. The easiest way you can achieve this is by using a domain joined Windows 8.1 device and then enabling the Windows Remote Management service on that device by opening an Administrative command prompt and typing the following command:-
WinRM quickconfig
Answer yes to the questions provided as in the screenshot below.
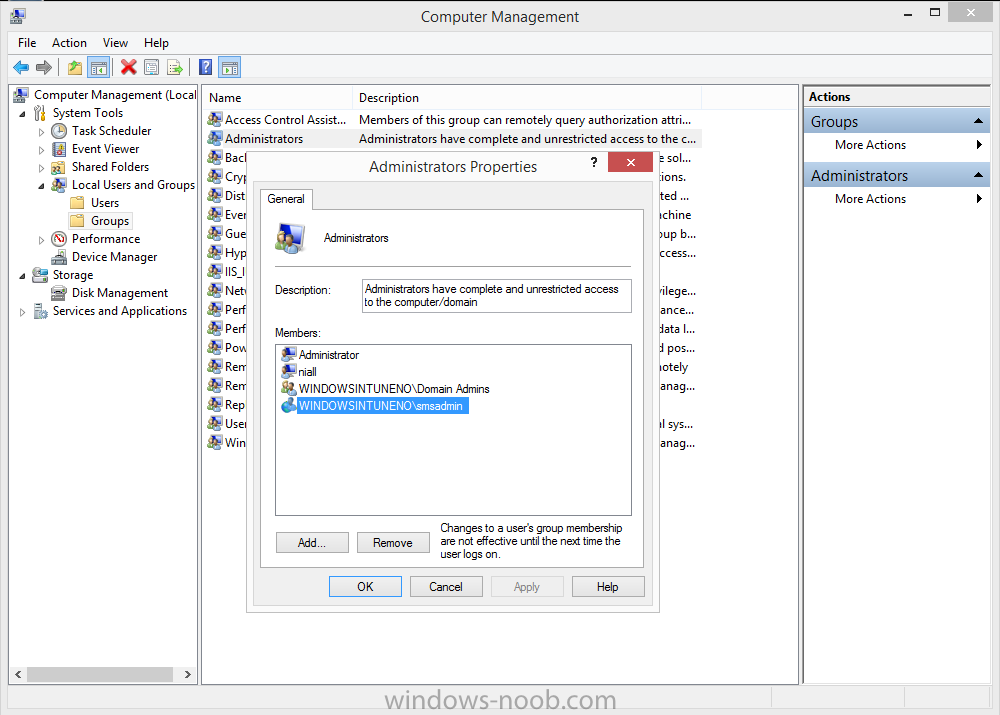
Next, add the user (for example, SMSadmin) you are running the CM12 console with to the administrators group on the remote machine like in the screenshot below
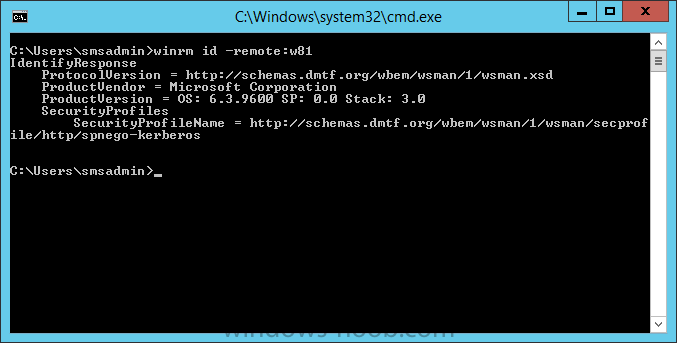
Finally test the connection from your CM12 server to the remote machine by typing the following in a command prompt
winrm id -remote:w81
the output should look like below, if it doesn’t make sure you’ve run the steps above.
Step 2. Add a link to a Windows Store app
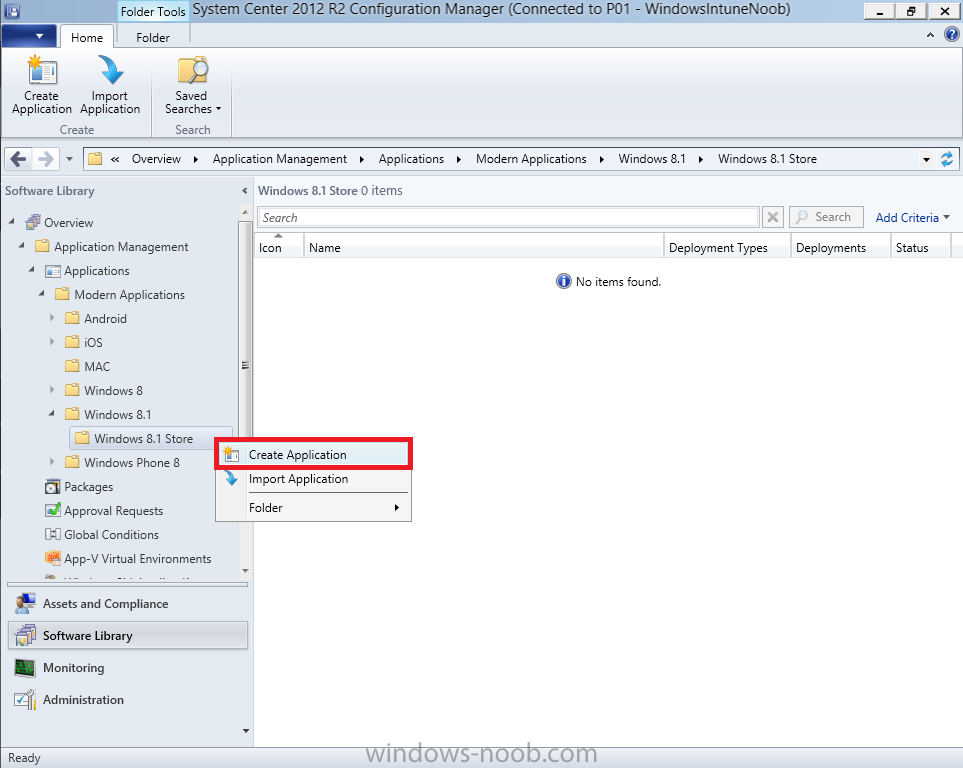
In the Configuration Manager 2012 R2 console, select Software Library, Application Management, Applications and expand our previously created folder structure, expand to Windows 8.1 Store and right click, choose Create Application
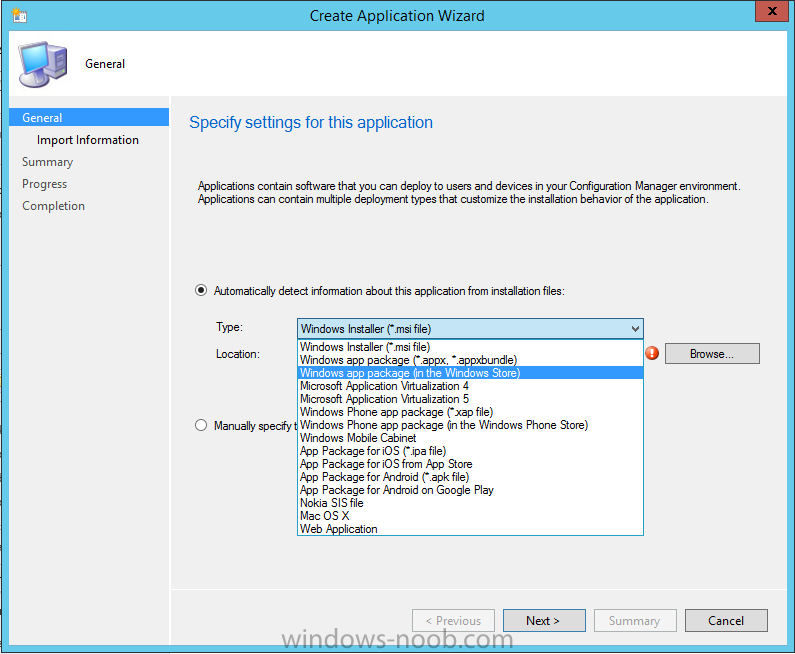
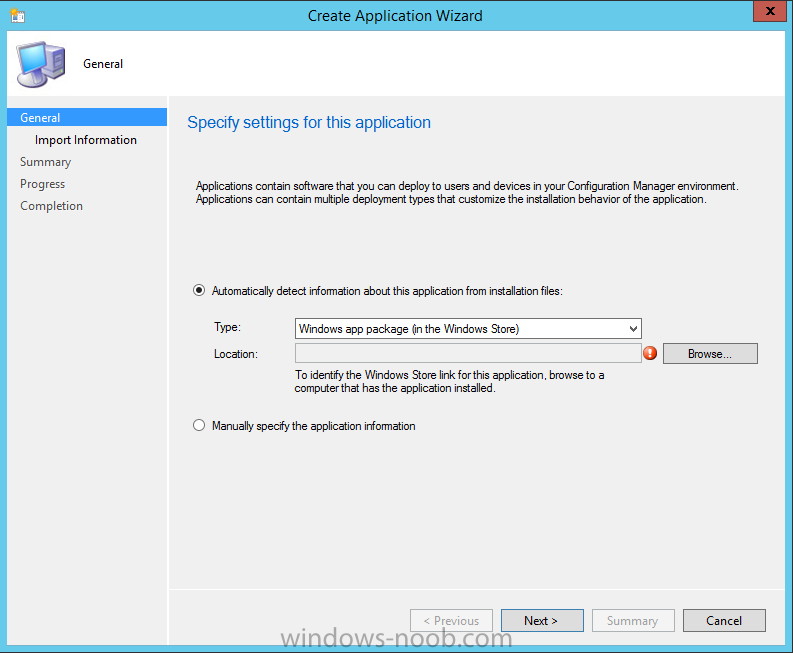
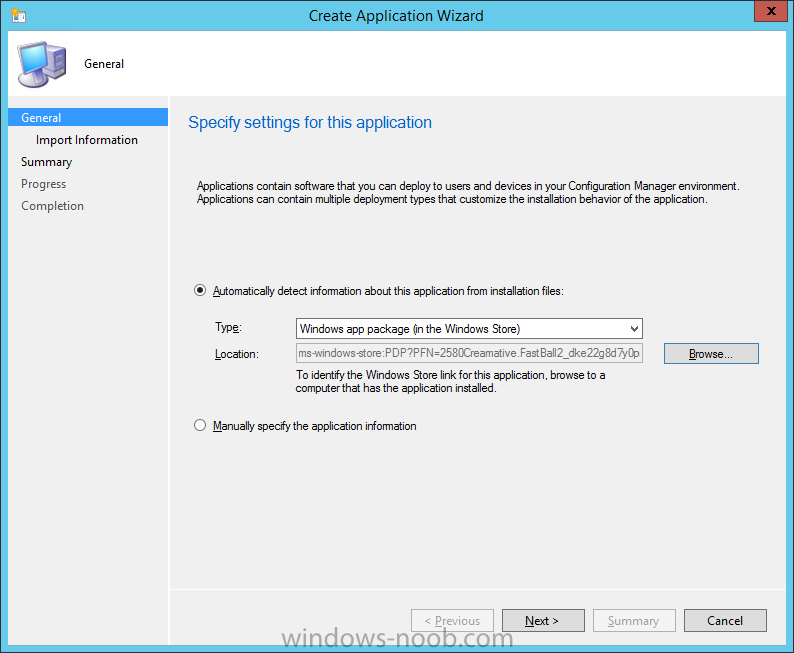
in the Specify settings for this application screen choose Windows App Package (in the Windows Store) as per the screenshot below
for Location click on Browse
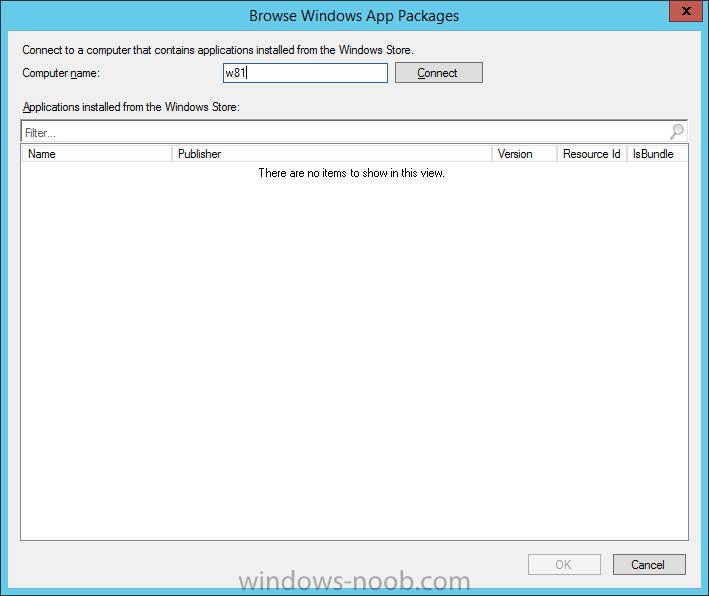
In the Browse Windows App Packages screen, enter the computer name of the computer you used in Step 1 above and click on Connect
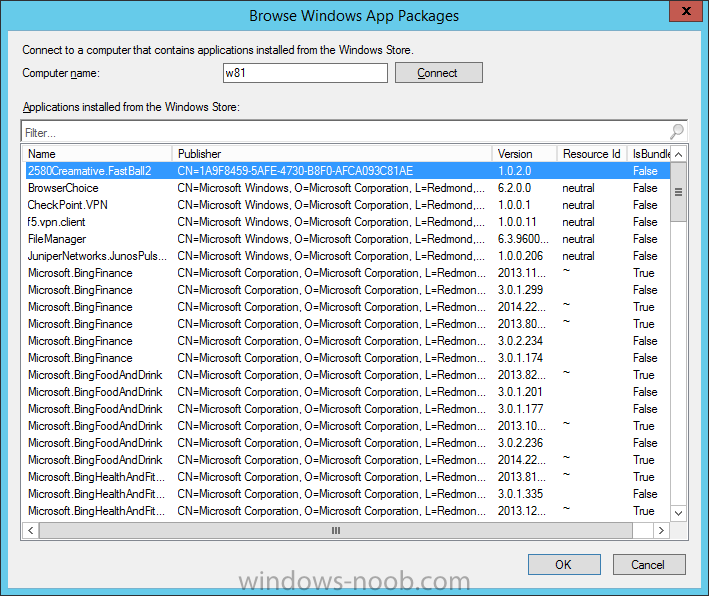
After some moments you should see a screen filled with the Windows App Packages installed on that remote computer , select the Application you want to make available in the Company Portal as a link to the Windows store and click Ok. In the example below I have selected an App called FastBall, it’s a free Windows store game with excellent music.
The select app appears in the location field, notice that it is greyed out and that ms-windows-store is the prefix to the app.
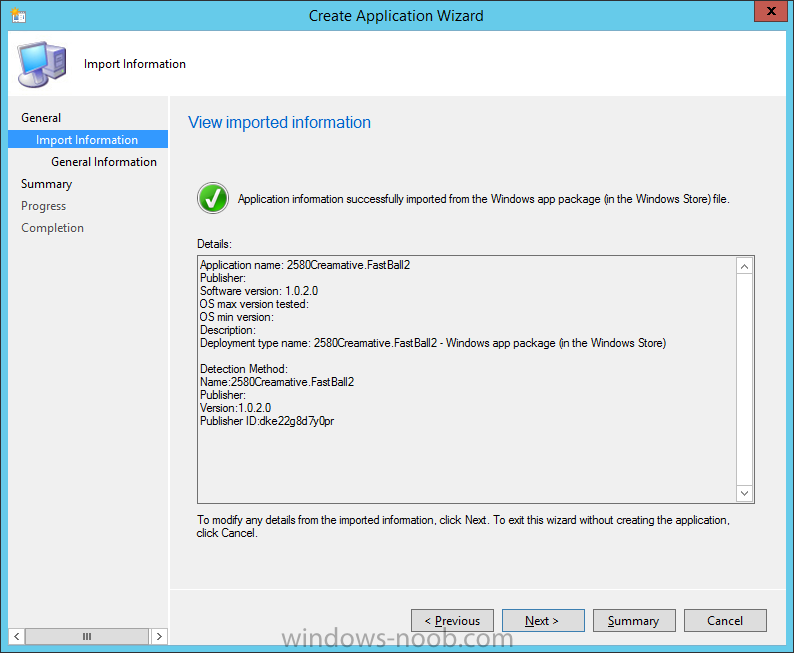
click next to view the imported information
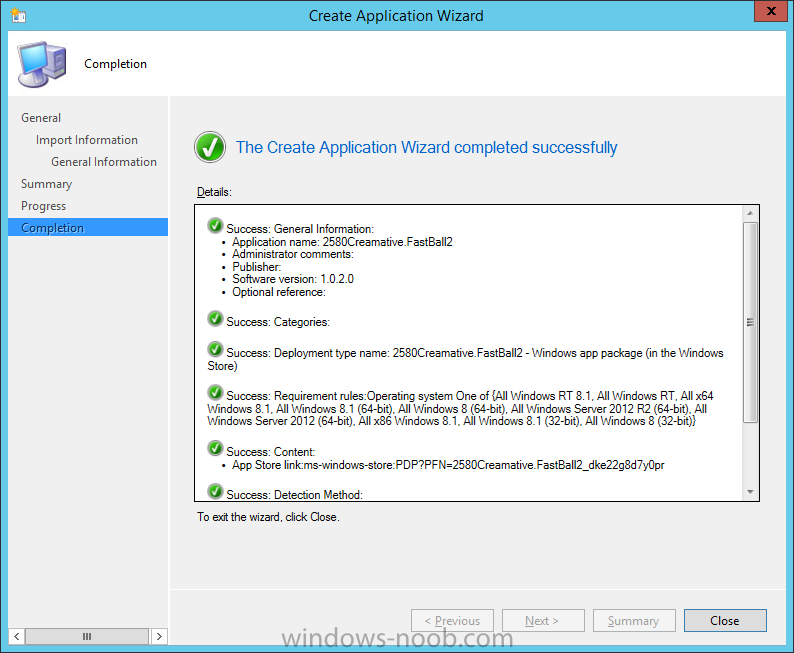
now you can enter details to your liking or continue through the wizard by pressing next, next. Interestingly you can see that the detection method, requirement rules, and content options are automatically filled in by the wizard
close the wizard
Step 3. Make the Application a Featured App and categorize it
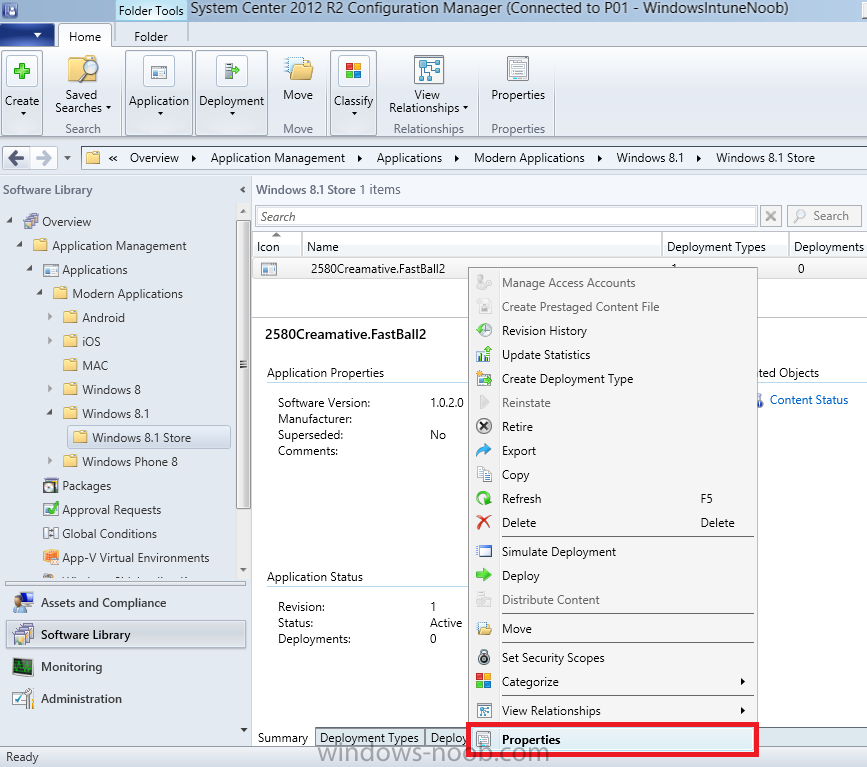
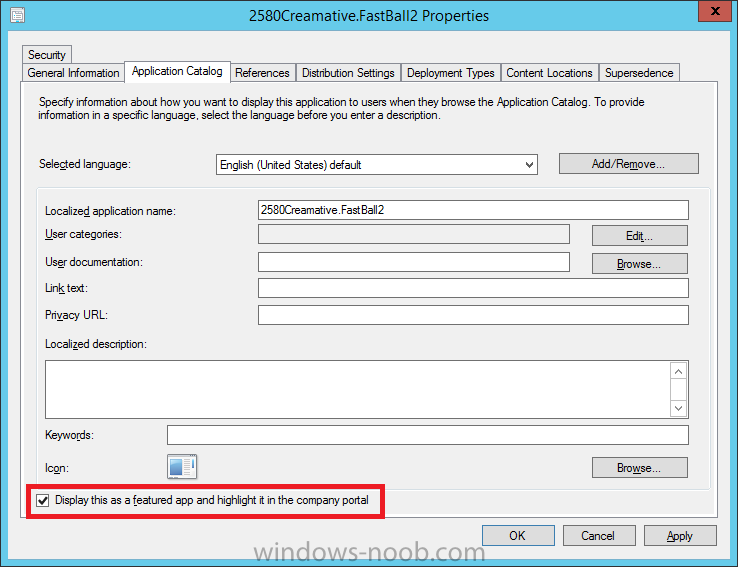
Featured apps can be highlighted in the Company Portal to hopefully catch the attention of your users. In this guide, we will make this Windows Store App a featured app. To do so, right click on the application and choose Properties
select the Application Catalog tab and place a checkmark in the checkbox beside Display this as a featured app and highlight it in the Company Portal
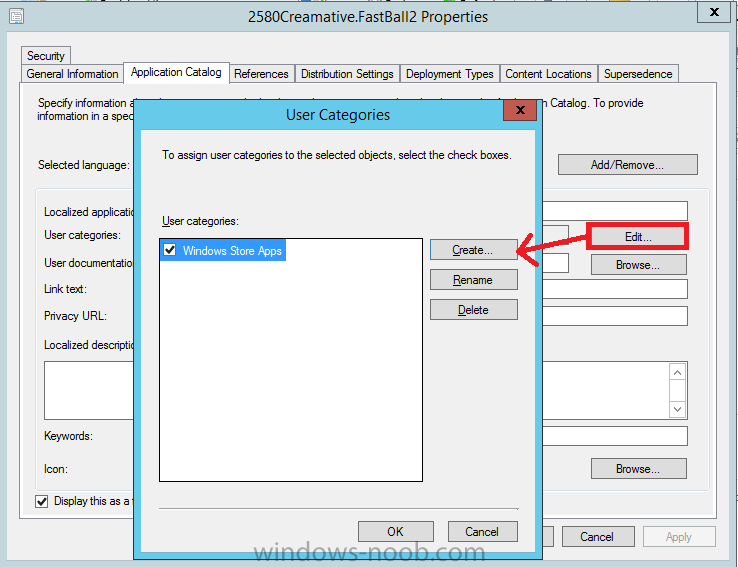
In addition to making our app Featured, you might want to apply a category to it such as Windows Store Apps. To create a category, click on User Categories, then select Edit, then choose create to create a category
click on Ok and Apply and Ok.
Step 4. Deploy the App
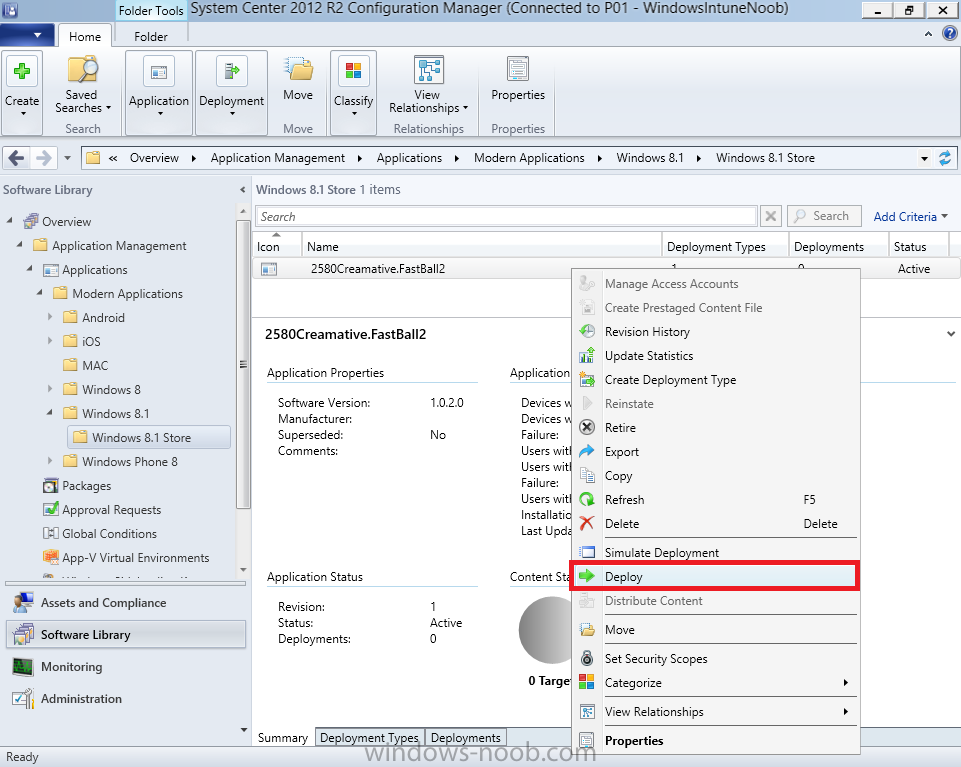
In order for your Windows Intune users to get the app via the Company Portal it needs to be deployed to a collection that they are in. Right click on the app and choose Deploy
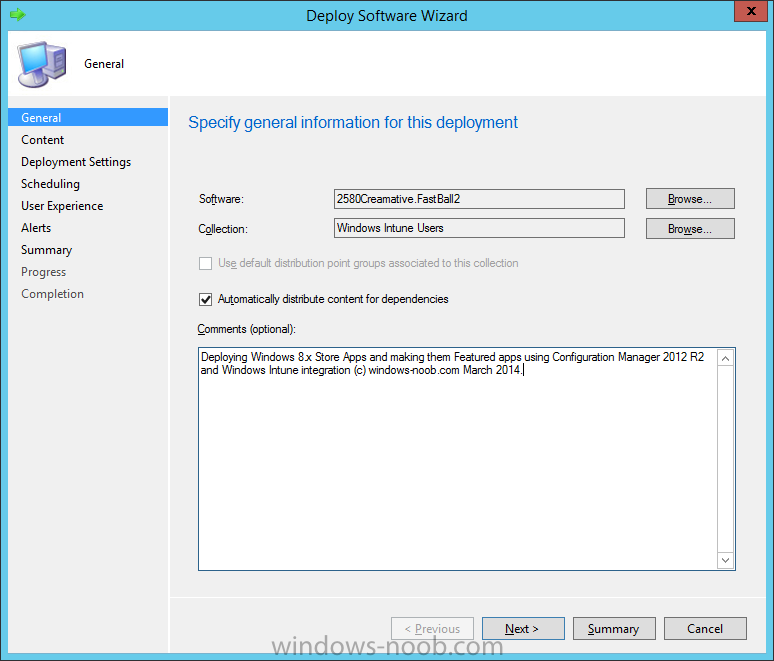
select a suitable collection such as Windows Intune Users
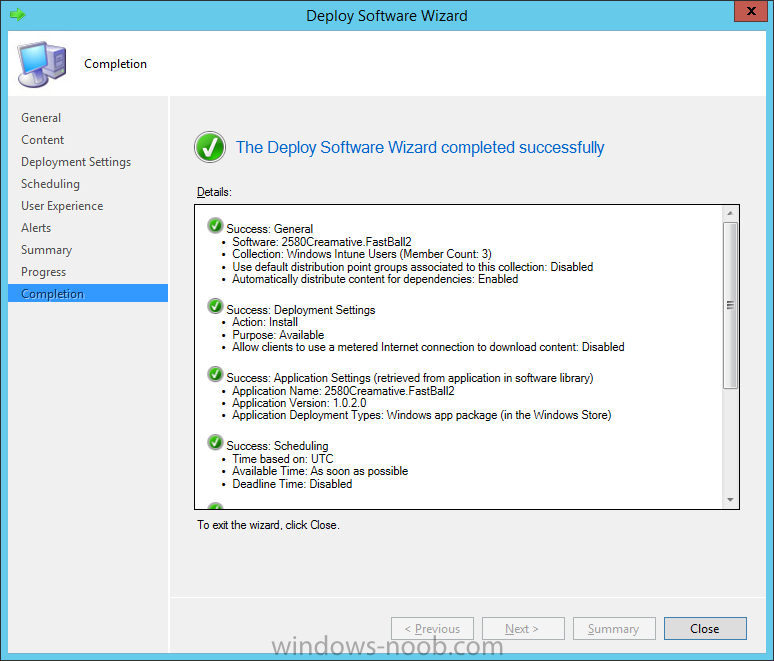
As this is only a link to an app (for example like this -ms-windows-store:PDP?PFN=2580Creamative.FastBall2_dke22g8d7y0pr) there is no content to distribute, therefore the Content options are greyed out, continue through the rest of the wizard to completion.
Step 5. Sign in to the Company Portal
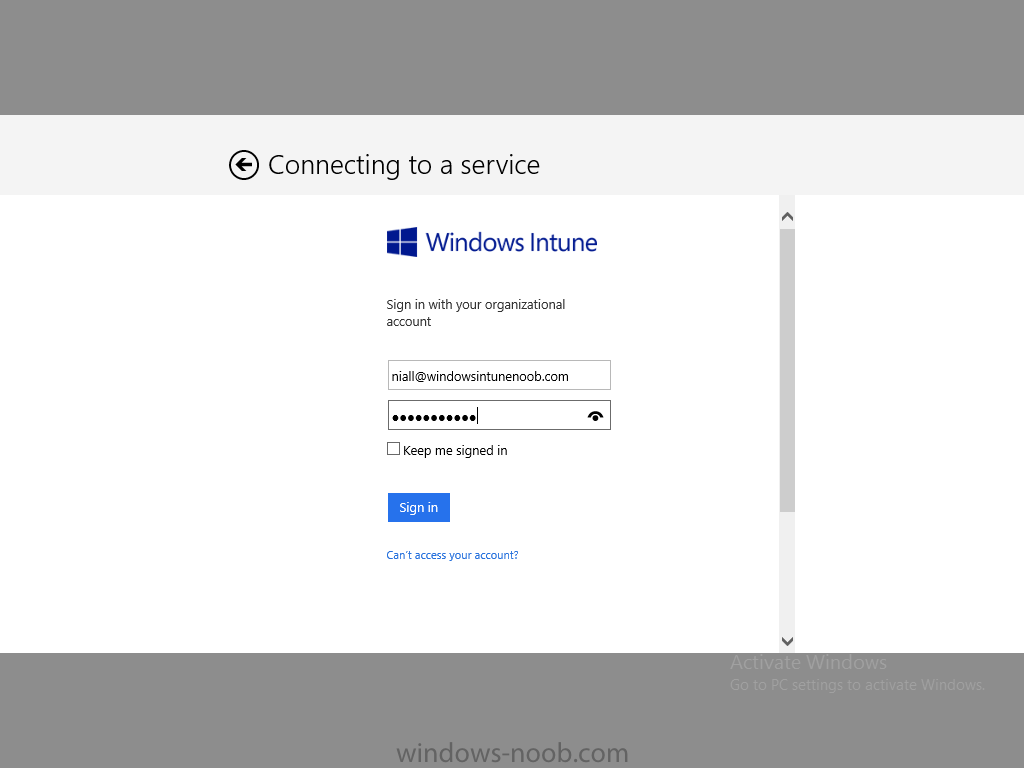
On a Windows 8.1 device that has been enrolled, login to the Company Portal by signing in.
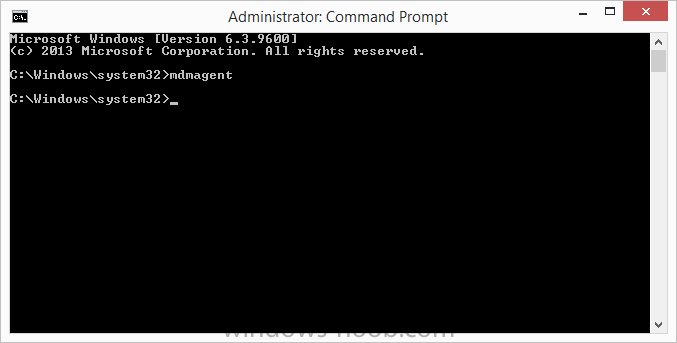
the Company Portal appears, if your featured app doesn’t show up, try running mdmagent via a command prompt to speed up policy retrieval
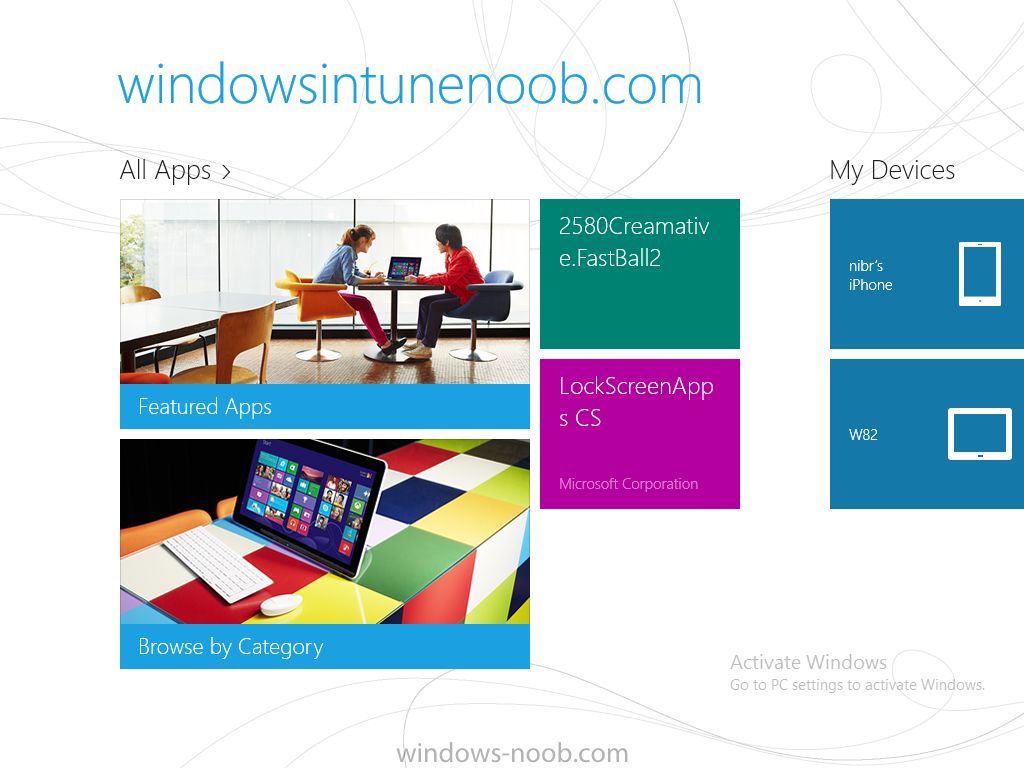
or you could wait a day or so for your Windows 8.1 device to refresh policy by itself, once it has the new policy it should look something like this
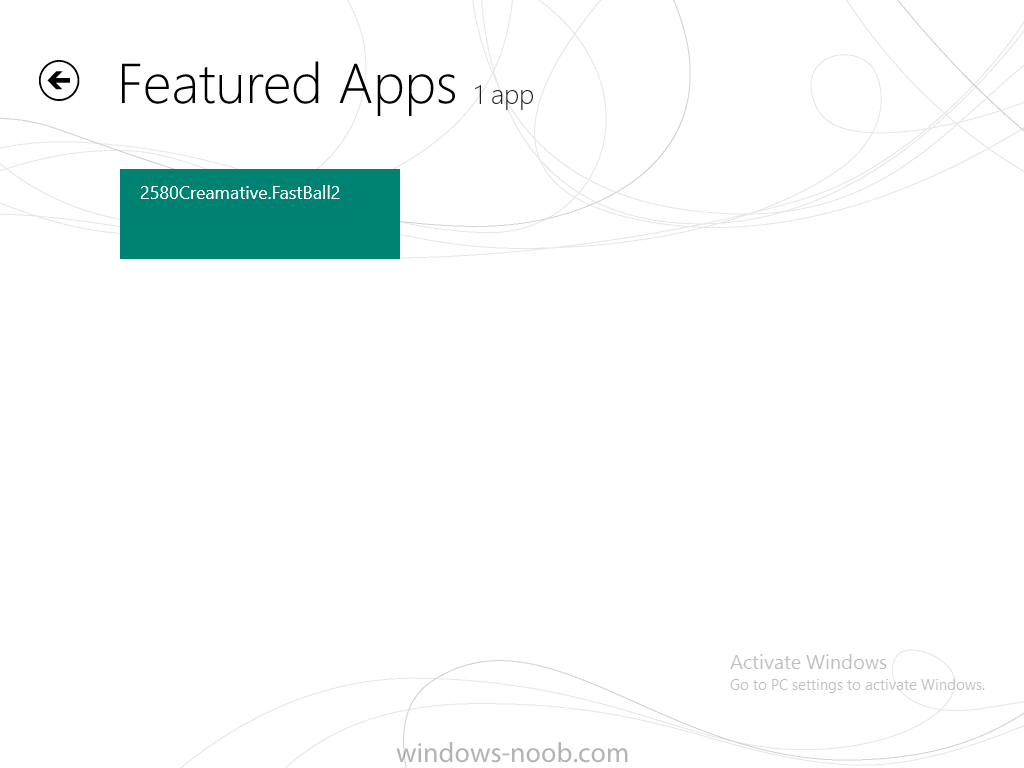
click on Featured Apps to see what that looks like
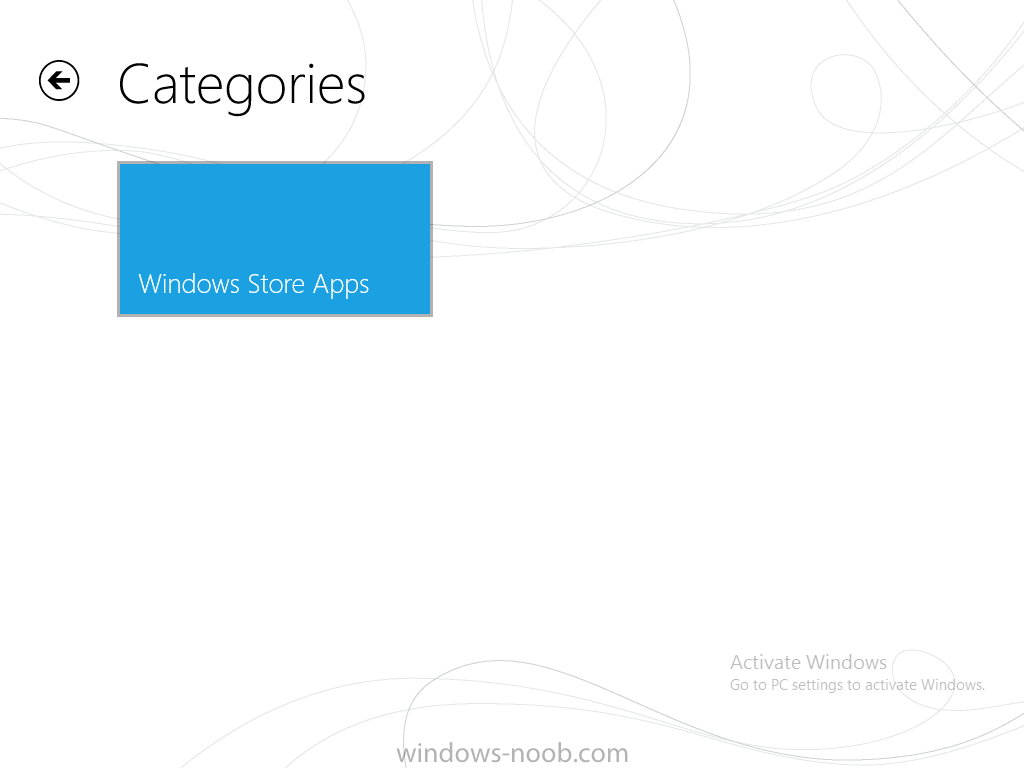
Click back and then click on Browse by Category to see how it was categorized, and you should see your Windows Store Apps category as per the screenshot below
Step 6. Install the Windows Store App
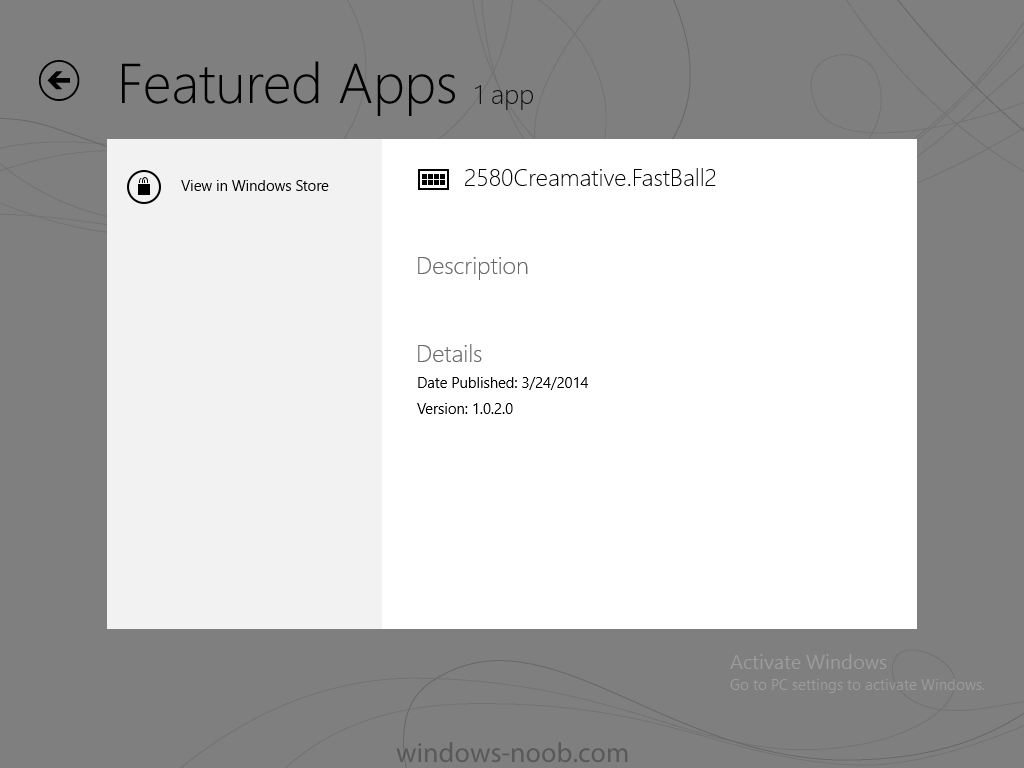
Start the installation process by clicking on the app itself
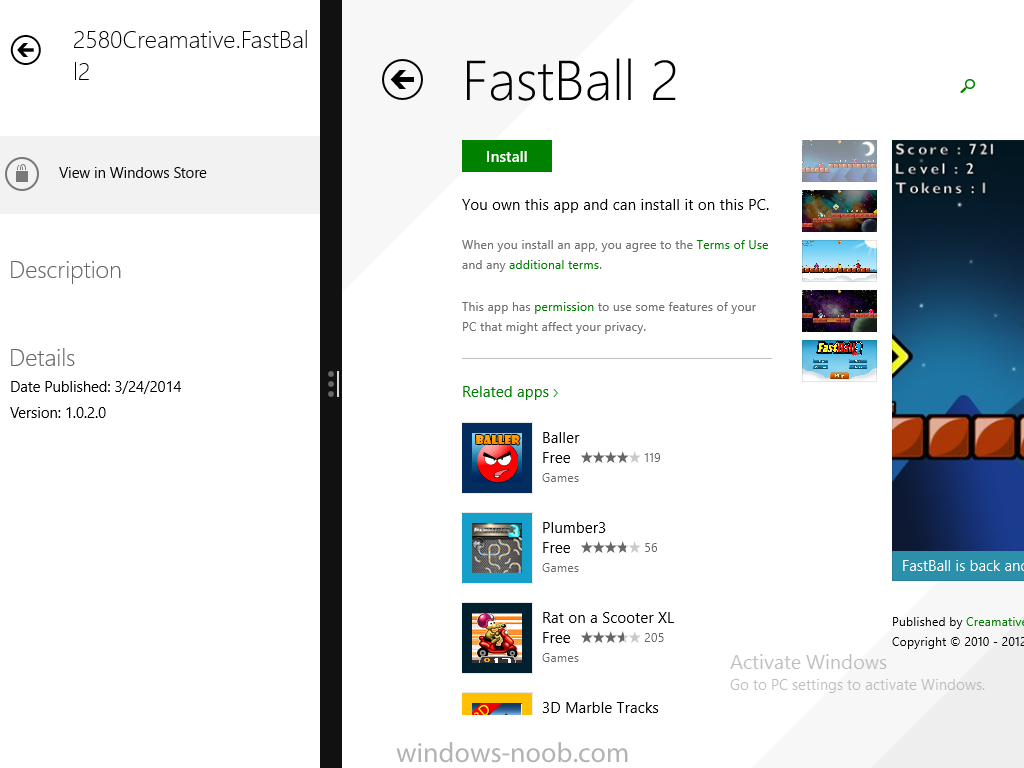
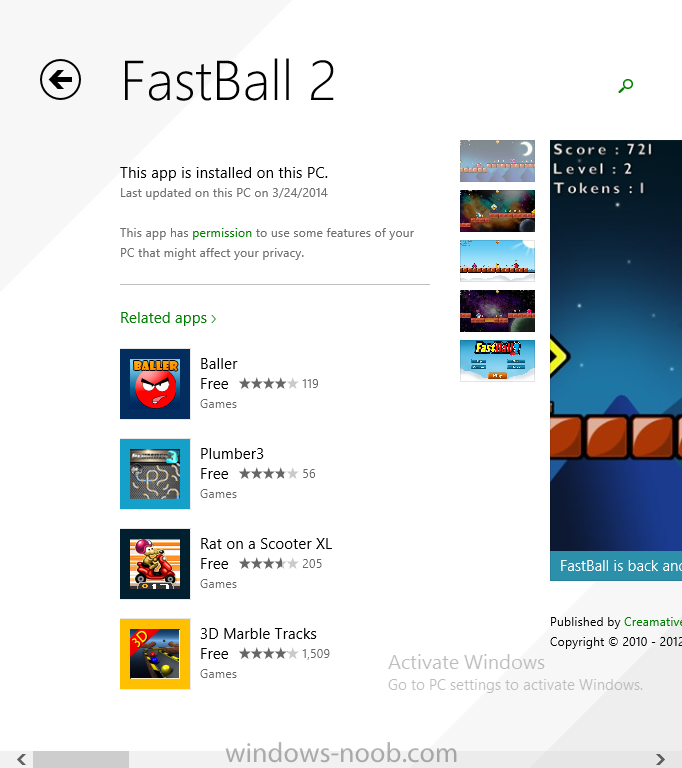
notice the text View in Windows Store in the top left, click on that, that will open up a split screen, Company Portal on the Left, Windows Store on the right, and our Featured Windows Store app is listed, click on Install
and it installs
You’ll probably want to verify that the app installed successfully by testing it,
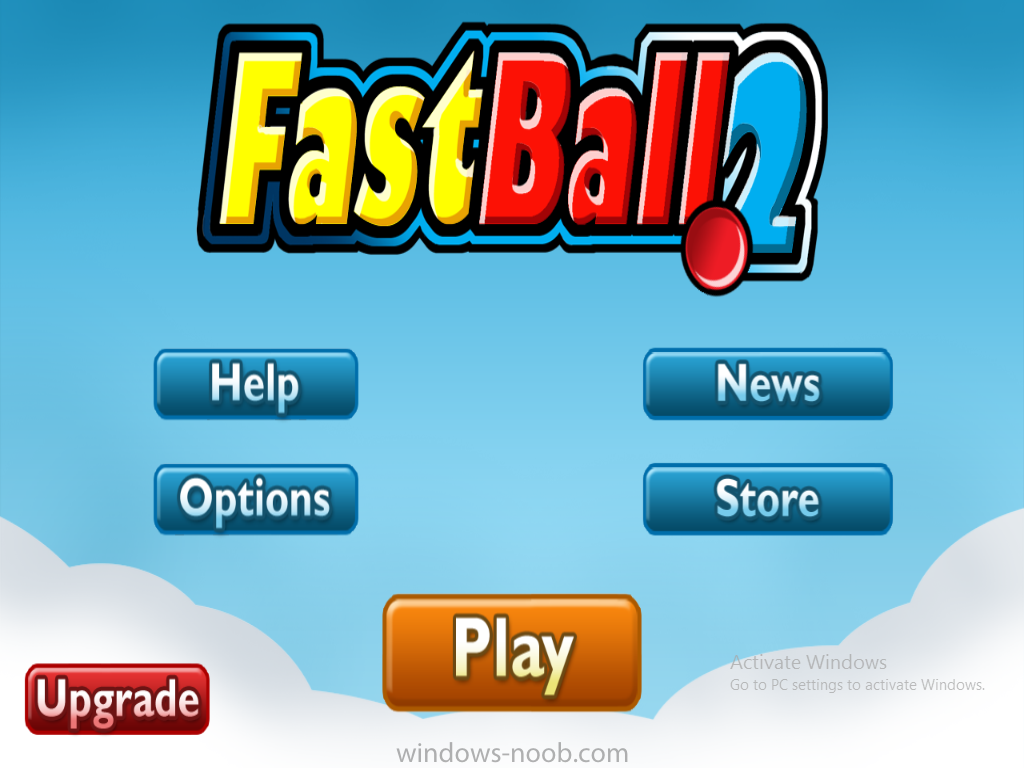
job done !, well nearly done, click on Play and tell me what you think of the music, cool isn’t it ?
Summary
In this guide we’ve learned how to deploy links to Windows Store apps to our modern mobile Windows 8.1 devices using Windows Intune Integration in Configuration Manager 2012 R2. In addition, we’ve learned how to make the app a featured app and how to categorize apps to make them easier to find.
Recommended Reading
Planning to Deploy Windows 8 Apps in Configuration Manager – http://technet.micro…y/jj822984.aspx
WinRM (Windows Remote Management) Troubleshooting – http://blogs.technet…leshooting.aspx
WinRM in mixed environments – http://www.thecodeki…ml#.Uy9PhIUZNaQ
Installation and Configuration for Windows Remote Management – http://msdn.microsof…2(v=vs.85).aspx
Downloads
For Offline reading you can download a Microsoft Word copy of this guide below.
 How can I manage modern devices using System Center 2012 R2 Configuration Manager Part 7.zip 1.95MB 9 downloads


