Imagine that you still have some Server 2008 X86 boxes in your organization and cannot replace them with Server 2008 R2 just yet, you decide to use what you have and enable the Distribution Point role on these servers with PXE enabled as a bonus (you cannot enable Multicast as that is a feature of Server 2008 R2).
Note: Each System Center 2012 Configuration Manager site system server must use a 64-bit operating system. The only exception to this is the distribution point site system role which can be installed on limited 32-bit operating system versions.
The Distribution Point role has the following prerequisites:
Windows feature:
- Remote Differential Compression
- BITS Server Extensions (and automatically selected options), or Background Intelligent Transfer Services (BITS) (and automatically selected options)
To support PXE or multicast, install the following Windows role:
- Windows Deployment Services
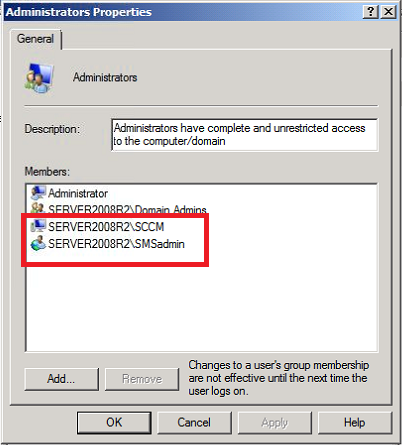
Step 1. Add Local Administrator accounts.
I added the Standalone primary server computer account to the Local administrators group, I also added the SMSAdmin account.
Step 2. Add BITS and RDC Prerequisites
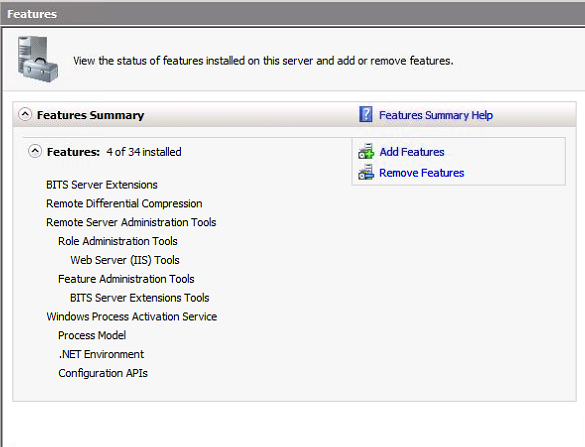
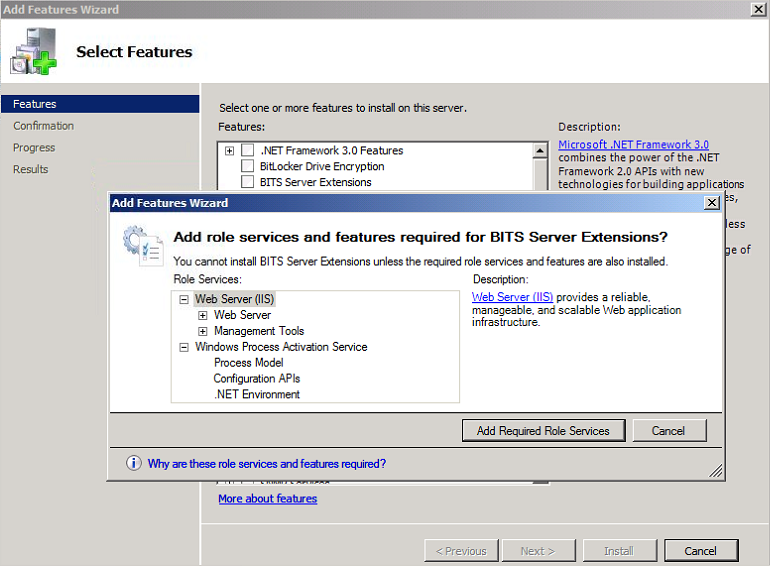
In Server Manager select Features, Add Features, Select BITS Server Extensions, also select Remote Differential Compression (if it is not already installed) and when prompted answer Add Required Role Services click next and next again.
so the following features are installed
 Step 3. Add the DP role to our new Site System to your Primary site.
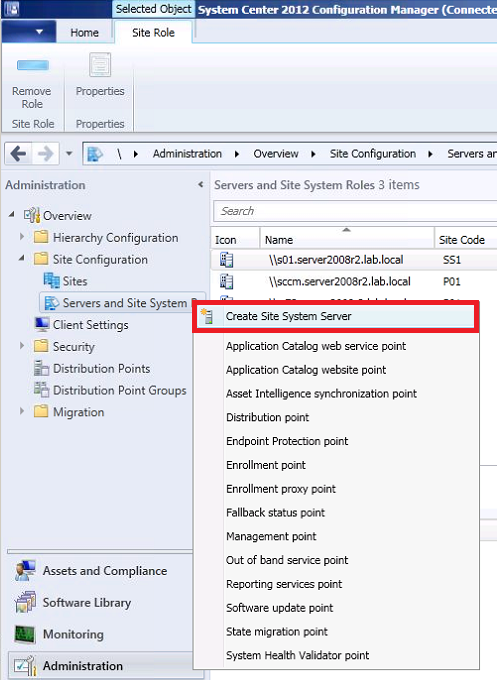
On your primary site server navigate to the Administration workspace, select Site Configuration and right click on Servers and Site System roles and choose Create Site System Server.
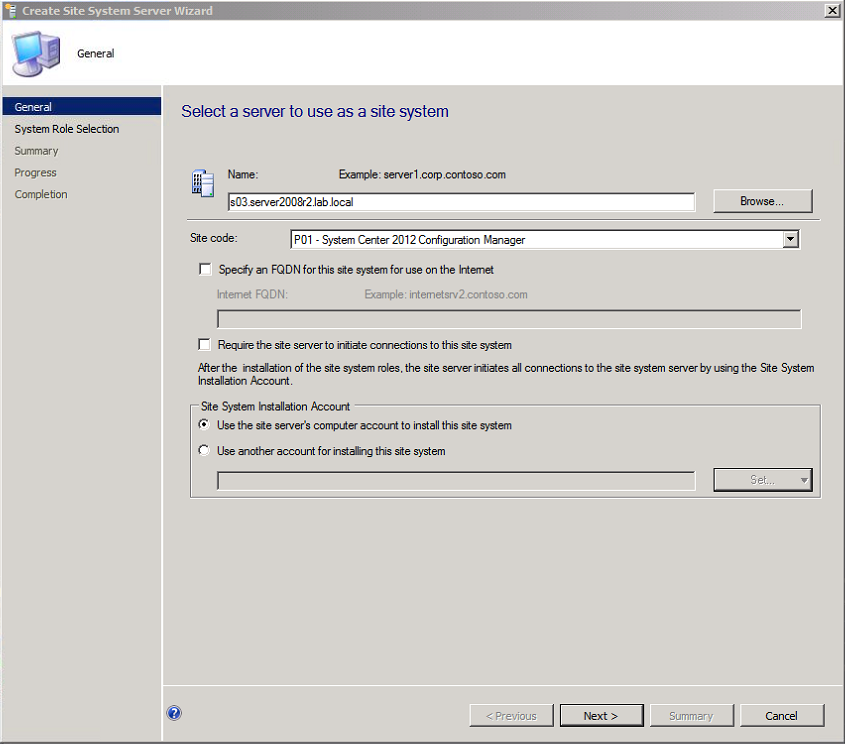
 select a server to use as a site system, input the FQDN of your site server and select the site that it will be managed by in the drop down menu
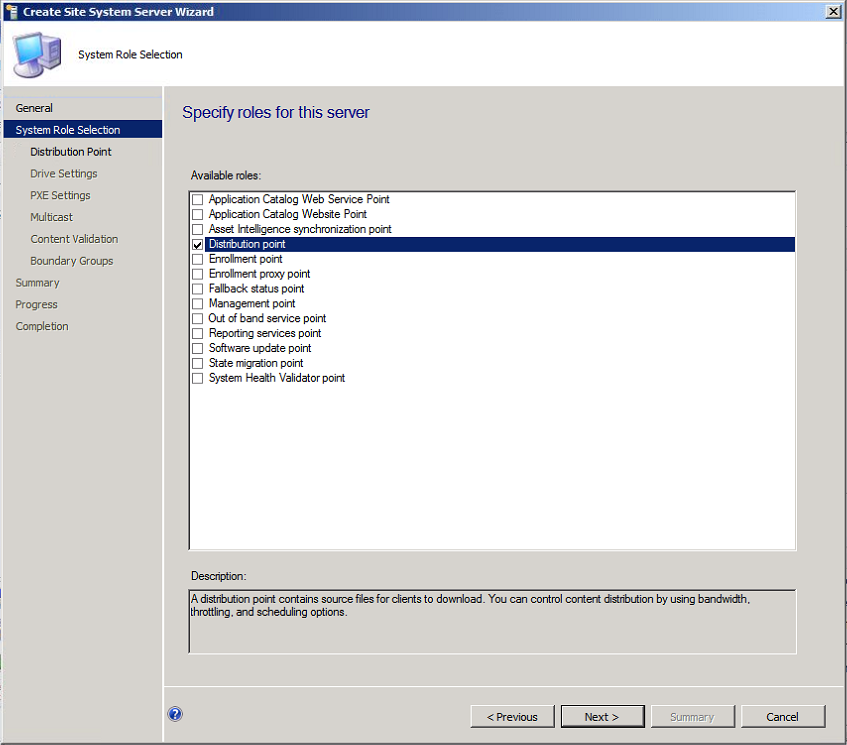
 select the Distribution Point role, notice how the wizard changes in the left pane to reveal more option screens
 select to Install and configure IIS, if you want to make the certificate last longer than one year from today then change it before proceeding,
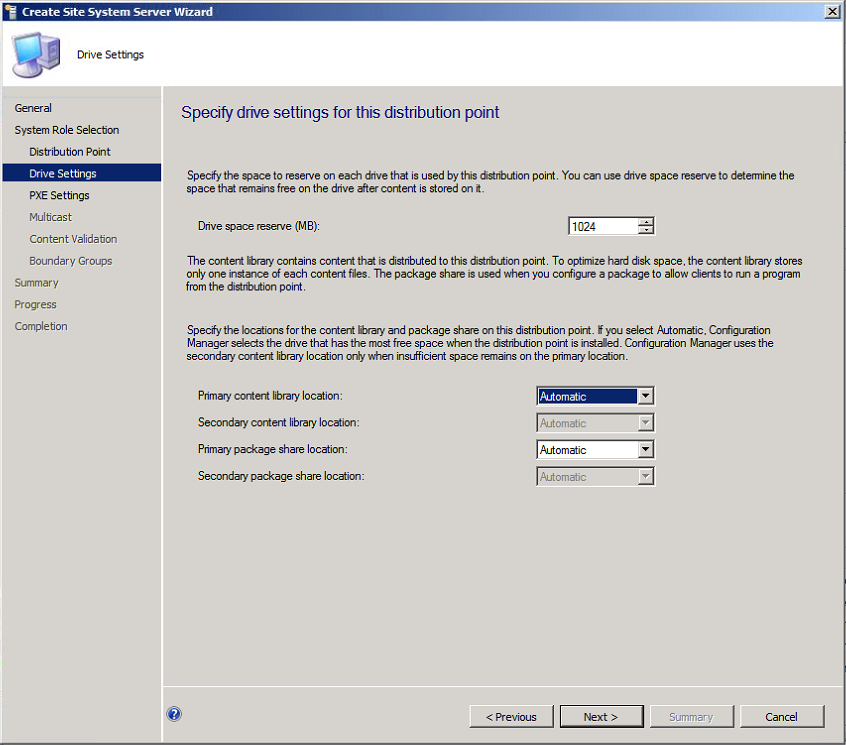
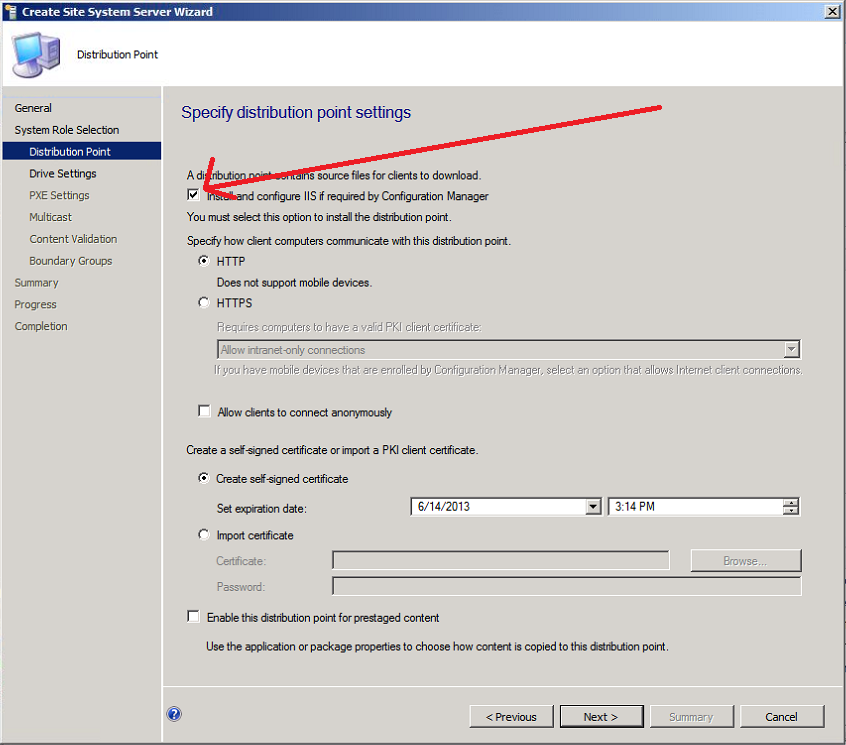 select your drive settings, i like to keep at least 1 GB free on my servers, if you have multiple drives you can also configure them here for content and package share locations
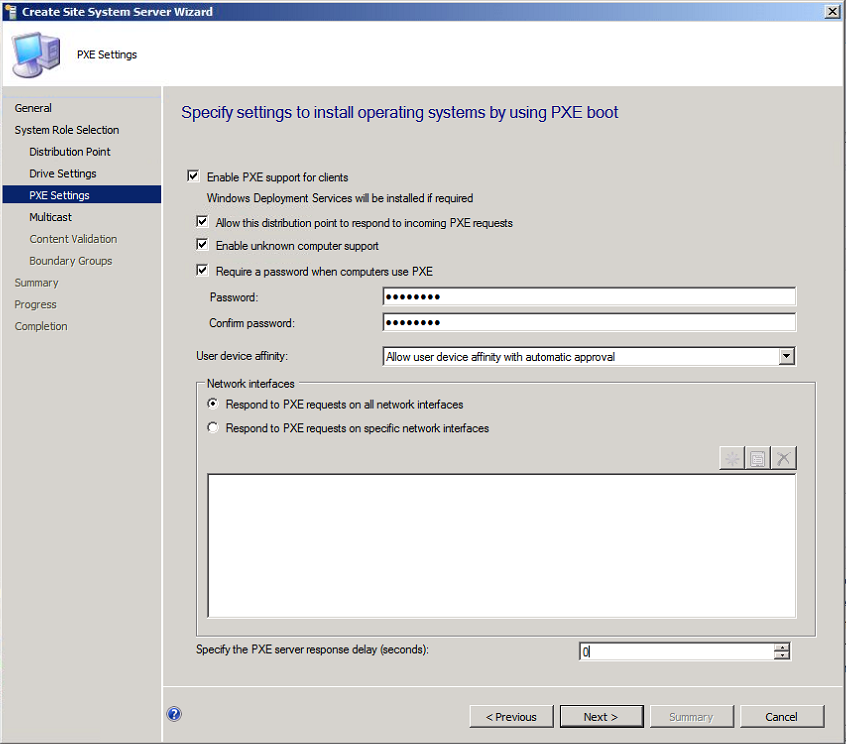
 Enable PXE in PXE Settings and then enable Unknown Computer support, input a password if required and answer yes to the prompts, I also allowed User Device Affinity with AutoMatic Approval
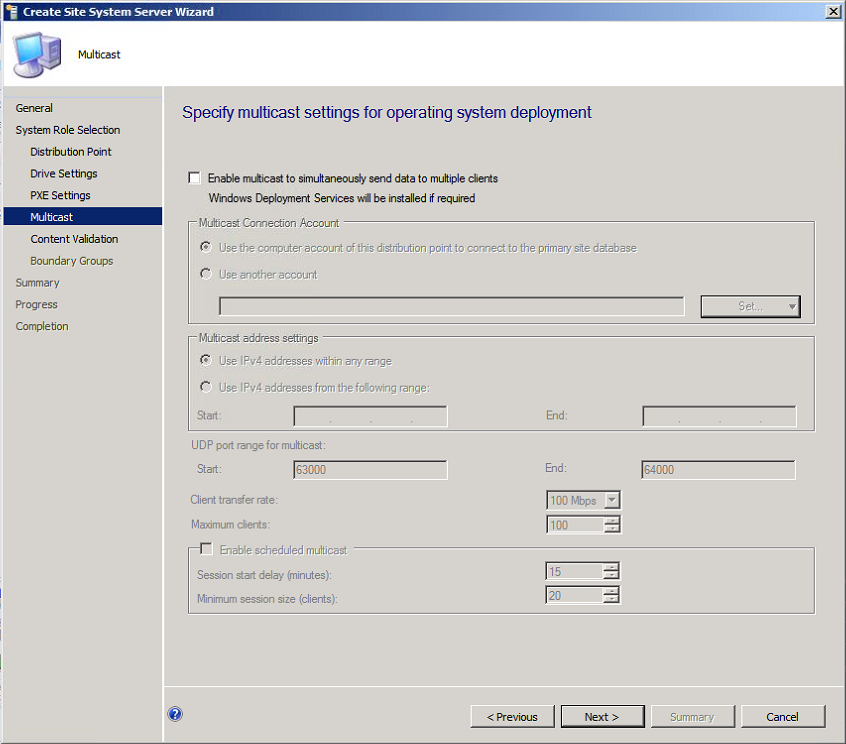
as this is Server 2008 X86 there is no support for Multicast, so don’t select this option (it won’t work….)
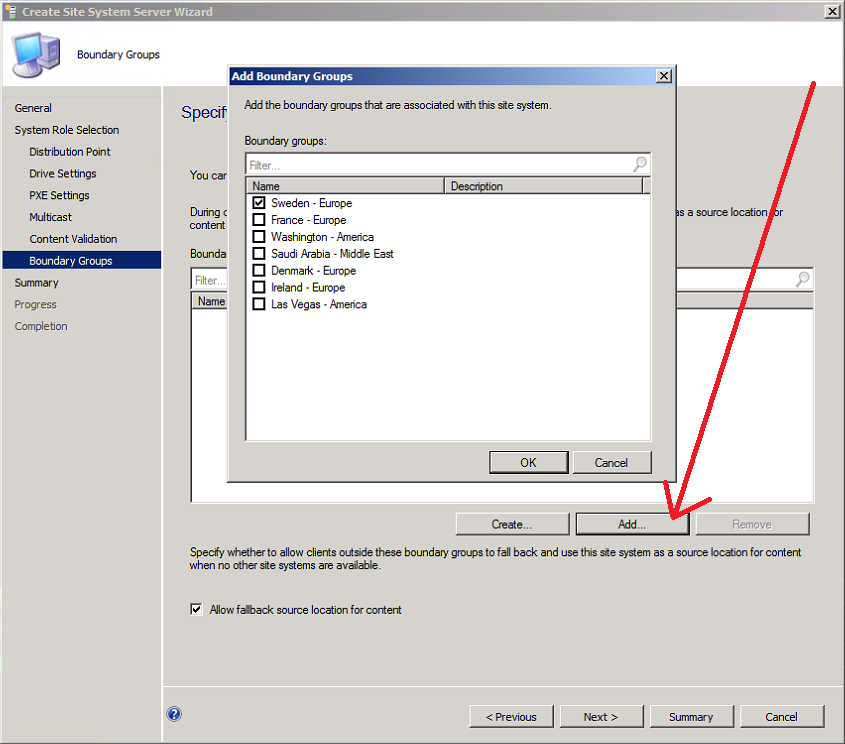
 click next at Content Validation through to Boundary Groups, select your boundary group that you want to associate this Distribution Point with by clicking on Add Boundary Groups and selecting the appropriate Boundary Group
 finish the wizard by clicking through to completion.
Step 4. Distribute the boot images to our new PXE enabled Distribution Point
Note: If we don’t distribute our boot images to our new distribution point then PXE boot will fail with the following error recorded in SMSPXE.log on the site system (C:\Windows\CCM\Logs). Matching Processor Architecture Boot Image (0) not found. To resolve this problem make sure to distribute both boot images to your new distribution point and make sure that Deploy this boot image from the PXE service point is checked in the Data Source tab of each boot image.
In Software Library, select Operating Systems and expand boot images
right click a boot image and choose Distribute Content
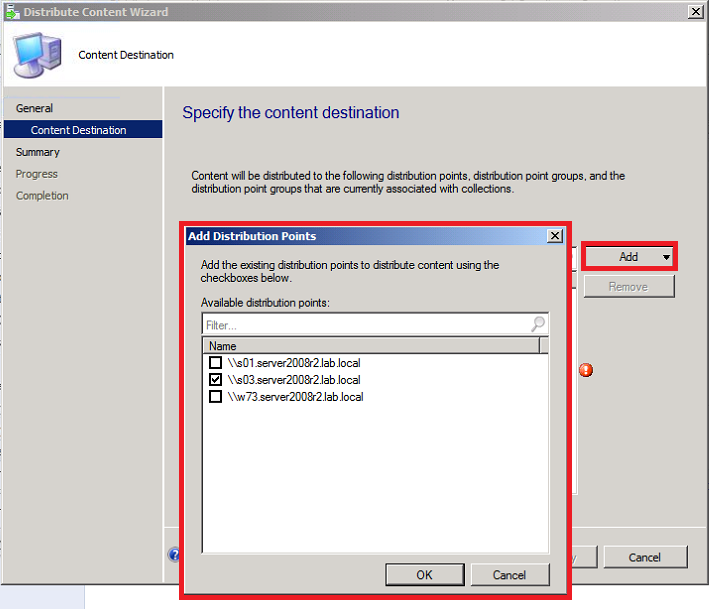
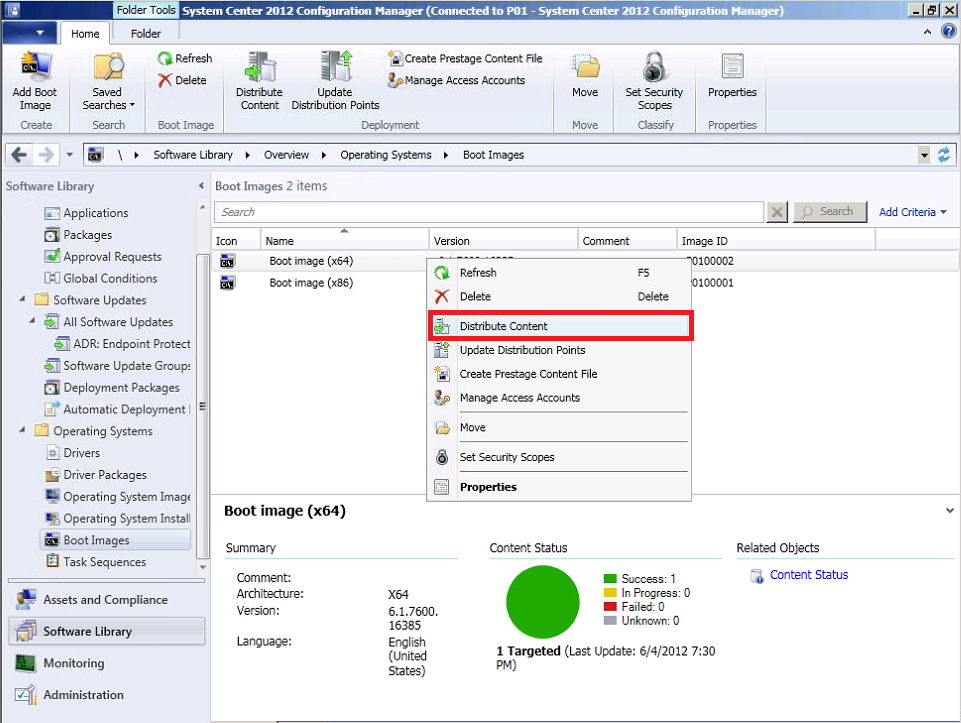 select our newly created distribution point by clicking on Add then selecting Distribution Point and then select the site system we just added (S03.server2008r2.lab.local in this case)
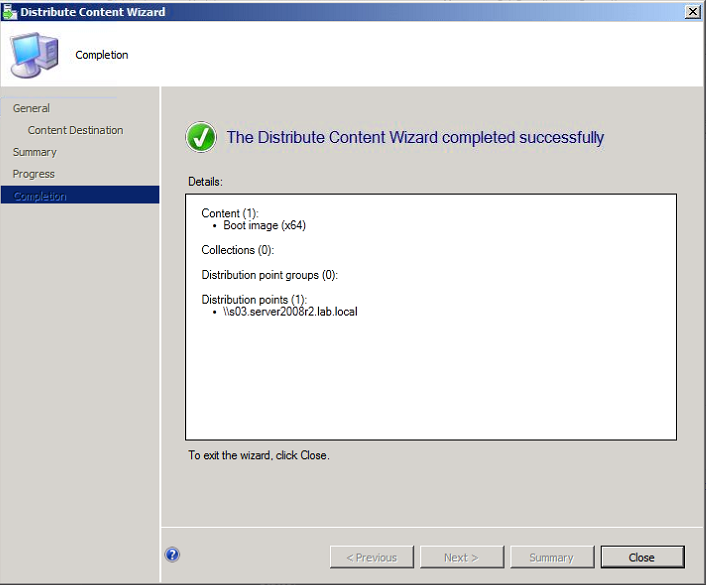 Note: repeat the above for the other architecture boot image so that both the X64 and X86 architecture boot images are distributed to the new distribution point.
Step 5: Monitor progress of the Distribution Points
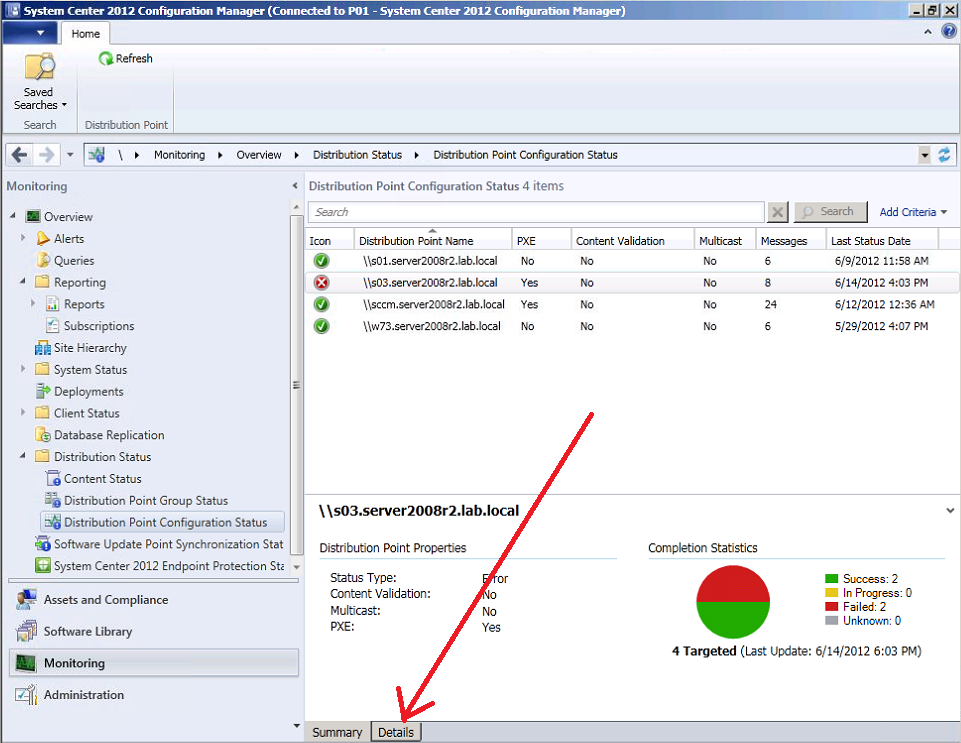
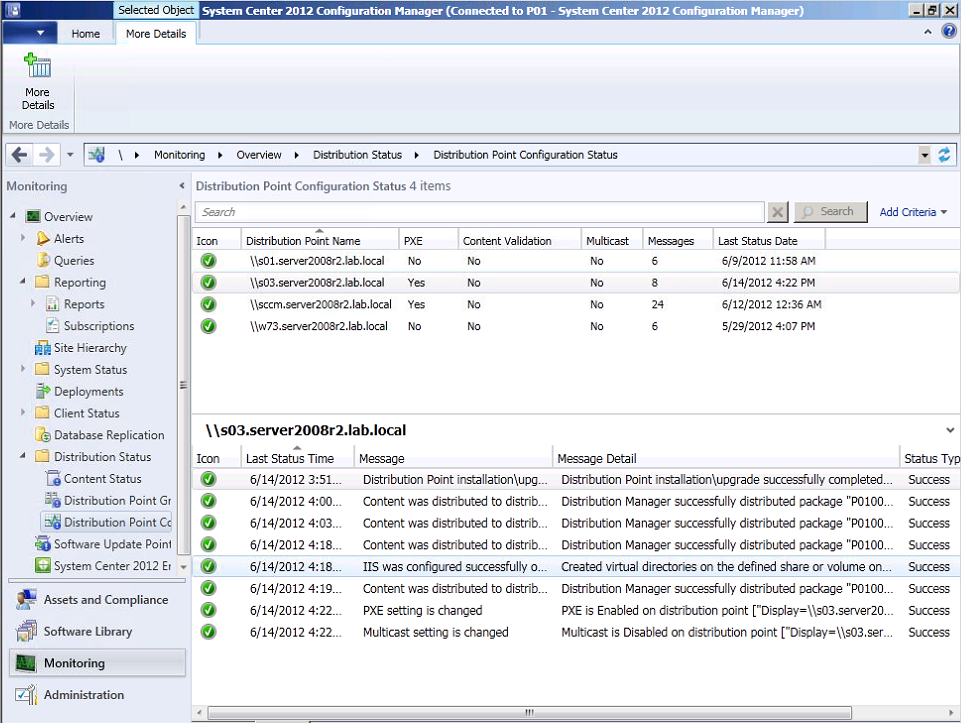
In the Monitoring workspace click on Distribution Point Configuration Status. Select the new site system we just added from the list. As we have just installed the role it is still busy configuring so will probably show up as failed. Click on the Details tab to get more info.
 you’ll probably see the first two messages like me, Distribution Manager failed to connect, you can ignore them unless of course you do have issues with your network/firewall.
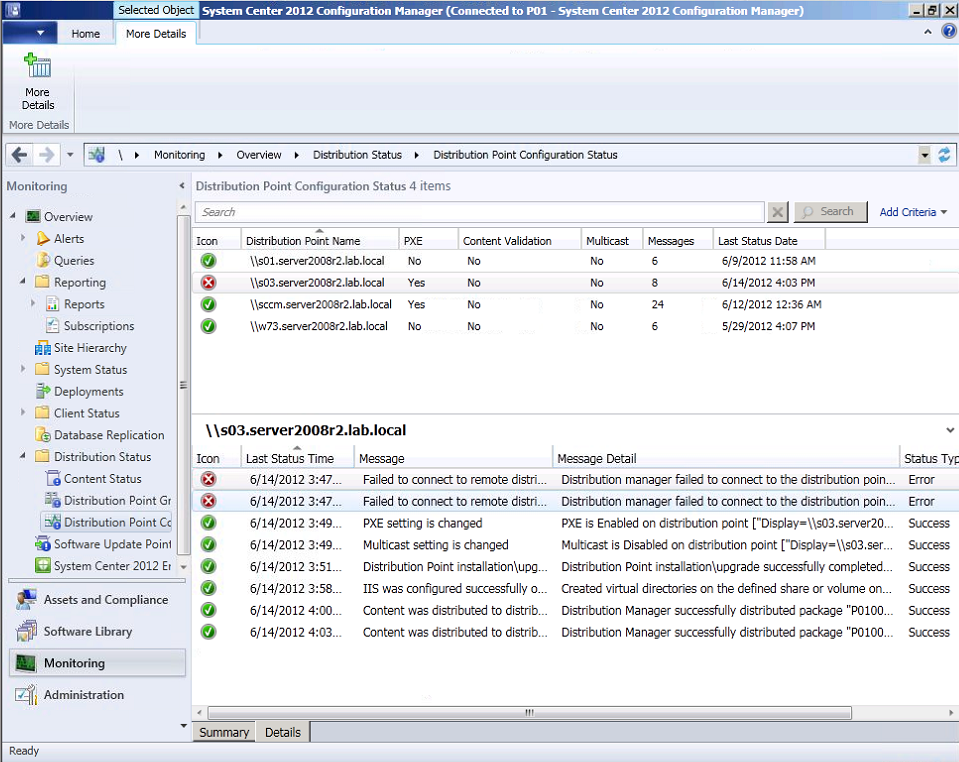 Now you can go and have a cup of coffee or retweet this post while you are waiting for your Distribution Point to finish configuring itself. You can also monitor the distrmgr.log file on your Primary server to review what it is doing (sending packages and connecting to the remote DP.)
Step 6. Configure network load and Bandwidth throttling
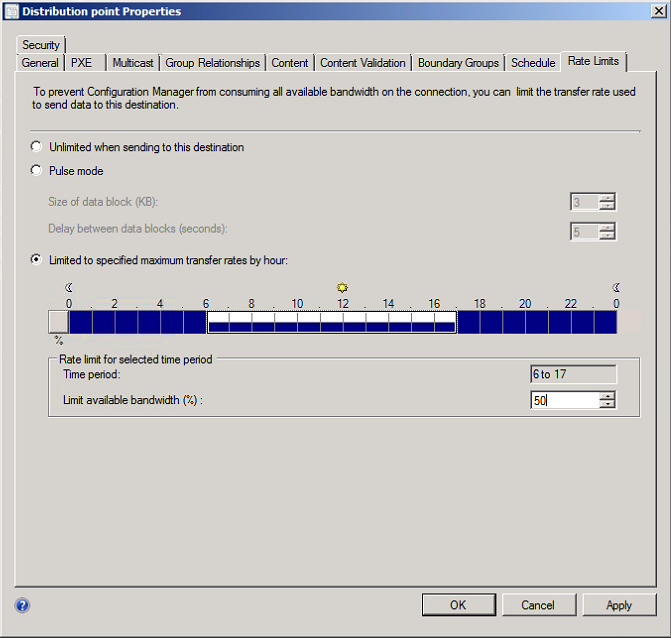
A new feature in Configuration Manager 2012 is the ability to configure network load (scheduling) and bandwidth (rate limits) on a remote distribution point. To configure these options simply browse to the Administration workspace, and select distribution points, right click on our new distribution point and select properties.
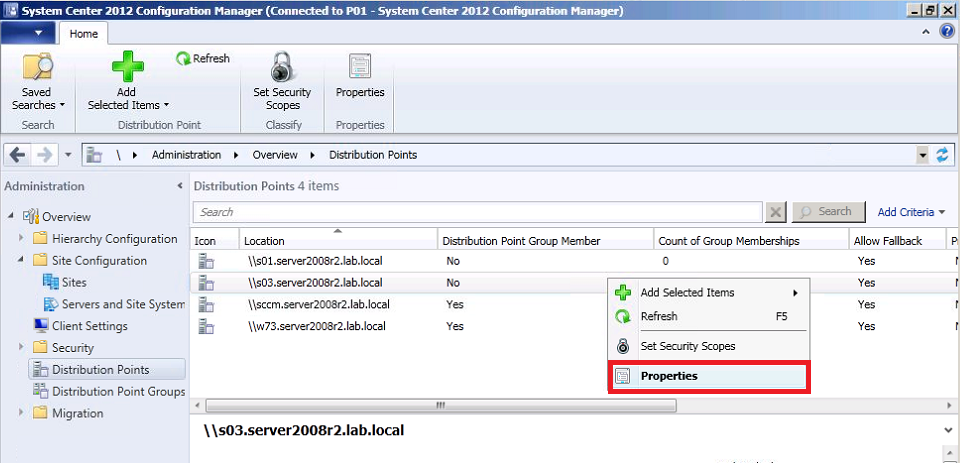 click on the schedule tab and configure it as you wish, if you don’t see that tab then you are probably not looking at a remote Distribution point.
 and then click on Rate Limits and configure it according to your wishes..
click apply when done and go back and check your distribution point status, it should be all done by now.
Step 7. PXE boot a computer
Assuming you have advertised something to the Unknown Computers collection, PXE boot a client that falls in the boundary of your new DP and review the SMSPXE.log file found on that site system using CMtrace.
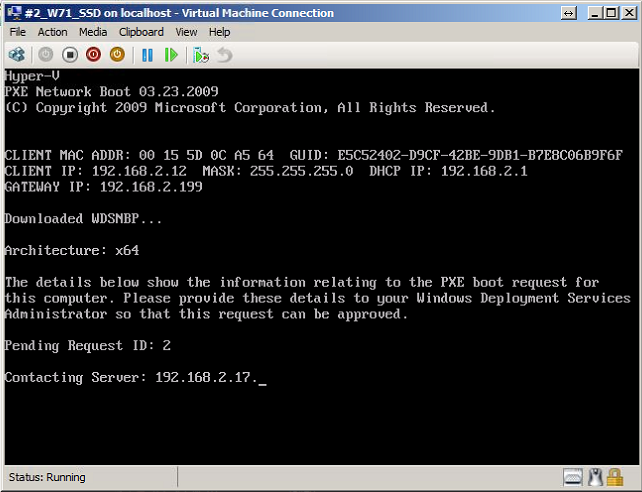 press F12 to continue… you know the drill..
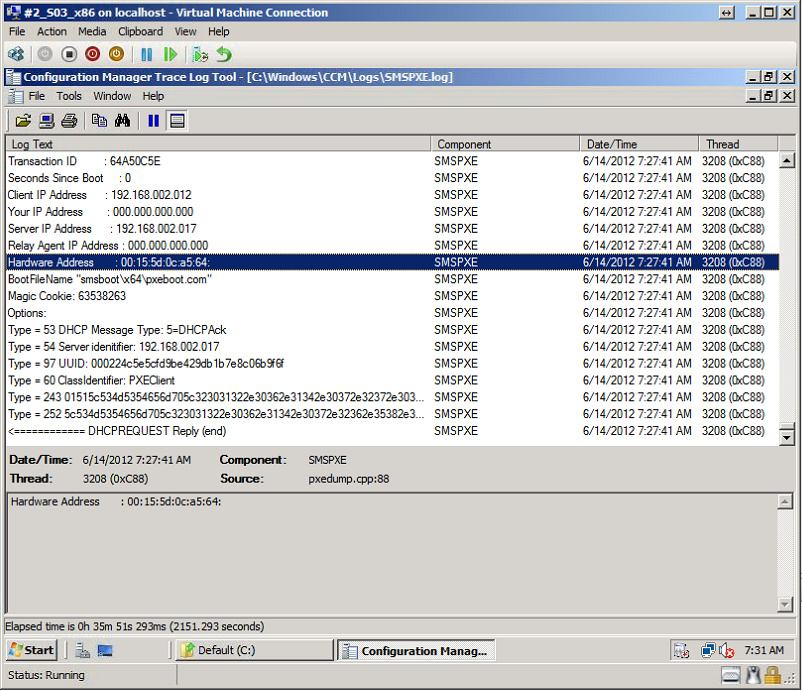
meanwhile on our new DP, look at the SMSPXE.log file
and you can see the MAC address from the above machine reflected in the SMSPXE.log file on our new DP, cool
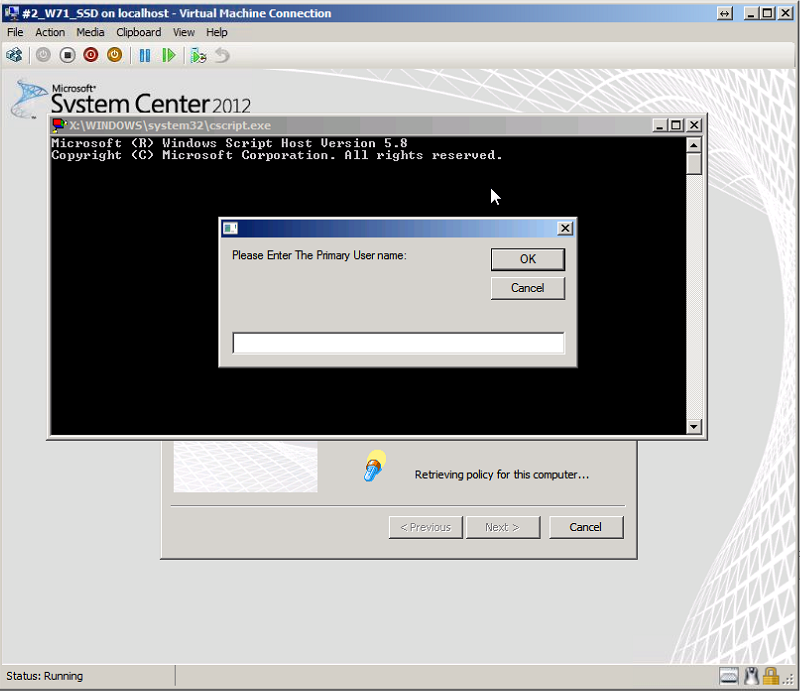
 enter the PXE password on the client computer, and input your UDA user if you configured prestart as i explained here, and the rest is history, have fun !
cheers
niall



Pingback: System Center 2012 Configuration Manager Step By Step Guides | just another windows noob ?